What is Stud Welding? – Process, Types, Uses, and Techniques
Published on: May 6, 2025 | Last modified: March 4, 2025
By: Joe Carter
So, what is a stud? A stud is a metal pin or rod that you attach to a surface using welding.
I regularly get inquiries regarding the what is stud welding question. Understanding this technique is crucial because it can improve project efficiency and strength. I’ve seen it transform weak joints into sturdy connections in various applications.
In this article, we’ll dive into the stud welding process, how a stud welder works, the different types of studs used, steps to perform stud welding, factors affecting performance, common issues, aftercare tips, real-world uses, and whether there are alternatives out there.
Contents
- What is Stud Welding?
- How Does Stud Welding Work?
- Types Of Studs Used in Stud Welding
- Advantages of Stud Welding
- Steps to Perform Stud Welding
- Factors Influencing Stud Welding Performance
- Common Issues in Stud Welding
- Real-world Uses for Stud Welding
- Are There Any Alternatives to Stud Welding?
- Frequently Asked Questions (FAQs)
- Conclusion
- References
What is Stud Welding?
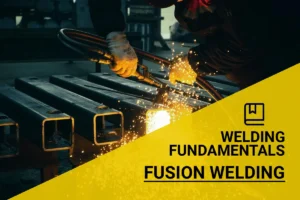
Stud welding is a process that securely attaches a stud to a metal surface. It uses high heat to fuse the stud’s base to the metal, allowing strong, permanent joints. Typical uses include construction and automotive industries, offering speed and strength. When considering the materials needed for welding, understanding how much welding rods cost can be essential for budgeting and project planning.
How Does Stud Welding Work?
Stud welding connects a metal stud to a surface using heat and pressure. It typically employs a stud welder that produces intense heat—around 6,000°C (10,832°F)—in milliseconds. This quick burst melts the base material and the stud’s end, forming a strong bond as they cool. Statistically, stud welding can save up to 50% in installation time compared to traditional welding methods, making it a popular choice for various projects.
Stud welding relies on a simple principle: the fusion of two metals through electrical discharge. It’s crucial for anyone wanting to learn how to weld a threaded stud efficiently. Mastering this technique involves understanding different types of studs, such as architectural or automotive, and their specific applications.
Take it from me, I’ve used stud welding on several projects, and it’s impressive. You won’t believe how strong the bond can be until you try it yourself. Whether you’re tackling automotive repairs or constructing metal frameworks, understanding stud welding can elevate your skills.
Types Of Studs Used in Stud Welding
What types of studs can you use?
-
Electrical Conductive Studs
These studs are designed for electrical connections. In stud welding, they create strong, lasting bonds for wiring and electrical systems. To use them, place the stud on the work surface, apply a welding gun, and instantly melt the base, anchoring the stud securely.
-
Mechanical Fastening Studs
Mechanical fastening studs provide a secure point for bolting. During welding, the stud locks into the metal for a robust hold. To apply, position the stud, use the stud welder, and allow the joining process to fuse the stud into the substrate.
-
Insulated Studs
Insulated studs have a coating to prevent electrical conductivity. Their role in the welding process ensures safety where electric current isn’t wanted. To weld them, place the insulated stud correctly, use the welding arc, and ensure a proper bond without compromising insulation integrity.
-
Self-embedding Studs
These studs have a distinctive design that allows them to embed into surfaces. They simplify the welding process by digging directly through the base material. To utilize, align the stud and trigger the welder, creating a solid connection without needing extra tools.
-
Threaded Studs
Threaded studs feature a spiral design for easy bolt-on applications. They’re perfect for affixing components. To weld, position the stud on your framework, apply heat with the gun, and screw it into place once cooled for a secure and adjustable fit.
We have now covered the various types of studs utilized in stud welding. Next, we will examine the benefits of stud welding.
Advantages of Stud Welding
What makes stud welding so popular? Here are some standout advantages:
| Advantage | Description | Impact |
|---|---|---|
| Speed | The welding process is completed in milliseconds, significantly reducing installation time. | Improves overall project efficiency, saving labor costs. |
| Strength | Welds can achieve joint strengths that are around 80% of the base metal. | Provides reliable and durable connections for various applications. |
| Cost-Effectiveness | Lower overall costs due to less material waste and faster installation. | Increased profitability in production environments. |
| Versatility | Applicable to various materials like steel, aluminum, and stainless steel. | Suitable for a wide range of industries including automotive and construction. |
| Minimal Heat Affected Zone | Quick process limits heat transfer, reducing distortion. | Maintains material integrity, especially in thin sections. |
We’ve wrapped up the benefits of stud welding here. Next up, we’ll look at the steps for performing stud welding.

Steps to Perform Stud Welding
Here are the steps for the stud welding process to ensure effective execution.
-
Prepare the Surface
Start by cleaning the welding area. Remove dirt, rust, or grease. The surface must be free of contaminants for proper adhesion. A clean surface can lead to successful welds 99% of the time.
Abrasive pads, wire brushes, or grinders work well for this task. Ensure your base material is compatible with the stud type; otherwise, you could waste time. A clean surface guarantees better results.
-
Select the Correct Stud
Choose a stud that meets your project requirements. Common stud types include threaded and unthreaded, available in various sizes. Always refer to manufacturer specifications; a common stud diameter is 1/4 inch (6.35 Mm) for most applications.
Consider the materials involved. For example, using a low carbon steel stud is ideal for most automotive applications. Selecting the right stud is crucial—it accounts for 50% of your success!
-
Set Up the Equipment
Set your stud welder according to the stud type and material. Adjust the pressure, current, and welding time based on your specifications. A typical setting for a 1/4 inch (6.35 Mm) stud might be 150 amps with a 1-second weld time. Follow your manufacturer’s guidance.
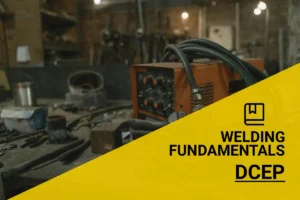
Direct current electrode positive is often used in welding to provide deeper penetration and a stable arc; for more information on this process, explore what DCEP means in welding.
.
Double-check your equipment. Misconfigurations can lead to waste and poor quality. Always calibrate before starting; it’s a crucial step that shouldn’t be overlooked!
-
Execute the Welding Process
Position the stud using a fixture if necessary to keep it steady. Use the weld gun to apply the correct force and time while overlapping the stud and base material. This ensures a strong bond; aim for a weld appearance that shows proper fusion—smooth and flush.
Monitor the duration; over-welding can cause damage. Remember that faster isn’t always better; a well-timed weld can make the difference between strength and failure!
We covered the steps for performing stud welding here. Next, we will cover the factors affecting stud welding performance.
Factors Influencing Stud Welding Performance
What factors impact the effectiveness of stud welding?
-
Material Type
The material of the stud and workpiece affects heat absorption and bonding strength. For example, carbon steel typically requires about 30-50 kJ/m² to weld effectively, while stainless steel often needs more due to its higher thermal conductivity.
-
Electrode Size
Electrode size influences current density and weld penetration. A larger electrode delivers more heat, which is crucial when welding thicker materials, often requiring adjustments to prevent burn-through.
To effectively manage these factors, it is important to utilize the right equipment including a basic semiautomatic welding system.
-
Welding Parameters
Adjusting welding parameters like current, voltage, and time is vital for optimal results. For instance, increasing the welding current by just 10% can enhance the bond integrity of metal studs, which is a key concept discussed in welding fundamentals.
Achieving precision in welding requires clear visibility and control during the process, which can be improved with better welding visibility techniques.
-
Environmental Conditions
Welding outdoors or in humid conditions can lead to oxidation (Rust) issues. Temperature variations can also alter material properties, affecting heat input and weld quality.
-
Workpiece Thickness
The thickness of materials dictates adjustments in welding techniques. Generally, thicker workpieces may require preheating or specialized studs that can withstand higher heat inputs during welding.
We covered factors affecting stud welding performance. Next, we will cover common issues encountered in stud welding.
Common Issues in Stud Welding
Let’s examine common problems in stud welding.
-
Insufficient Weld Penetration
Insufficient weld penetration can occur due to incorrect settings or material mismatch. Check penetration by lifting the stud. If it pulls out too easily, adjust your power settings. Use a power rating between 4,000 and 8,000 amperes (A) based on stud size.
Different welding positions can also impact penetration quality; the 3G welding technique is particularly critical when ensuring robust joints under stringent conditions.
-
Porosity in Welds
Porosity appears as small holes in the weld, typically caused by trapped gas or contaminants. Clean the base material thoroughly. If porosity persists, check the power supply for irregularities. Addressing these issues can improve weld quality, but understanding what causes porosity in welding is essential for best practices.
-
Misalignment Of Studs
Misalignment can weaken the joint. After placing the stud, ensure it’s vertical using a square or level. Reposition it before starting the weld if there’s any tilt.
-
Electrode Wear and Tear
Electrode wear is critical in stud welding. A worn electrode leads to inconsistent welds. Inspect the tip; if it’s flattened or worn beyond the manufacturer’s specifications, replace it immediately.
-
Inconsistent Weld Quality
If your stud welds vary in quality, check the machine calibration and settings. An irregular arc length can cause this issue. Run a test to confirm consistency before your actual application.
Real-world Uses for Stud Welding
People use stud welding to secure various components in manufacturing. It has many applications, including:
- Automotive Assembly: Stud welding attaches components like brackets quickly and securely. It’s popular for its efficiency and strength.
- Construction: Used to connect rebar (Reinforcing Bar) in concrete structures, stud welding provides high tensile strength. It’s favored for its speed and cost-effectiveness.
- Sheet Metal Fabrication: Studs are welded to attach fixtures. This method’s clean finish enhances the aesthetic appeal of final products.
- Appliance Manufacturing: It secures insulation and frameworks in appliances, ensuring durability. The speed of the process makes it a preferred choice for manufacturers.

Are There Any Alternatives to Stud Welding?
When you need similar results, several alternatives exist. For instance, you might consider using a spot welder or a TIG welder. These methods, like the Miller Syncrowave, can be more versatile in certain applications where precise control is necessary.
Let me share an insight I’ve gained over the years: adhesive bonding often works well in areas needing smooth finishes and reduced heat effects. Products like 3M DP420 provide strong bonding without the need for flashy welding equipment. It’s all about finding the right fit for your project!
Frequently Asked Questions (FAQs)
Now let us look at the questions I typically get asked about stud welding.
What is Stud Welding Used for?
Stud welding is used for fastening components without additional hardware, providing a strong bond. Industries often utilize this technique for constructing bridges, buildings, and automobiles where strength and speed matter. This method increases weld strength, reducing overall construction costs. In various manufacturing sectors, the versatility of a multi-process welder can further enhance operational efficiency.
What is the Difference Between Spot and Stud Welding?
The difference between spot and stud welding lies in the application method. Spot welding involves joining two metal sheets at specific points, while stud welding attaches a stud to a substrate. Spot welding is ideal for thin materials, whereas stud welding caters to thicker workpieces.
What Are the Disadvantages Of Stud Welding?
Stud welding’s disadvantages include potential for burn-through and limited accessibility. For instance, it may not work well on very thin or high-temperature materials. Costs could increase if specialized equipment is required, depending on the project’s complexity and size. To effectively manage these challenges, it is important to know how to read welding blueprints.
How Strong is a Stud Weld?
A stud weld can achieve strengths comparable to or greater than the base materials. The joint strength often reaches 80% of the base material’s strength. Depending on the stud type and application, strength varies, but achieving significant bonds is a notable advantage.
How Does a Stud Welder Work?
A stud welder works by creating an electric arc between the stud and the base material, melting both and fusing them together. This process typically takes a few milliseconds, resulting in efficient assembly. Understanding the machine’s settings is vital for achieving optimal weld quality. Another type of welding you might encounter is socket welding, which involves inserting one pipe into a recessed area of a fitting. For more details, you can explore what is a socket weld here.
How to Weld a Threaded Stud?
To weld a threaded stud, clean the surfaces, place the stud against the workpiece, and activate the welder. The current heats the stud, melting it quickly to create a bond. Proper alignment and securing help ensure a successful and strong connection during the process.
Conclusion
I hope this was worth your while. We covered what stud welding is, how it works, the types of studs used, steps to perform it, factors influencing its performance, common issues, aftercare tips, real-world uses, and even alternatives. This gives you a solid understanding of the stud welding process and its practical applications.
In short, what is stud welding? It’s a method to attach metal studs to a base material using heat. By melting the base and the stud together, it forms a strong bond. Wishing you success in your welding projects and a greater grasp of how to use a stud welder effectively!
If you’re interested in exploring more topics related to welding, be sure to visit our homepage at What is Welding, where you’ll find additional expert blogs and valuable welding advice.
References
- International Organization for Standardization. (2017). ISO 3834: Quality Requirements for Fusion Welding of Metallic Materials. Geneva, Switzerland: ISO.
Joe Carter is a retired welding professional with over 40 years of hands-on experience in the industry, spanning ship repair, structural welding, and even underwater projects. Joe is a master of MIG, TIG, and Stick welding. Passionate about mentoring the next generation of welders, Joe now shares his decades of expertise and practical insights to help others build rewarding careers in welding.
Adhesive Bonding, Automotive Industry, Construction, Fabrication, Metal Fabrication, Metalworking, Spot Welding, Stud Welding, Welding, Welding Techniques