How to Weld Aluminum With a Torch? A Step-by-step Guide to Tools, Techniques, and Tips
Published on: November 22, 2024 | Last modified: March 4, 2025
By: Joe Carter
A welding torch is a tool used to heat and join metal parts together. It creates a high-temperature flame that melts metal and allows for a strong bond.
I get asked all the time about how to weld aluminum with a torch. It’s vital to follow the right techniques since aluminum’s low melting point makes it tricky. From my experience, using the proper torch and filler material can make a huge difference in quality and strength.
In this guide, you’ll learn about types of welding torches, things you’ll need, steps to weld aluminum with a torch, safety tips, and common issues you might encounter. We’ll also explore factors affecting welding aluminum, advanced tips for aftercare, and real-world uses for welding aluminum with a torch. You’ll gain insights into how to torch weld aluminum effectively.
Contents
- How to Weld Aluminum With A Torch?
- What is a Welding Torch?
- Types Of Welding Torches
- Things You’ll Need
- Steps to Weld Aluminum With a Torch
- Safety Tips
- Types Of Welding for Aluminum With a Torch
- Factors Affecting Welding Aluminum With a Torch
- Common Issues You Might Encounter
- Aftercare, Inspection, and Advanced Tips for Welding Aluminum With a Torch
- Key Techniques for Successful Torch Welding of Aluminum
- Top Benefits You Can Expect
- Real-world Uses for Welding Aluminum With a Torch
- Exploring Alternatives to Welding Aluminum With a Torch
- Frequently Asked Questions (FAQs)
- Conclusion
- Additional Reading
How to Weld Aluminum With A Torch?
A welding torch is a tool that melts metals. To weld aluminum with a torch: set your oxygen and acetylene to 5 psi (34.5 Kpa) each, use aluminum filler rods, and maintain a flame about 1 inch (2.54 Cm) from the metal. It’s tricky but great for fabrication work.
What is a Welding Torch?
A welding torch is a versatile tool that fuses materials using heat. It generates extremely high temperatures, often reaching 1,927°C (3,500°F), depending on the gas used. Most torches utilize oxygen and a fuel gas like acetylene or propane. These combinations produce a controlled flame, which is essential for strong welds.
When welding aluminum, you need specific techniques with the torch. Using a propane torch can be challenging because aluminum conducts heat quickly. I once had to weld aluminum using a torch—it required finesse and attention to detail to maintain the right heat without melting the material.
I’ve used it for a DIY project on my metal fence. I was surprised by how effective a propane torch could be for aluminum welding. Learning to weld aluminum with a torch opened new opportunities for my home projects. It’s a skill that pays off, especially for making sturdy and long-lasting repairs.
Types Of Welding Torches
-
Oxy-acetylene Torches
Oxy-acetylene torches combine oxygen and acetylene gases to produce high heat. For aluminum welding, set the torch to a neutral flame—neither oxidizing nor carburizing. Heat the aluminum at the joint until it glows, then add an aluminum filler rod for a strong bond. Understanding the basics of oxy-fuel welding is essential for achieving optimal results in these processes.
Choosing the correct welding rod is crucial for achieving optimal results in various welding applications, especially regarding aluminum connections. Discover more about selecting the right welding rod to ensure the integrity of your welds.
-
TIG (Tungsten Inert Gas) Torches
TIG torches use a non-consumable tungsten electrode for precise welding. When working with aluminum, maintain a short arc length and keep the tungsten clean. Melt the base metal and introduce a filler rod while controlling the electric current for consistency. It’s essential to understand the technical factors that affect welding outcomes, such as what causes weld spatter.
-
MIG (Metal Inert Gas) Torches
MIG torches automatically feed a continuous wire electrode for fast welding. To weld aluminum, use a spool gun to prevent wire jams. Set the correct voltage and feed rate, then apply the nozzle at a right angle to the workpiece. For specific setups, follow the steps on hooking up a Miller suitcase welder.
-
Plasma Cutting Torches
Plasma torches cut metal with a high-velocity jet of ionized gas. While primarily for cutting, you can weld aluminum using a specific technique. Control the distance and speed while the torch emits a focused plasma arc to fuse the metal edges.
-
Laser Welding Torches
Laser welding uses concentrated laser beams for precise welds. To weld aluminum, focus the beam on the joint area. Align the laser’s focal point with the aluminum joint and adjust the speed for clean penetration and minimal distortion.
You should now have a good understanding of various welding torch types, their uses, and advantages. In the next part, we’ll discuss essential supplies for welding.
Things You’ll Need
What do you need to get started?
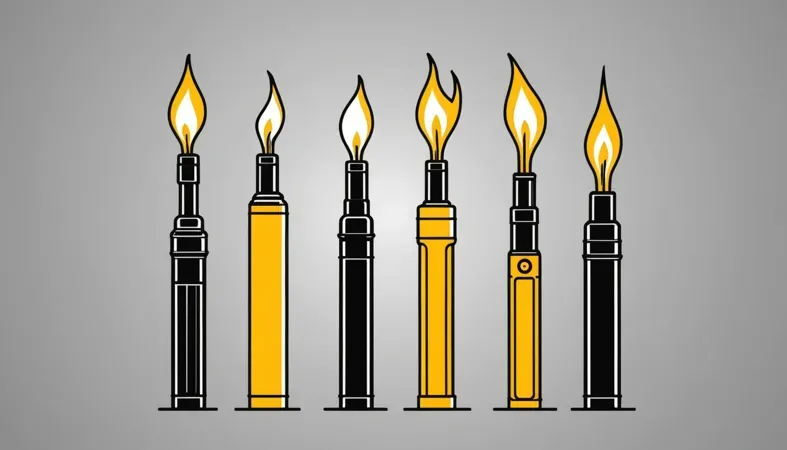
- Welding Torch: You’ll need a welding torch, such as the Bernzomatic TS8000. It provides the high heat required to melt aluminum.
- Aluminum Brazing Rod: You’ll need rods like Harris 1100 Aluminum Rods. They help fuse aluminum during welding.
- Propane Fuel: Ensure you have propane, such as the Worthington 5 lb. Steel Propane Tank, to fuel your torch and maintain the right temperature.
- Flux: Use flux like Rothenberger Rofluid. It prevents oxidation and improves bonding during welding.
We’ve wrapped up essential materials and tools here. Next up, we’ll look at the process for welding aluminum with a torch.
Steps to Weld Aluminum With a Torch
Let’s cover how to weld aluminum effectively using a torch. Follow each step carefully to achieve strong welds.
-
Prepare the Workspace
Clear your workspace of clutter. Ensure good ventilation, especially when using propane or acetylene torches; fresh air is crucial. Set up on a flat surface and keep flammable materials away. Remember, safety first, but let’s keep it practical!
Place an aluminum welding table, if available, as it reflects heat for faster welding. Keep your tools within arm’s reach to avoid unnecessary movements during the process—it saves time!
-
Set Up the Welding Torch
Attach the appropriate tip to your torch. For aluminum, a larger tip works better, increasing heat output. Use a 0.5 mm to 1 mm (0.020 In to 0.040 In) diameter. It’s critical to check for leaks before lighting up!
Set up the fuel and oxygen mix. For acetylene, a typical mix ratio is 1:3, which produces a neutral flame. Starting with a bit more oxygen tends to keep welds clean.
-
Clean the Aluminum Surface
Smooth the aluminum with a wire brush or grinder. Dirt or oxidation can weaken your weld. Aim for a 1-2 mm (0.04-0.08 In) bare metal area around your weld joints. First impressions matter—even in welding! To ensure an accurate temperature reading during the welding process, you can learn about how to weld thermocouple wire.
Consider using a cleaner or solvent for better results. Alcohol wipes work well. When in doubt, always clean; nothing good comes from skipping this step!
-
Adjust Flame Settings
Ignite the torch and adjust it to a neutral flame. You want a flame that’s not too soft or sharp, ideally 6-8 in (15-20 Cm) long. The right flame keeps you cool while providing enough heat to melt aluminum quickly.
Listen for a feisty hiss! If you hear pops or crackles, adjust your flame for optimal welding.
-
Begin Welding Process
Position the torch about 3-4 inches (7.5-10 Cm) above the work area and move in a steady motion. Maintain a consistent speed; too fast means weak welds, and too slow can cause burn-through. Adjust your angle to about 45 degrees for the best penetration!
Feed a filler rod into the weld pool as you move. Keep it moving to create an even bead of about 0.5-1.0 mm (0.020-0.040 In) thickness. Trust me, a consistent feed makes all the difference—I learned the hard way!
-
Inspect and Finish Weld
Once done, cool your weld by moving it to a safe spot—don’t dunk it in water! Look for even color and good fusion; a smooth finish indicates success. Don’t rush the inspection; it’s crucial for a strong final product!
If you notice imperfections, don’t panic. You can grind it down and re-weld. Take your time now, and you’ll thank yourself later for the corrections!
We’ve wrapped up the steps for torch welding aluminum here. Next up, we’ll look at important safety tips.
Safety Tips
Let’s explore essential precautions for torch welding.
- Protective Gear: Always wear gloves, goggles, and flame-resistant clothing like a welding jacket. This protects against sparks and heat.
- Ventilation: Ensure your workspace is well-ventilated. Poor air quality can expose you to harmful fumes.
- Fire Extinguisher: Keep a fire extinguisher nearby and check it regularly. This can prevent small accidents from becoming life-threatening.
- Equipment Check: Inspect your welding torch and hoses for leaks. Cracks can worsen and lead to dangerous gas leaks.
Making safety a priority ensures a successful and enjoyable welding experience.
We’ve wrapped up essential safety tips for welding. Next up, we’ll look at different methods for welding aluminum with a torch.
Types Of Welding for Aluminum With a Torch
Let’s explore different welding techniques, including Gas Tungsten Arc Welding, Gas Metal Arc Welding, Oxy-Fuel Welding, and Electron Beam Welding.
-
Gas Tungsten Arc Welding (GTAW)
GTAW, or TIG welding, uses a non-consumable tungsten electrode. Set the current between 10-300 amps (A) to control the heat. It’s excellent for thin aluminum, producing clean, strong welds.
-
Gas Metal Arc Welding (GMAW)
Also called MIG welding, GMAW employs a continuously fed wire as an electrode. You can set the voltage between 15-30 volts (V), making it faster than GTAW. GMAW is versatile and works well on thicker aluminum.
-
Oxy-fuel Welding
This method uses a flame from burning fuel gas with oxygen to weld aluminum. A propane torch can reach temperatures up to 3,500°F (1,927°C). Although slower, it’s effective and convenient for small projects.
-
Electron Beam Welding
This technique uses a focused beam of electrons to provide deep penetration and minimal distortion. It’s ideal for precision work and projects requiring controlled environments, though it’s more specialized and costly.
-
Arc Welding
Arc welding generates an electric arc between an electrode and aluminum. You can control the heat, making it suitable for thick materials. It’s less common for aluminum but effective when done correctly.
Based on my experience, Gas Tungsten Arc Welding is my preferred method for aluminum. It produces precise, clean welds with minimal cleanup, offering the best results for intricate projects.
Factors Affecting Welding Aluminum With a Torch
What factors influence the effectiveness of joining aluminum using a torch?
-
Material Thickness
The thickness of aluminum affects the required heat and technique. Thin sheets under 1/8 inch (3.2 Mm) need less heat than thicker materials, which can be 1/2 inch (12.7 Mm) or more. Adjust your speed and flame to prevent warping.
-
Cleaning Method
Clean surfaces produce stronger welds. Use a stainless steel brush or a chemical cleaner to remove oxides. This is crucial for aluminum due to its protective oxide layer, which complicates welding.
-
Flame Temperature
The flame temperature determines the melting point achieved. An oxy-acetylene flame can exceed 3,200°F (1,760°C), melting aluminum quickly for solid welds. Always ensure the right flame size for even heat distribution; otherwise, you may ruin your work.
-
Welding Speed
Your welding speed affects penetration and bead shape. Too fast, and you won’t penetrate; too slow, and you’ll burn through. Aim for a consistent travel speed of about 3 to 6 inches per minute (7.6 To 15.2 Cm Per Minute).
-
Shielding Gas Type
Argon is a common shielding gas for aluminum welding. It protects the weld from oxidation during the process, which is crucial for quality. A mix can work too, but pure argon usually yields better results.
Common Issues You Might Encounter
Let’s look at unique problems specific to the welding torch.
-
Inadequate Cleaning
The welding torch won’t perform well if it’s contaminated with dirt or oil. To fix this, always clean the torch tip with acetone or a wire brush before use.
-
Poor Penetration
If the welding torch doesn’t penetrate properly, you might be using the wrong gas flow. Check your settings; for aluminum, set the gas flow to about 15-25 CFH (Cubic Feet Per Hour).
-
Contamination Risks
The welding torch can introduce contaminants if you’re not careful with your setup. Keep your filler materials and work area clean to prevent issues.
-
Burn-through Risks
Watch out! A welding torch can burn through thin materials. To resolve this, lower the heat input or use a quicker travel speed while welding.
-
Weld Cracking
Cracking may occur if your welding torch produces uneven heat. Watch the weld pool for signs of unevenness. Aim for uniform heating, and preheat the area if it’s cold.
Aftercare, Inspection, and Advanced Tips for Welding Aluminum With a Torch
Here’s crucial information on aftercare, inspection, and expert tips to ensure excellent results with your welding torch.
Aftercare Tips
After welding aluminum with a torch, always cool your welds slowly. Rapid cooling can cause cracking. Use a soft cloth dipped in acetone to gently clean the bead; this removes oxidation without affecting the weld’s integrity.
Inspection
Inspect your welds for micro-cracks using a magnifying glass. A visual inspection should focus on areas within 5 inches (12.7 Cm) of the weld. If you notice a cold lap—a section where the weld hasn’t fused correctly—grind that area out and re-weld using a Lincoln Electric TIG machine for optimal results.
Expert Tips
If you’ve got a few years of experience, consider adjusting your torch angle to about 20 degrees during welding for better penetration. This technique can improve your bead contour. Always use 1/16 inch (1.6 Mm) aluminum filler rods for optimal compatibility, especially with 6061 aluminum, to ensure strong, consistent joints.
Key Techniques for Successful Torch Welding of Aluminum
Now let’s dive into some essential techniques to turbocharge your aluminum welding with a torch.
Preheating Aluminum
Preheating aluminum can smooth out the process. If your material’s thick (over 1/4 inch or 6.35 mm), preheat it to about 250°F (121°C) before starting. This helps the metal absorb heat better, preventing cracks.
Controlling Torch Angle
The angle of your torch can make or break your weld. Keep it at about 30-45 degrees to achieve good penetration and a consistent weld bead. Adjust the angle to get that perfect fill!
Filler Material Choice
Choosing the right filler rod is key. For general aluminum, use 4047 rods for good flow, or 4045 rods for higher strength. These rods yield better fusion and match well with base materials. A little research can save you some headaches down the road!
Timing Your Filler Rod Addition
Add your filler rod at the right moment. Wait until you see a puddle forming, then slowly introduce the rod into the molten pool. If you add it too early, it’ll just cool down, and if too late, you’ll miss out on a solid bond.
Technical Flame Control
| Flame Type | Appearance | Ideal for |
|---|---|---|
| Neutral Flame | Clear blue inner cone, light blue outer envelope | General welding of aluminum |
| Oxidizing Flame | Short inner cone, sharp point | Not recommended, leads to brittleness |
| Carburizing Flame | Long, feathered inner cone | Can cause contamination |
Stick to a neutral flame. It helps maintain a clean weld, reducing the risk of oxidation.
Top Benefits You Can Expect
The biggest advantage of welding aluminum with a torch is versatility. I’ve used it for various projects, from automotive repairs to art pieces.
This technique is also more affordable than others. It’s great for precision welding, offers quick setup, and allows easy heat control. Plus, it’s portable; you can take it to any job site without hassle!
Real-world Uses for Welding Aluminum With a Torch
People use torch welding for various applications, including:
- Aircraft Repairs: Torch welding is perfect for lightweight aluminum structures. It’s used to repair cracks and damaged parts efficiently, maintaining the aircraft’s integrity. It’s highly popular in aviation maintenance.
- Bicycle Manufacturing: Custom bike frames are often welded with a torch. This method creates strong joints while keeping the frame lightweight, which is crucial for performance. It’s favored by high-end bike builders.
- Marine Applications: Boat hulls and other aluminum components are welded with a torch. The process withstands salty environments and helps prevent corrosion. It’s commonly used in boat repair shops.
- Artistic Metalwork: Artists use torch welding for aluminum sculptures and installations. It allows for intricate designs and strong bonds in creative pieces, making it popular in galleries and public art programs.
Exploring Alternatives to Welding Aluminum With a Torch
There are several alternatives to achieve solid aluminum joins without using a welding torch. Techniques such as MIG welding or TIG welding may be preferred due to their precision and control. Using products like an Aluminum Welding Torch Kit or Aluminum Brazing Rod can make your job easier and help you get cleaner results.
Sometimes, you might want to explore propane as an option, especially if you’re focused on a DIY approach. Can you weld steel with a propane torch? Absolutely! It’s a viable method for lighter applications. Remember, each technique has its pros and cons, so consider what works best for your project.
Frequently Asked Questions (FAQs)
Now let us look at some questions I typically get asked.
What is the Easiest Way to Weld Aluminum?
The easiest way to weld aluminum is to use a MIG (Metal Inert Gas) process. MIG welding works well because it provides a continuous feed of filler metal, making the process smoother and faster. With the right setup, you can achieve quality welds while minimizing distortion.
How Do You Bond Aluminum to Aluminum Without Welding?
You can bond aluminum to aluminum without welding by using epoxy adhesives or special aluminum bonding agents. These products create strong, durable bonds, typically with tensile strengths of around 12,000 psi (83 Mpa), making them suitable for various applications.
Can You Braze Aluminum With an Oxy-acetylene Torch?
Yes, you can braze aluminum with an oxy-acetylene torch. Brazing uses a filler metal with a melting point below 450°C (842°F), which allows aluminum to be joined without melting the base materials. Proper techniques ensure strong joints suitable for many applications.
Can I Weld Aluminum With Mapp Gas?
While it’s possible to weld aluminum with Mapp gas, it’s not the ideal choice. Mapp gas burns at about 2,000°C (3,632°F), which can be excessive and lead to distortion. It’s better to use a dedicated aluminum welding method for best results.
Can You Weld With a Propane Torch?
You can weld some aluminum with a propane torch, but the results may vary. Propane burns at lower temperatures, around 1,980°C (3,596°F), which may not be hot enough for thicker aluminum pieces, leading to poor weld quality.
Conclusion
We covered the essentials of how to weld aluminum with a torch, including the types of welding torches, necessary tools, safety tips, and factors affecting the process. We also discussed troubleshooting common issues, aftercare practices, and the benefits of mastering this skill. Finally, we explored real-world uses and alternatives for welding aluminum with a torch.
I trust these insights have been helpful as we focused on how to weld aluminum with a torch. Basically, you need to choose the right welding torch, gather your materials, and follow the outlined steps carefully. Whether you’re using oxy-acetylene or propane, proper technique and safety are key for successful projects.
For more comprehensive information on welding techniques, tips, and best practices, visit What is Welding.
Additional Reading
- Miller Electric. (2021). Welding Safety: A Complete Guide. Appleton, WI: Miller Electric Manufacturing Company.
- Lancaster, J. F. (1999). The Physics of Welding (2nd ed.). Oxford, UK: Pergamon Press.
Joe Carter is a retired welding professional with over 40 years of hands-on experience in the industry, spanning ship repair, structural welding, and even underwater projects. Joe is a master of MIG, TIG, and Stick welding. Passionate about mentoring the next generation of welders, Joe now shares his decades of expertise and practical insights to help others build rewarding careers in welding.
Gas Welding, Metalworking Techniques, MIG Welding, Safety Tips, Safety Tips For Welding, Torch Welding, Welding, Welding Aluminum, Welding Equipment, Welding Table, Welding Techniques

