How is the Amperage Adjusted on a GMA Welder? Tips, Techniques, and Safety
Published on: February 15, 2025 | Last modified: March 4, 2025
By: Joe Carter
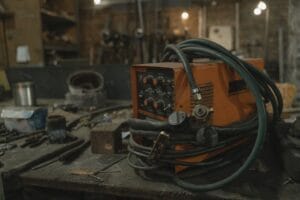
A GMA welder, or Gas Metal Arc welder, is a type of welding machine that uses a continuous wire feed to weld metals. It’s popular for its speed and versatility, making it a go-to for many welders.
It’s a question that often arises: how is the amperage adjusted on a gma welder? Knowing how to adjust your amperage is crucial for quality welds. I’ve seen too many welds fail because someone didn’t adjust their settings right, so trust me, it’s important.
In this article, we’ll explore what a GMA welder is, different types of GMA welders, necessary tools, steps for adjusting amperage, safety tips, various adjustment techniques, factors that influence amperage, common issues you might face, and how to properly care for your machine. You’ll also learn the benefits of correct amperage adjustment and discover different applications for GMA welding, including answers to questions like what is the lowest acceptable amperage setting for GTA welding.
Contents
- How is the Amperage Adjusted on A GMA Welder?
- What is a GMA Welder?
- Types Of GMA Welders
- Things You’ll Need
- Safety Tips
- Steps for Adjusting Amperage on a GMA Welder
- Types Of Amperage Adjustment Techniques
- Factors Influencing GMA Welder Amperage
- Understanding the Impact of Amperage on Weld Quality
- What Could Go Wrong: Common Issues
- Benefits Of Proper Amperage Adjustment
- Applications Of GMA Welding
- When to Try a Different Approach
- Frequently Asked Questions (FAQs)
- Conclusion
- References
How is the Amperage Adjusted on A GMA Welder?
A GMA welder, known for gas metal arc welding, adjusts amperage via a dial or control panel. Set 10 to 30 amps per mm of material thickness. It’s crucial for quality welds in auto and fabrication projects, ensuring simplicity and precision. Using a weld through primer can significantly improve the ease and quality of joining coated surfaces. Learn about weld through primer.
What is a GMA Welder?
A GMA welder, or Gas Metal Arc welder, is a machine used for various applications. It feeds a continuous solid wire electrode through a welding gun, which also emits a shielding gas—typically argon or carbon dioxide—to protect the weld from contamination. According to the American Welding Society, GMA welding can achieve speeds of up to 25 inches per minute (63.5 Cm/min), making it efficient for many projects.
Adjusting the amperage on a GMA welder influences heat input and weld penetration. It’s crucial to set the right amperage for the material thickness. Tweaking the settings during my projects has helped me achieve a perfect bead.
While working on a car restoration project, I used the GMA welder for various metal repairs. I had to determine the lowest acceptable amperage setting for GMA welding. Setting the amperage correctly made a significant difference. The right settings ensured good fusion without burning through the metal, allowing me to create strong, durable joints.
Types Of GMA Welders
-
MIG Welders
MIG welders use a continuous wire feed to weld materials quickly. To change the amperage, adjust the wire feed speed or voltage settings on the machine’s control panel. Start with a base setting of about 50-200 A (Amps), depending on the material thickness.
-
Pulse MIG Welders
Pulse MIG welders provide a rapid on-off cycle of the welding current. Adjust the amperage through the pulse parameters on the welder. Begin with an initial amperage of around 80-220 A and fine-tune by increasing the pulse frequency until you find the right rhythm. Understanding the various components of a GMA welding system can enhance your welding efficiency and techniques by exploring what components make up a GMA welding system.
-
Cordless MIG Welders
Cordless MIG welders offer mobility without power cords, ideal for remote jobs. Adjust the amperage by regulating wire speed or battery voltage. Aim for an amp range of 40-180 A and monitor the weld consistency to ensure quality. An interesting alternative method for efficient metal joining is submerged arc welding, which you can explore in detail through this submerged arc welding guide.
-
Multi-process Welders
Multi-process welders can perform various welding techniques, such as MIG, TIG, and stick welding. Adjust amperage based on the specific process selected. Choose the desired process setting and tweak the amperage between 20-250 A as needed.
-
Wire Feed Welders
Wire feed welders use a spool of metal wire that feeds into the arc. Adjust the amperage by altering the wire feed speed or voltage. For best results, start with an amperage range of 30-200 A, based on the wire size and type you’re using.
We have now covered the different types of GMA welders. Next, we will examine the necessary tools and materials.

Things You’ll Need
What do you need to adjust the amperage on a GMA welder?
- Welding Machine: You’ll need a reliable GMA welding machine, like the Lincoln Electric Power MIG 210 MP. It’s crucial for setting the correct amperage.
- Control Panel: You need a precise control panel, such as the Miller Multimatic 215. This allows you to easily adjust the settings.
- Welding Manual: Refer to a welding manual, like the Welding Techniques Manual. It’s essential for understanding recommended amperage settings.
- Wire Type and Gauge: Use 0.030 inch (0.762 Mm) MIG wire, like ER70S-6. This affects how you set the amperage based on the thickness of your materials.
We’ve wrapped up the items you’ll need. Next up, we’ll look at important safety precautions.
Safety Tips
Let’s quickly review key precautions for amperage adjustment.
- Use Personal Protective Equipment (PPE): Always wear gloves, a helmet, and a bodysuit for protection. This prevents severe burns.
- Check Amp Range: Verify amperage settings match your project requirements. Check manufacturer charts for exact data, usually based on material thickness.
- Avoid Overheating: Monitor your welder’s heat output; exceeding limits can cause damage. Keep it under 60°C (140°F) to ensure equipment longevity.
- Use Proper Ventilation: Ensure adequate airflow in your workspace. For Gas Metal Arc (GMA) welding, a fan or exhaust reduces risks from harmful fumes.
Remember, safety precautions protect you and your equipment; I’ve learned this the hard way.
You should now have a good understanding of safety precautions for welding. In the next part, we’ll discuss adjusting amperage on a GMA welder.
Steps for Adjusting Amperage on a GMA Welder
Here are the steps to effectively set the amperage for your GMA welding machine.
-
Understand Your Material
Identify the type and thickness of the material you’re welding. Use 6-12 amps per millimeter of steel thickness. For 3 mm steel, set the amperage between 18 and 36 amps. This helps establish proper weld penetration and bead shape. Understanding specific terms, like DCEP in welding, enhances your welding skills.
Note: Thicker materials require higher amperage levels for proper fusion. Low settings on thicker steel can weaken the weld.
-
Select the Correct Amperage
Adjust the welder’s amperage control knob according to your material’s thickness and type. Most GMA welders have a digital display for accuracy. For softer materials like aluminum, set the amperage lower than for steel. It’s crucial to enhance your visibility with appropriate techniques to ensure precise welding, which can be explored in the guide on how to see better when welding.
For 0.8 mm (0.031 In) wire, a common setting is around 25-30 amps. Note your setting for future reference. Getting this right is crucial for a clean, effective weld.
-
Check Your Welding Setup
Ensure the electrode extension is correct. A longer extension can increase amperage, causing defects like excessive spatter. The extension should generally be 12-19 mm (1/2 to 3/4 Inch).
In my experience, a proper extension length significantly improves arc stability. Don’t skip this step—it’s vital for quality welding!
-
Test Your Settings
Before starting your main project, conduct a test. Weld a couple of beads on scrap material of the same thickness. Examine the weld bead—does it look smooth? Adjust the amperage by 5-10 amps if you see undercut or burn-through.
This test is essential for ensuring your settings are suitable for the full project. Don’t hesitate to tweak the setting for the best results.
-
Final Adjustments and Practice
Make any final adjustments based on your test welds. If the bead appears too flat, you may need to increase your amperage slightly for a more rounded bead. Practice is essential.
I recommend experimenting with various settings to find what works best before starting real projects. Remember: each welder and material behaves differently, and guidance is key to mastering your craft.
Exploring spray transfer welding techniques can offer insights into enhancing your welding skills.
So far we covered how to adjust amperage on a GMA welder. Next, let’s look at different techniques for amperage adjustment.
Types Of Amperage Adjustment Techniques
Let’s explore different amperage adjustment methods: manual adjustments, digital controls, remote controls, automatic feed adjustments, and preset amperage settings.
-
Manual Adjustments
Manual adjustments use a dial or knob on the welder to incrementally change the amperage based on material thickness, typically ranging from 10A to 300A (Amperes). This method provides direct control, ideal for hands-on welders who want immediate feedback.
-
Digital Controls
Digital controls enable precise adjustments with the push of a button. Many GMA welders feature digital displays that show the exact amperage setting. This technique enhances accuracy and reduces guesswork, helping you achieve optimal weld quality.
-
Remote Controls
Remote controls allow amperage adjustments from a distance. This method is ideal for complex welds, especially in tight spaces. It lets operators maintain focus while controlling the amperage on the go.
-
Automatic Feed Adjustments
Automatic feed adjustments change amperage based on the material’s electrical feedback. This advanced technique ensures a consistent arc and improves weld quality. I appreciate how this feature minimizes manual adjustments, allowing for precise results as welding conditions change.
-
Preset Amperage Settings
Preset amperage settings are programmed into the welder for common applications. Each setting corresponds to specific materials and thicknesses, streamlining the process. For instance, you might set 120A for mild steel that is 3 mm (1/8 Inch) thick, providing a smooth starting point for consistent welds.
Factors Influencing GMA Welder Amperage
What factors affect the adjustment of amperage on a GMA welder?
-
Material Thickness
Welding thicker materials requires higher amperage. For example, 1/4 inch (6 Mm) steel usually needs around 150-200 amps for deep penetration.
-
Electrode Diameter
Larger electrode diameters need more amperage. A 0.035 inch (0.9 Mm) wire typically uses around 30-90 amps, while a 0.045 inch (1.2 Mm) wire may need 70-230 amps.
-
Welding Position
Welding positions matter. Horizontal welding can use less amperage compared to overhead welding, which often requires a higher setting to counteract gravity.
-
Travel Speed
Faster travel speeds may need less amperage to prevent burn-through, while slower speeds require more to ensure fusion. Adjust amperage anywhere from 130-220 amps based on your speed.
-
Heat Transfer Methods
Methods like conduction and convection significantly impact amperage settings. Efficient heat transfer can allow you to reduce amperage, while greater resistance may require an increase to maintain weld quality.
Understanding the Impact of Amperage on Weld Quality
Amperage directly influences your welding results. Let’s look at how adjustments can affect your work.
| Amperage Level (A) | Weld Appearance | Potential Issues |
|---|---|---|
| 10-15 A | Thin, inconsistent bead | Insufficient heat for fusion |
| 20-30 A | Acceptable bead shape | Risk of insufficient penetration |
| 40-50 A | Strong, well-defined bead | Good heat distribution |
| 60-80 A | Flat, wide bead | Overheating potential; burn-through |
| 90+ A | Heavy, excessive spatter | Risk of warping metal |
Weld Penetration and Amperage
Higher amperage increases heat, which results in deeper weld penetration. For instance, a 3 mm (1/8 inch) steel requires around 60 A for optimal penetration without excessive burning through. On the other hand, for 1 mm (0.04 inch) steel, you might only need 20-25 A. Understanding this correlation can dramatically uplift your welding game!
Amperage Adjustment to Material Types
When welding different materials, adjusting the amperage is key:
- Steel: Use 1 A per 0.025 mm thickness. Thicker steel generally requires 125-200 A.
- Aluminum: It’s more thermally conductive. Start around 70-100 A for 3 mm thick aluminum.
- Stainless Steel: Typically demands higher settings, around 25-30% more than mild steel.
What Could Go Wrong: Common Issues
Let’s examine unique issues related to the GMA (Gas Metal Arc) welder.
-
Inconsistent Welding Bead
The GMA welder may produce uneven beads. Check your travel speed and gun angle. A speed of 10-12 inches per minute (25-30 Cm/min) often works best. Ensure your settings match the material and thickness.
-
Overheating Of Material
The GMA welder can overheat metal due to incorrect amperage settings. Adjust to about 18-20 volts for typical steel thickness to maintain cooler working temperatures.
-
Undercutting the Weld
Using the GMA welder improperly can cause undercuts, which appear as shallow grooves alongside the weld. Keep your arc length short, under 1/4 inch (6 Mm), to minimize this defect.
-
Insufficient Penetration
If the GMA welder doesn’t penetrate, you risk poor bond strength. Check settings between 19-23 volts with adequate wire feed speed, and adjust as needed for thicker materials.
-
Excessive Spatter
Excessive spatter from the GMA welder can occur due to high settings. Use a wire diameter of 0.030 inch (0.8 Mm) and check nozzle distance. Reducing wire feed can significantly decrease spatter. It is crucial to understand the technical reasons behind what causes weld spatter to effectively manage and minimize it during welding operations.
Benefits Of Proper Amperage Adjustment
The right amperage adjustment on a GMA welder ensures strong, clean welds. When I worked on a custom metal frame, I used it to prevent burn-through and achieve a flawless finish.
Moreover, correctly setting the amperage improves penetration, reduces spatter, and enhances control. It also saves time on rework and extends the life of your consumables.
Applications Of GMA Welding
GMA welding has various practical applications, including:
- Automotive Repairs: Adjusting amperage for sheet metal thickness produces clean, strong welds. It’s common since car bodies often require precision.
- Aerospace Components: Specific amperage settings deliver low heat input on sensitive materials, minimizing distortion. This is crucial for ensuring flight safety.
- Pipeline Construction: Maintaining proper amperage is essential for welding thick steel pipes. This application is prominent in the energy sector.
- Fabrication of Heavy Machinery: High amperage welds larger material thicknesses, ensuring durability. It’s standard practice in industrial settings.

When to Try a Different Approach
If you’re looking for options that might fit your project better, consider using pulse welding. Machines like the Miller Multimatic 215 can help control heat, reducing the need for precise amperage tweaks. Sometimes, the machine’s built-in features come in handy, such as the auto-set that adjusts settings based on material thickness.
You might also explore using different electrode types, like the E7018 for stick welding or a smaller diameter wire for GMA welding. These choices can lead to desirable results, even without adjusting the amperage directly. Having been through similar situations myself, I’ve found that experimenting with techniques can often yield unexpected and satisfying outcomes.
Frequently Asked Questions (FAQs)
Now let us look at some common questions I typically get asked about GMA welding.
What Determines the Correct Current Setting for a GTA Weld?
The correct current setting for a GTA weld is determined by factors like material thickness and type. For instance, a thicker steel might need around 125 A (Amps), while thinner materials can require just 50 A. Adequate settings help prevent weld defects.
What Are the Welding Parameters?
The welding parameters include voltage, amperage, travel speed, and gas flow rate. These factors directly affect the quality of your weld. A proper balance is key; for example, too high a travel speed could lead to weak joints. Understanding these essentials is crucial when diving into welding fundamentals to ensure your projects turn out successful.
Understanding the costs and types of welding rods available can further enhance your welding precision and efficiency.
How Does a Welder Control Amperage?
A welder controls amperage using a control dial or knob on the welding machine. When you adjust this, you’re tweaking the output of your machine, which impacts the heat produced during welding. This ensures you have just the right heat for your specific job.
How to Adjust Welding Current?
To adjust welding current, simply locate the amperage control on your welder and turn it to your desired setting. A good rule of thumb is to start at 1 A per 0.025 mm of material thickness for most metals. Always test on scrap to perfect your settings.
How to Set Amps on a Stick Welder?
Setting amps on a stick welder involves finding the amperage dial and adjusting it based on your electrode size and material type. For example, a 3.2 mm electrode often works best around 110-140 A. Accurate settings help achieve smooth, strong welds.
Conclusion
That brings us to the end of our discussion on how amperage is adjusted on a GMA welder. We covered what a GMA welder is, the types of GMA welders, steps for adjusting amperage, safety tips, common issues, and the benefits of proper amperage adjustment. We also touched on factors influencing amperage, types of adjustment techniques, and the applications of GMA welding.
To wrap up, adjusting the amperage on a GMA welder means you tweak the settings based on the metal thickness and type. Remember, a good rule of thumb is to set around 1 amp per 0.001 inches (0.0254 Mm) of steel thickness. If you’d like more guidance on how amperage is adjusted on a GMA welder or related topics, just contact me.
For additional expert welding insights, feel free to visit What is Welding.
References
- American Welding Society. (2015). AWS D1.1/D1.1M: Structural Welding Code – Steel. Miami, FL: AWS.
- Canadian Welding Bureau (CWB): https://www.cwbgroup.org
- Canadian Welding Bureau. (2019). CSA W59: Welded Steel Construction. Ontario, Canada: CWB.
Joe Carter is a retired welding professional with over 40 years of hands-on experience in the industry, spanning ship repair, structural welding, and even underwater projects. Joe is a master of MIG, TIG, and Stick welding. Passionate about mentoring the next generation of welders, Joe now shares his decades of expertise and practical insights to help others build rewarding careers in welding.
American Welding Society, Amperage Adjustment, GMA Welder, MIG Welding, Safety Tips, Welding, Welding Applications, Welding Techniques, Wire Diameter