How to Cut Welds? Steps, Safety Tips, and Techniques
Published on: May 25, 2025 | Last modified: March 4, 2025
By: Tyler James
Cut welds refer to the process of separating metal pieces that are joined together by welding. This often involves cutting through the weld bead or the base metal itself.
You may be wondering how to cut welds. It’s crucial to learn this skill because cutting welds can repair or repurpose metal parts effectively. In my experience, following the right steps makes the difference between a clean cut and a damaged project.
In this guide, I’ll cover what cut welds are, different types of cut welds, essential prerequisites to get started, clear steps for cutting welds, safety tips, various cutting techniques, factors affecting your approach, how to solve common problems, and aftercare. We’ll also explore the key benefits and industry uses of knowing how to cut through welded metal.
Contents
- How to Cut Welds?
- What Are Cut Welds?
- Types Of Cut Welds
- Essential Prerequisites to Get Started
- Steps for Cutting Welds
- Safety Tips
- Types Of Cutting Techniques for Welds
- Factors Affecting Weld Cutting Techniques
- How to Address Common Problems
- Aftercare, Inspection, and Advanced Tips for Cutting Welds
- Key Benefits
- Industry Uses
- Exploring Alternatives
- Frequently Asked Questions (FAQs)
- Wrap Up
- Additional Reading
How to Cut Welds?
Cut welds refer to the process of severing a welded joint. To cut welds, use tools like a plasma cutter (Above 5,000°F or 2,760°C) or grinder. Expect moderate difficulty. Common applications include repairs and metal fabrication.
While working on various fabrication projects, you might also wonder if a 220 welder can be adjusted to work with a more common 110 outlet. This question is addressed comprehensively in the guide about converting a 220 welder to 110.
What Are Cut Welds?
Cut welds refer to the process of removing welded joints. A cut weld involves breaking the fusion created by welding. Typically, welds are cut using tools like plasma cutters or angle grinders, which can apply up to 200 amperes (200 A) at high temperatures. Understanding different welding types, such as MIG, TIG, or stick, helps identify the best methods to cut specific welded materials.
Now that you know what cut welds are, let’s discuss how to cut them. I often use my angle grinder for this job, especially with thicker welds. It’s quick, efficient, and fits easily into tight spaces. I’ll explain my cutting methods in detail next.
A colleague found it useful for cutting through robust metal seams while working on a restoration project. He noted the importance of cutting through a weld accurately to avoid damaging surrounding metal. Methods like using a cutting torch or specialized spot weld cutters can make a significant difference. Knowing how to cut welded metal effectively saves time and material in the long run. So, can a welder cut metal? Absolutely! The right tools and techniques simplify the toughest jobs.
Types Of Cut Welds
What types of cut welds will you encounter?
-
Bevel Cuts
A bevel cut features an angle, making it easier to join two pieces. To achieve a bevel cut, use a cutting torch or angle grinder at a 30-45 degree angle. Mark your weld, then carefully guide the tool along the seam.
For more information on effectively creating secure welds, consider exploring the basic types of welding joints.
-
Square Cuts
Square cuts are straight and perpendicular to the workpiece. For square cuts, use a band saw or reciprocating saw. Align the tool with the weld and keep the cutting blade straight for a clean cut.
-
Flame Cuts
Flame cutting uses a high-temperature torch to slice through metal. Preheat the area, then advance the torch along the weld seam. Keep the flame steady for an even cut.
-
Plasma Cuts
Plasma cutting is precise and works best on thin metals. Set the machine to the correct settings and guide the torch along the weld to create smooth cuts with minimal slag.
-
Band Saw Cuts
Band saws excel at cutting multiple welds quickly and neatly. Secure your project, then run the saw blade along the weld line. This method is ideal for repeating cuts on larger projects.
That covers the different types of cut welds. Let’s now take a look at the essential prerequisites to get started.
Essential Prerequisites to Get Started
What do you need to cut welds?
- Angle Grinder: You’ll need a reliable angle grinder, like the DEWALT DWE402 (4.5 Inch or 115 Mm). It’s essential for cutting through metal welds efficiently, featuring a powerful motor at 11,000 RPM.
- Cutting Wheel: Use a high-quality cutting wheel, such as the Makita B-58897, designed for metal. This ensures clean cuts and reduces heat build-up while cutting through weld beads.
- Weld Removal Tool: Consider the Neiko 00206A weld removal tool. It’s specifically made for removing welds without excessive force or damaging the surrounding material.
- Angle Iron or Clamping Device: Get a sturdy clamping device, like the Bessey GH15 3-in-1. This keeps your workpiece securely in place for accurate cuts and improves safety during the process.
You should now have a good understanding of the necessary foundations for welding. In the next part, we’ll discuss the methods for cutting welds.
Steps for Cutting Welds
Here are the steps for cutting welds effectively, no matter the job.
-
Identify the Weld Type
First, identify the weld type. Different welds—like MIG, TIG, or Stick—require specific cutting techniques. For example, MIG welds, known for their smooth appearance, often cut more easily. In contrast, Stick welds can be tougher due to their penetration into the base metal.
Choose the right method based on the welded materials. For sheet metal, a cutting torch or grinder may suffice. For thicker metals, use high-speed saws or plasma cutters for a clean cut.
-
Prepare the Cutting Tools
Ensure your cutting tools are ready. Whether you use an angle grinder or cutting torch, keep the blade or nozzle in good condition. For an angle grinder, a cutting wheel rated for metal with a diameter of 130-150 mm (5-6 Inches) works best. Stay sharp and efficient!
Adjust the tool settings as needed. A cutting torch should typically be set to 0.8 bar (10 Psi) of oxygen and a similar amount of acetylene. This balance maximizes temperature for a smoother cut.
-
Make the First Cut
Start cutting with precision and care. Position your grinder or cutter at a consistent angle of 20-30 degrees relative to the weld line for optimal results. Proceed slowly, especially with stronger metals, and watch for sparks! Take your time to avoid warping the base material.
Don’t rush! I once hurried a cut and ended up with a jagged edge that required much more cleanup. A smooth and steady hand pays off. Remember, the goal is to cut deep enough to break the bond but not all the way through the base metal.
-
Carefully Remove the Welded Piece
Once your cut is complete, begin to remove the welded piece. Use a lever or mallet if needed—apply force gently to avoid damaging surrounding metal. This process can take time, especially if the weld bond is strong. For those looking to ensure a stable power source for their welding projects, you might consider exploring tips on wiring a 220 outlet for a welder.
If you’re cutting through multiple layers, slice each layer separately. This method minimizes stress and keeps everything aligned. Patience and careful removal are key here.
-
Clean Up the Cut Area
After cutting, clean the area. Remove any weld slag or burrs using a wire brush or grinder. A clean workspace prevents any leftover materials from causing issues in your next welding project.
Consider using a grinder with a flap disc for a smooth finish—100-120 grit works best. Take your time here too; a neat workspace enhances the quality of future work.
So far in this section, we covered the steps for cutting welds. In the next section, we will talk about safety tips.
Safety Tips
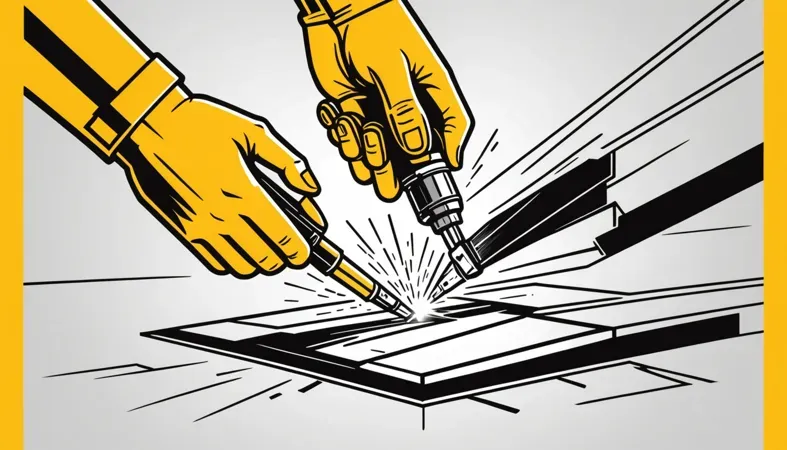
Let’s cover four important precautions for cutting welds.
- Wear PPE: Use personal protective equipment like gloves and goggles. High-quality brands, such as 3M, offer excellent protection against sparks and debris.
- Check Ventilation: Good airflow prevents fume buildup. Use fans or ensure outdoor workspaces are clear to keep air moving.
- Turn Off Power Tools: Always disconnect tools when not in use. This simple step prevents accidental startups and keeps you and others safe.
- Use Proper Cutting Equipment: Choose a TIG (Tungsten Inert Gas) or plasma cutter for accuracy. These can handle up to 100 amps, providing cleaner cuts.
Prioritizing safety precautions is crucial for your protection; I can’t stress this enough!
Types Of Cutting Techniques for Welds
Let’s move on to the types of cutting techniques. We’ll cover mechanical, thermal, chemical, manual, and automated methods.
-
Mechanical Cutting Techniques
Mechanical cutting involves tools like saws and grinders, which remove material through direct contact. An angle grinder operates at high speeds—typically around 12,000 RPM (Revolutions Per Minute)—to cut through welded metal quickly.
-
Thermal Cutting Techniques
Thermal cutting uses heat to slice through welds. Methods include oxy-fuel cutting and plasma cutting. For instance, plasma cutting can pierce through 25 mm (1 Inch) thick metal precisely by melting it with an electrical arc.
-
Chemical Cutting Techniques
Chemical cutting uses specialized acids or solutions to dissolve metal. This method is slower but effective for certain metals. For example, hydrochloric acid can cut through specific alloys, though it’s not commonly used due to safety concerns.
-
Manual Cutting Techniques
Manual cutting involves hand-held tools like hacksaws or torches. It’s labor-intensive but allows for precision in tight spaces. From my experience, having the right tools is crucial; for instance, a good torch makes cutting welds much easier.
-
Automated Cutting Techniques
Automated cutting uses machines programmed for precise cuts. CNC (Computer Numerical Control) machines excel in this area, ensuring consistency in large batches. They can cut metal quickly without sacrificing quality, which is vital for production settings.
We’ve wrapped up various cutting techniques for welds here. Next up, we’ll look at factors that affect weld cutting methods.
Factors Affecting Weld Cutting Techniques
What factors impact your approach to cutting welds effectively?
-
Material Thickness
Thicker materials require different cutting techniques. For instance, cutting a 12 mm (0.47 In) thick weld needs more power than a 3 mm (0.12 In) weld.
-
Type Of Weld Metal
Weld metals like stainless steel and aluminum behave differently. Their melting points impact cutting methods—aluminum melts at 660°C (1220°F), while stainless steel starts at 1375°C (2500°F).
-
Tooling Precision
The accuracy of your tools matters greatly. Using tools like a spot weld cutter offers precision that can save you time, especially on 1-2 mm (0.04-0.08 In) thin materials.
-
Desired Finish Quality
Your finish dictates your method. A clean cut may require a cutting torch rather than a grinder, especially for aesthetic or structural integrity in detailed projects.
-
Environmental Conditions
Wet or windy conditions can affect your cutting efficiency. Moisture can increase rust, compromising weld integrity before cutting begins.
We covered factors influencing weld-cutting techniques here. Next, we will cover solutions to common issues that arise.
How to Address Common Problems
Now, let’s look at some specific issues related to cut welds.
-
Inconsistent Cuts
Cut welds can have uneven edges. Check for cut depth uniformity (Ideally, 2-3 Mm Deep). Use a ruler or gauge to verify cuts and adjust your cutting speed as needed.
-
Tool Wear
Worn tools create poor cut welds. Sharpen or replace blades at the first sign of wear to ensure clean edges. Regular inspections are essential!
-
Heat-affected Zone Issues
Cut welds often show heat-affected zones, which change metal properties. Monitor pre-heat and cooling rates, aiming for less than 50 °C (122 °F) to reduce warping.
-
Excessive Smoke and Fumes
Excessive smoke during cutting can signal poor ventilation. Monitor smoke levels and use fume extractors to maintain a safe workspace.
-
Safety Hazards
Cuts from welds present safety risks. Always wear protective gear: gloves, a helmet, and goggles. Don’t forget spark screens—they protect your surroundings.
Aftercare, Inspection, and Advanced Tips for Cutting Welds
Here’s essential aftercare and inspection advice, along with expert tips for those experienced in cutting welds.
Aftercare Tips
After cutting welds, clean the area with a wire cup brush or grinder. Remove sharp edges and burrs to prevent injuries. Apply a rust inhibitor like WD-40 (Available in Multiple Sizes) to the exposed metal for corrosion protection.
Choosing the right welding equipment is essential for achieving professional results in home projects; explore the best welding machine for home use.
Inspection
Inspect the cut surface for cracks or separated materials. Use a micrometer (E.g., 0.001 Inches / 0.025 Mm) to measure material thickness. I recommend using a digital caliper for precise readings; ensure it’s zeroed before starting.
Expert Tips
If you’ve been cutting welds for years, refine your methods by adjusting cutting speed to match material thickness. Use a plasma cutter set to a sharp arc length of 0.125 inches (3.18 Mm) for better control. Allow time for heat dissipation; slow cuts require additional pauses, typically every 3 inches (76 Mm), for shock absorption and to avoid distortion.
Key Benefits
The main benefit of cutting welds is that it lets you easily separate joined metal pieces. A colleague found it useful for repairing machinery without hassle.
Moreover, mastering this technique offers additional benefits like saving time on projects, reducing material waste, avoiding damage to surrounding areas, and enhancing overall safety. These advantages make it essential for any welding professional.
Exploring how electrode classification informs the welding process can provide a deeper understanding of these techniques. For more detailed information, visit electrode classification E316-16.
Industry Uses
I’ve known people to use techniques for cutting welds in various projects. However, it has many applications, such as:
- Repair Work: Cutting faulty welds for repairs ensures structural integrity. It’s common in automotive and machinery repairs.
- Metal Recycling: Cutting welds allows for disassembling scrap metal, which is vital in salvage yards where up to 75% of metal can be recycled.
- Custom Fabrication: Designers often cut welds to modify existing metal frames. This application is in high demand in construction and custom fabrications.
- MIG Inspection: Technicians may need to cut out welds for quality control checks. Ensuring compliance can save businesses thousands in rework costs.

Exploring Alternatives
When you’re looking to cut welds, consider alternative methods like using a cutting torch or a spot weld cutter. These tools, such as the Dewalt DWMT70781L Spot Weld Cutter, can work wonders when precision is key. From both successes and failures, I’ve learned that sometimes using a Weld Removal Tool makes for simpler and cleaner cuts, especially in tight spaces.
If you’re in a bind, a powerful angle grinder can also do the trick for thicker metal, like 1/4 inch (6 Mm) or more. Remember, while welding cables can sometimes limit your options, choosing the right tool impacts your result. In the end, it’s all about what works best for your specific situation. When dealing with more delicate tasks, mastering techniques for thin metal is essential.
Frequently Asked Questions (FAQs)
Now let us look at some common questions I typically get asked.
What is the Best Tool for Cutting Welds?
The best tool for cutting welds is usually an angle grinder equipped with a quality cutoff wheel. This tool allows for precise cuts and handles various metal types effectively, making it ideal for cutting through welds. Additionally, using the right wheel can extend its life, boosting efficiency.
How to Cut Through a Weld?
You can cut through a weld using an angle grinder, a reciprocating saw, or a plasma cutter. Each tool works well, but an angle grinder provides more control, especially on tight spots. Always ensure proper safety gear and the right cutting technique to prevent accidents. Understanding the different welding methods can enhance your technical skills, particularly socket weld techniques.
What is the Best Way to Cut Spot Welds?
The best way to cut spot welds is to use a spot weld cutter. This specialized tool drills precisely where the welds are, minimizing damage to the surrounding material. Standard drills can tear the metal, while dedicated cutters ensure a cleaner, efficient process.
Can a Welder Cut Metal?
Yes, a welder can cut metal, but it depends on the type of welder. For instance, a plasma cutter is excellent for cutting metal quickly and easily. However, if you’re using a stick or MIG welder, you’ll need a separate cutting tool to achieve clean edges.
How to Cut Welding Cable?
You can cut welding cable easily using a cable cutter or a pair of heavy-duty wire cutters. These tools are designed to handle thick cables without fraying the wires inside, ensuring a safe and clean cut. Remember to use gloves to protect your hands during the process.
Wrap Up
We’ve covered a lot in this article, from understanding what cut welds are, to the various types of cut welds. We’ve also gone over essential prerequisites, safety tips, cutting techniques, and factors that can affect your methods. We touched on common problems, aftercare, benefits, industry uses, and even some alternatives.
In conclusion, knowing how to cut welds means understanding the right techniques, like using angle grinders or torches. Remember, safety is key, and proper tools make the process easier. By following these steps and tips, you can effectively cut welds and tackle your metalwork projects with confidence.
For those looking to deepen their understanding of the welding field, we invite you to visit What is Welding for more insights.
Additional Reading
- American Welding Society. (2020). AWS Welding Handbook: Welding Science and Technology (Vol. 1). Miami, FL: AWS.
- Little, R. L. (1999). Welding and Welding Technology. New York, NY: McGraw-Hill Education.
Tyler is a passionate DIY welder and self-taught metal artist with years of hands-on experience transforming raw materials into functional and artistic creations. Specializing in MIG welding, Tyler crafts everything from custom furniture to outdoor sculptures, blending creativity with technical skill. Committed to making welding accessible, Tyler shares practical insights and project inspiration to help beginners and hobbyists confidently explore the world of metalworking.
American Welding Society, Cut Welds, Fabrication, Metal Cutting Techniques, Personal Protective Equipment, Safety Tips, Tools For Welding, Welding, Welding Equipment

