How to Pass a 2G Weld Test? Tips, Steps, and Success Factors
Published on: December 7, 2024 | Last modified: March 4, 2025
By: Joe Carter
A 2G test is a welding test performed in the horizontal position. It’s a basic and essential skill for welders, showing proficiency in fundamental techniques.
You may ask, how to pass a 2g weld test? It’s crucial to prepare well for this test. I remember when I first tackled it and realized how important attention to detail is. The right technique can make a big difference in your results.
In this guide, we’ll explore the fundamentals of a 2G test, the prerequisites needed, effective steps for success, important precautions, various approaches that work, and factors impacting your performance. We’ll also cover common issues, aftercare tips, key benefits, and where 2G welding is commonly used. Get ready to learn what to expect in a weld test and elevate your skills, whether you’re curious about how to pass a mig welding test or other welding certifications.
Contents
- How to Pass A 2g Weld Test?
- What is a 2G Test?
- Types Of 2G Tests
- Prerequisites: What Do You Need?
- Precautions
- Steps to Pass a 2G Weld Test
- Types Of Approaches for Passing a 2G Weld Test
- Factors Affecting Success in a 2G Weld Test
- Common Issues and Troubleshooting
- Aftercare, Inspection, and Advanced Tips for Passing a 2G Weld Test
- Advanced Techniques for Mastering the 2G Weld Test
- Key Benefits Of Passing a 2G Weld Test
- Where is 2G Welding Used?
- When to Try a Different Approach
- Frequently Asked Questions (FAQs)
- Conclusion
- References
How to Pass A 2g Weld Test?
The 2G test is a horizontal groove weld test. To pass, maintain 1/8 inch (3.2 Mm) bead height and 30 to 45 degrees travel angle. It’s tough, often used in structural welding and pipe fabrication.
What is a 2G Test?
The 2G test measures welding skills in a horizontal position. In this test, you weld a joint placed flat on a table, typically joining two pieces of metal at a right angle. Using a 3/16 inch (4.76 Mm) gap, the weld’s size and quality are closely checked for defects.
To pass a 2G weld test, your welding must be clean and strong. It’s crucial to have proper technique and control over your filler material. I practiced my technique for days before my test, focusing on the bead’s consistency and penetration depth each time.
I can’t tell you how many times I’ve relied on it for critical projects. Passing the 2G weld test is a badge of honor in welding. It sets the stage for more advanced challenges, like the 3G weld test. If you’re preparing for a weld test, understanding the fundamentals will help you succeed. Consider how to pass the current test, adapt, and you’ll breeze through!
Types Of 2G Tests
What types of tests will you encounter for a 2G weld assessment?
-
Pipe Weld Test
This test checks your skill in welding pipes. To succeed, maintain a consistent speed and correct angle.
-
Plate Weld Test
In this test, you’ll weld flat plates together. Use the correct heat settings and clean surfaces to ensure a strong bond.
-
Fillet Weld Test
This type focuses on making a three-sided joint. Control your bead size and keep a steady hand to excel.
-
Vertical Weld Test
This test involves welding in a vertical position. To pass, adjust your technique and use a weaving motion for stability.
-
Overhead Weld Test
Welding overhead tests your ability to manage gravity. Keep angles constant and travel slowly to control the weld puddle.
You should now have a good understanding of the various 2G test types. In the next part, we’ll discuss necessary prerequisites.
Prerequisites: What Do You Need?
What do you need to prepare for the 2G weld test?
- Welding Machine: You’ll need a MIG welding machine, like the Lincoln Electric Power MIG 210. It’s essential for providing the right heat and stability during the test.
- Weld Wire: Use ER70S-6 wire specifically. It offers excellent performance, ensuring a strong and clean weld, which is critical for success.
- Weld Shielding Gas: You’ll need a 75/25 Argon/CO2 mixture, such as Airgas 75/25. This gas combination ensures a smooth and stable arc for the 2G test.
- Welding Hood: A quality auto-darkening hood, like the Miller 281003, is necessary to protect your eyes and help you focus on proper technique while welding.
We have now covered necessary requirements and tools. The next section will focus on important safety measures to consider.
Precautions
Here are essential precautions for your 2G weld test.
- Good Ventilation: Proper airflow reduces harmful smoke. Use exhaust fans like the B-Air F260 or similar.
- Protective Gear: Wear gloves and a welding helmet. A quality auto-darkening helmet can prevent serious eye injuries.
- Read Safety Data Sheets (SDS): Understanding these sheets keeps you aware of hazards. Product-manufactured SDS documents are vital for safe practices.
- Proper Equipment Condition: Always check your welding unit for issues. A functioning Lincoln Electric multi-process welder is crucial.
Following safety measures can help you avoid injuries; they are important.
So far we covered safety measures to take. Let’s look at the steps for passing a 2G weld test next.
Steps to Pass a 2G Weld Test
Here are the steps to help you successfully complete a 2G weld test.
-
Set Up Your Position
Begin by positioning yourself correctly. The 2G weld test is performed in a horizontal position. Adjust your stance to manipulate the torch comfortably, minimizing stress and maintaining a steady hand throughout the test.
Align your body perpendicularly to the welding joint for better visibility and control—key factors when welding under pressure. A strong position contributes to a stronger weld!
-
Adjust Your Machine Settings
Configure your welding machine for direct current (DC) electrode positive (DCEP) mode. Typical settings for 0.045-inch (1.2 Mm) wire with a shielding gas flow rate of 15-20 cubic feet per hour (CFH) are essential. Ensure your amperage is around 180-220 amps for flux-cored welding.
Each machine may vary slightly, so check the manufacturer’s guidelines for optimal settings. Set the voltage according to metal thickness; too high can cause burn-through, while too low may result in weak penetration.
-
Begin Welding With Proper Technique
Start your weld with a solid arc strike. Proficiency here is vital for quality output. Maintain a steady travel speed of around 12-16 inches per minute (30-41 Cm/min) while pushing the filler rod into the joint. A consistent speed ensures proper bead formation, which is fundamental for strength. If you ever need to correct errors or disassemble parts, understanding how to remove welds efficiently is essential.
A common mistake is using too much filler material too quickly. Focus on controlling your bead size; compact, well-aligned beads indicate a successful weld!
-
Monitor Your Heat Input
Consistently monitor the heat input to avoid overheating and distortion. Aim for a heat input rate of about 1.0-1.5 kJ/mm for most metals. Excess heat can result in lack of fusion, causing significant issues in the final weld. Ensuring optimal heat control can also minimize unwanted by-products such as weld spatter formation.
If the weld looks too shiny, you might be applying too much heat. If you notice discoloration, adjust your technique or settings before proceeding.
-
Finish and Clean the Weld
Once finished, allow the weld to cool naturally. This typically takes about 10-15 minutes for steel bars, but observe to ensure they’re within a good margin for a reliable joint. Cleaning is crucial; brush off slag or spatter carefully to check alignment and practice good habits.
Inspect your weld carefully when it’s cool. Note any cracks or imperfections for refinement. A final inspection should show a smooth, even bead—the sign of a job well done!
We’ve wrapped up the steps for passing a 2G weld test here. Let us turn our attention to the different approaches for success.
Types Of Approaches for Passing a 2G Weld Test
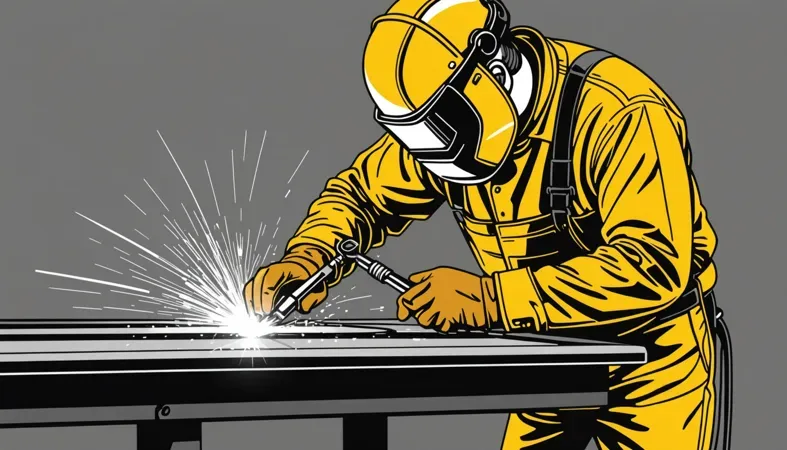
Let’s examine different welding techniques, including Arc Welding, MIG Welding, TIG Welding, Stick Welding, and Plasma Cutting.
-
Arc Welding Techniques
Arc welding uses an electric arc to melt and join metals. Typically operating at 200-400 amps, this method generates high heat for strong welds. To pass a 2G weld test, maintain an optimal arc length; an excessively long arc can lead to poor joints. Understanding electrical safety measures is crucial to minimize electric shock risks in welding.
.
-
MIG Welding Processes
MIG welding (Metal Inert Gas) is known for its speed and versatility, using a continuous wire feed. A wire feed speed of about 100-350 inches per minute usually works well for a 2G weld test.
-
TIG Welding Methods
TIG welding (Tungsten Inert Gas) offers precision with a non-consumable tungsten electrode. Maintain a travel speed of about 76-305 mm (3-12 Inches) per minute to achieve quality beads for a passing 2G weld test. Ensuring safety is crucial in welding practices, and overlooking the use of protective gear can lead to severe consequences; learn more about welding without a mask.
-
Stick Welding Applications
Stick welding uses a consumable electrode to create the weld. Common in outdoor settings, it typically operates at 100-500 amps. To succeed in a 2G weld test, focus on electrode angle and movement for a smoother finish. Proper grounding techniques are essential to ensure safety and effectiveness in welding practices, as understanding how to ground a welder can significantly improve your results.
-
Plasma Cutting Techniques
Plasma cutting uses ionized gas to slice through metal. While it’s not directly related to welding, preparing pieces with this method can enhance your 2G weld test results by ensuring clean edges.
Factors Affecting Success in a 2G Weld Test
What factors influence your success in the 2G weld test?
-
Welding Position
The 2G position is horizontal, affecting how gravity influences the weld. A strong, even bead is essential to ensure the weld passes inspection, as it must resist forces from multiple directions.
-
Material Properties
The type of base metal impacts weldability. For instance, steel (With a Tensile Strength Of About 400 Mpa) behaves differently than aluminum, affecting penetration and strength in the finished weld.
-
Welding Technique
Using the correct speed and angle while moving the torch can make a significant difference. Techniques like stringer beads or weaving help control heat and shape, which are crucial for success in the 2G test.
-
Welder Experience
Experience directly affects success rates. Beginners may struggle, while professionals with years of experience typically pass more tests. Practicing with different settings boosts confidence and skill level.
-
Environmental Conditions
Welding in extreme temperatures (Below 0°C or Above 40°C, or 32°F to 104°F) can alter metal behavior. Adequate ventilation is also important to ensure consistent weld quality and reduce defects. It’s important to know the crucial components to disconnect when working on a vehicle to prevent damage, and this welding disconnection guide can help.
Common Issues and Troubleshooting
Let’s look at unique challenges in the 2G test.
-
Poor Penetration
Poor penetration in the 2G test often results from insufficient heat. You can spot it by checking for a shallow weld pool. To resolve it, increase your travel speed and adjust your settings.
-
Excessive Spatter
Excessive spatter in the 2G test can ruin your weld’s appearance. Check your wire feed speed and voltage settings. Lower them to minimize spatter.
-
Weld Cracking
During the 2G test, cracks may form due to rapid cooling. Identify cracks by visually inspecting the weld surface after cooling. Control the cooling rate and consider preheating (Warming Up Beforehand).
-
Inconsistent Heat Input
Inconsistent heat input in the 2G test leads to weak joints. Recognize it by uneven weld beads. Keep your heat settings steady and maintain a constant travel speed for consistency.
-
Improper Material Fit-up
The 2G test requires precise fit-up to avoid gaps. Inspect joints before welding. Ensure a tight fit and use clamps if necessary to hold materials together while welding.
Aftercare, Inspection, and Advanced Tips for Passing a 2G Weld Test
Here’s essential advice on aftercare, inspection, and expert tips to help you ace the 2G weld test.
Aftercare Tips
After welding, cool the joint immediately using compressed air if allowed; aim for about 10 psi (68.95 Kpa) to speed up cooling. Keep the weld area clean—avoid contaminants like rust or oil, and use acetone for a spotless surface. Store your welding rods at a temperature of 15°C to 25°C (59°F to 77°F) to prevent moisture absorption.
Inspection
Check for discoloration on the weld. Use a caliper to measure the bead width; it should be between 6 mm to 10 mm (0.24 In to 0.39 In) for quality assurance. Perform a crack test using a dye penetrant method like Magnaflux Dye-Penetrant 7 to ensure weld integrity. The Wynson 825PQ kit is handy for quick field inspections.
Expert Tips
I recommend adjusting your amperage settings to around 110-130 A for optimal penetration on a 6 mm to 8 mm (0.24 In to 0.31 In) thick plate. Use a back purge with argon to prevent oxidation on root passes—set it at roughly 5-10 cfh (Cubic Feet Per Hour). Don’t skip interpass temperature checks; ideally, keep it below 150°C (302°F) to avoid weaknesses.
Advanced Techniques for Mastering the 2G Weld Test
If you want to go beyond the basics, consider these advanced techniques for a high-quality weld.
Understanding Heat Affected Zones (HAZ)
- Definition: HAZ is the area around the weld that experiences changes due to heat. It can affect the material properties, so stay mindful while welding.
- Impacts: Excessive heat can lead to issues like softening of the base metal. A tight control of your heat settings keeps HAZ minimized, ensuring a strong joint.
Weld Pattern Techniques
Using different weld patterns can significantly impact your final outcome.
- Weaving Pattern: This requires side-to-side movement while traveling forward. It helps in covering wider gaps and allows for better penetration.
- Stringer Bead: A straight line pattern is best for thin materials. It produces less heat input and minimizes distortion.
Table of Settings and Techniques for 2G Weld Test
| Technique | Amperage (A) | Travel Speed (IPM) | Gas Flow (CFH) | Weld Pattern |
|---|---|---|---|---|
| MIG Flat Fillet | 160-180 | 12-16 | 15-20 | Stringer Bead |
| MIG Horizontal Groove | 180-220 | 10-14 | 20-25 | Weaving |
| Flux-Cored | 180-240 | 12-16 | 25-30 | Weaving |
Practical Practice Tips
Lastly, hands-on practice can make all the difference:
- Simulate Real Test Conditions: Practice under similar conditions you’ll face during the actual test.
- Record Your Performances: Keep a video log of your welding for self-critique.
- Seek Feedback: Work with a mentor or instructor to get personalized insights to improve.
Key Benefits Of Passing a 2G Weld Test
The main benefit of passing a 2G weld test is immediate job readiness. I can’t tell you how often I’ve used it to get hired for various welding positions.
Additionally, a successful test boosts your confidence, improves your skills, and makes you more marketable. It opens doors to advanced certifications and increases your earning potential.
Where is 2G Welding Used?
I’ve seen many professionals use 2G welding in heavy industries, but it has numerous applications, such as:
- Pipelines: 2G welds secure gas and oil pipelines. They can handle high pressure and prevent leaks, making safety crucial.
- Bridges: Welders use 2G welding in bridge structures to connect girders. This technique supports heavy loads, making it essential in civil construction.
- Boiler Fabrication: Two-dimensional welds maintain structural integrity under extreme heat. They prevent catastrophic failures, which is vital.
- Aerospace Components: It’s used to weld fuel tanks and other parts in aircraft. Precision is key, so 2G welding excels in this field.

When to Try a Different Approach
There are several alternatives to achieve success in the 2G test, depending on your situation. Depending on your skills, you might want to consider options like the MIG method, using products such as Lincoln Electric’s Easy MIG 180. Reflecting on my past experiences, certain methods like flux-cored welding tend to be easier for beginners who may struggle with stick welding in the horizontal position.
If you encounter difficulties with traditional techniques, tools like the Hobart Handler 210 can open new doors. Switching gears can help, especially when preparing for additional tests, like the X-ray or UT weld tests. Adapting your approach can improve your chances of passing those assessments.
Frequently Asked Questions (FAQs)
Here are some unique questions I typically get asked about welding tests.
What is a 2G Weld Test?
A 2G weld test refers to a horizontal fillet weld test. In a 2G position, the welder must produce a weld while working on a horizontal joint. This test assesses your skills to weld in this specific position.
What is the Hardest Welding Test to Pass?
The hardest welding test to pass is often considered to be the 6G test. This test combines vertical and horizontal welding at a 45-degree angle. It demands precision and advanced techniques, making it challenging for many welders. For those looking to understand more about the different welding inspection and testing standards, exploring these guidelines can be quite beneficial.
What Do I Need to Bring to My Welding Test?
You need to bring essential tools and materials to your welding test. Common items include your welding helmet, gloves, and safety gear. Make sure to check what specific equipment the testing facility requires as it can vary. When setting up for practice, knowing the optimal welding table height can enhance your preparation efforts.
What is MPI Test in Welding?
An MPI test, or Magnetic Particle Inspection test, detects surface defects in welds. This non-destructive testing method uses magnetic fields and fine iron particles to identify flaws. It’s critical for ensuring the integrity of welds in critical applications.
How Do I Pass a MIG Welding Test?
To pass a MIG welding test, focus on mastering the technique. Proper settings, joint preparation, and a steady hand are key. Practice is essential; it’s wise to have hands-on experience with different materials before taking the test.
Conclusion
We are almost done. We covered what a 2G test is, the types of 2G tests, necessary prerequisites, and steps to pass the test. We also looked at precautions, various approaches, factors impacting your success, common issues, aftercare, and the benefits of passing a 2G weld test.
Hopefully, I was able to impart some of my experience on how to pass a 2G weld test. To wrap it up, focus on preparing your materials, following the right steps, and troubleshooting any issues. By understanding the various components, like requirements and inspection tips, you’re set for success in your welding journey.
If you’ve found this information helpful, I encourage you to explore more resources and insights available at What is Welding.
References
- American Welding Society. (2015). AWS D1.1/D1.1M: Structural Welding Code – Steel. Miami, FL: AWS.
- American Society of Mechanical Engineers. (2019). ASME Section IX: Welding and Brazing Qualifications. New York, NY: ASME.
- American Welding Society. (2018). AWS D14.3: Specification for Welding Earthmoving and Construction Equipment. Miami, FL: AWS.
- American Welding Society. (2020). AWS A3.0: Standard Welding Terms and Definitions. Miami, FL: AWS.
Joe Carter is a retired welding professional with over 40 years of hands-on experience in the industry, spanning ship repair, structural welding, and even underwater projects. Joe is a master of MIG, TIG, and Stick welding. Passionate about mentoring the next generation of welders, Joe now shares his decades of expertise and practical insights to help others build rewarding careers in welding.
2G Weld Test, American Welding Society, Electrical Safety, MIG Welding, Welding, Welding Safety, Welding Skills, Welding Table, Welding Techniques

