How to Wire a Welding Outlet? Essential Steps, Types, and Precautions
Published on: April 21, 2025 | Last modified: March 4, 2025
By: Joe Carter
An outlet is a point in a wall where you plug in electrical devices. It allows electricity to flow from the power source into your tools.
It’s a question I’m often asked: how to wire a welding outlet? Proper wiring is crucial for safety and efficiency. I’ve seen firsthand what can happen with improper wiring—overheating and even fires. So, paying attention is a must.
In this article, you’ll find how to wire a welding outlet, the types of welding outlets, the necessary prerequisites, and the steps to wire a welding outlet. We’ll also cover precautions you need to take, factors affecting wiring, common problems to watch for, and tips for aftercare. Plus, we’ll discuss the real-world uses for a welding outlet. Get ready to dive into wiring details you shouldn’t overlook!
Contents
- How to Wire A Welding Outlet?
- What is a Welding Outlet?
- Types Of Welding Outlets
- Prerequisites
- Precautions
- Steps to Wire a Welding Outlet
- Types Of Electrical Wiring for Welding Outlets
- Factors Affecting Wiring a Welding Outlet
- Common Code Considerations When Wiring a Welding Outlet
- Welding Outlet Installation Checklist
- Typical Problems to Be Aware Of
- Aftercare, Inspection, and Advanced Tips for Wiring a Welding Outlet
- Top Benefits Of a Properly Wired Welding Outlet
- Real-world Uses for a Welding Outlet
- Alternatives for Wiring a Welding Outlet
- Frequently Asked Questions (FAQs)
- Conclusion
- References
How to Wire A Welding Outlet?
An outlet is an electrical connection point. To wire a welding outlet, use a dedicated 50-amp circuit. Follow local codes—typically, you’ll need 6-gauge wire. It can be tricky, so consult an electrician for large projects. To gain specific knowledge on joining metals, explore how to weld metal effectively.
What is a Welding Outlet?
A welding outlet is an electrical receptacle designed to supply power to welding machines. It typically handles higher voltage and amperage than standard household outlets. Most welding outlets, like a 50 amp (50A) 240 volt (V) outlet, use either a NEMA 6-50 or NEMA 14-50 plug design. This setup lets welders operate effectively without blowing circuits or experiencing power loss.
When wiring a welding outlet, safety and proper technique are essential. Ensure the circuit can handle the machine’s demands. I’ve wired several outlets, and it’s vital to double-check connections for a secure fit to avoid shorts.
A friend relied on a welding outlet for his home garage setup. He taught me how to wire a welder outlet correctly, emphasizing the importance of understanding plug types, like NEMA 6-50. If you’re looking to connect leads on a welder, make sure you know your device’s plug type and match it with the proper outlet configuration.
Types Of Welding Outlets
What types of outlets will you encounter when wiring? Let’s dive in!
-
Standard 120V Welding Outlets
These outlets are common for light-duty welding tasks. To set one up, use 12-gauge wire to connect the outlet to your circuit panel. First, run the wire from the panel to the outlet location, connecting the black wire to the brass terminal, the white wire to the silver terminal, and the green wire to the ground terminal.
Ensuring a proper ground connection is essential for safety when setting up your welding equipment, and you can learn more about grounding a welder properly.
-
240V Welding Outlets
240V outlets are suitable for heavy-duty welders. Use 10-gauge wire for compliance. Connect a double-pole breaker to the panel, run the wire to the outlet, and attach the red and black wires to the terminals, along with the ground wire to the ground terminal. If you ever make a mistake during the welding process, knowing how to break a weld can prove essential.
-
Dedicated Welding Outlets
These outlets serve only welding equipment to avoid overloads. To wire a dedicated outlet, use a calcium-insulated breaker. First, install the breaker in the panel, then pull wiring from the breaker to the outlet using at least 10-gauge wire.
-
GFCI Welding Outlets
Ground Fault Circuit Interrupters (Gfcis) protect you from electrical shocks. For wiring, a 20-amp GFCI breaker is ideal. To set it up, run a 12-gauge wire to the GFCI outlet and connect the black, white, and ground wires correctly, just like any standard outlet.
-
Combination Outlets for Welders
These outlets let you plug in various tools. To hook it up, use a dual circuit breaker. Connect the necessary gauge wires to the combo outlet, securing both 120V and 240V options as needed.
We have now covered various types of welding outlets. Next, we will examine the necessary prerequisites for welding.
Prerequisites
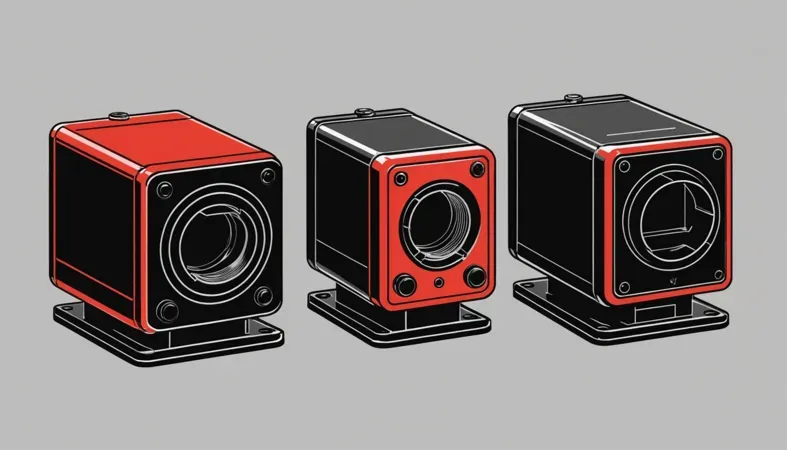
What do you need to wire a welding outlet?
- 50 Amp 220V Welder Plug: You need a specific plug, like the NEMA 6-50P. It’s critical for ensuring your welder receives the right voltage and amperage.
- 50 Amp Welder Receptacle: Get a matching receptacle, such as the NEMA 6-50R. This provides a safe connection for your welder’s power supply.
- 10/3 AWG Wire: Use heavy-duty wire, like Southwire’s 10/3, suitable for handling the high current loads required by your welder.
- Circuit Breaker: A 50 Amp double-pole circuit breaker (Square D QO Series) is essential for protecting your circuit from overloads and shorts.
We have now covered necessary requirements and prior knowledge. Next, we will examine safety measures and guidelines.
Precautions
Let’s cover essential safety measures for wiring an outlet.
- Disconnect Power: Always turn off power at the breaker to avoid shocks. Use an adjustable breaker switch for better control.
- Use Proper Tools: Choose insulated tools for wiring. Ensure your tools, like Klein or Husky, meet ANSI standards.
- Check Voltage Rating: Ensure the outlet matches your welder’s voltage, typically 220 V (Volts). My welder works best at 240 V.
- Wear Protective Gear: Use gloves, goggles, and a fire-resistant apron. A durable welding jacket should offer fire protection.
Remember, safety is key. It’s not just about doing it right—it’s about staying safe!
So far we covered safety measures for welding. Next, let’s look at how to wire a welding outlet.
Steps to Wire a Welding Outlet
Here are the steps to wire a welding outlet effectively.
-
Choose the Right Outlet Configuration
Start by selecting the appropriate outlet type for your welder. Most welding machines need either a 50 Amp, 220V (Or 240V) outlet or a dedicated 30 Amp circuit. For example, a standard 50 Amp welder typically uses a 4-prong plug, while smaller units may need only a 3-prong configuration. Check the manufacturer’s specifications to ensure you’re selecting the right one.
Once you confirm the required outlet configuration, mark the installation location. It’s critical to keep it accessible yet clear of flammable materials. Place it where you can easily reach it from your workbench or welding area, considering any extension needs for cable runs.
-
Run the Appropriate Wiring
Next, run the appropriate wiring from your circuit breaker box to the welding outlet. Use a minimum of 6-gauge (9.94 Mm²) wire for a 50 Amp circuit to handle the amperage without overheating. For a 30 Amp circuit, 10-gauge (5.26 Mm²) wire suffices, but never go below that. Follow local codes regarding wire types, typically THHN in conduit.
When it comes to joining metal components, understanding the role of weld-through primer applications can ensure stronger and more reliable welds.
When planning the wire run, keep it as direct as possible. If it bends or goes through walls, use flexible conduit to protect it. Ideally, the wire should lie no closer than 12 inches (30 Cm) to any other line to avoid interference or damage.
-
Connect the Wires to the Outlet
Once you’ve run the wiring, connect the wires at the outlet. Start by stripping about 1 inch (2.54 Cm) of insulation off each wire end to expose the copper. Connect the ground wire to the green screw, then attach the hot wires to the brass screws. Follow the manufacturer’s color coding; usually, black or red connects to the live terminal.
If you’re using a 4-prong plug, connect a neutral wire to the corresponding terminal. Double-check all connections before securing the outlet cover. A loose connection could lead to overheating, damaging your welder or causing a fire hazard.
-
Install the Breaker in Your Panel
The final step is to install the appropriate breaker in your main electrical panel. For a 50 Amp welding outlet, use a double-pole circuit breaker rated for 50 Amps. A 30 Amp outlet requires a lighter breaker. Make sure to turn off the main power while installing!
Insert the breaker into the panel’s bus bars securely. Connect the hot wires to the breaker terminals and the ground wire to the grounding bar. I’ve seen many fuses fail due to improper tightness, so ensure everything’s securely tightened. Once done, switch on the main power and turn on the new circuit breaker.
We covered the steps for wiring a welding outlet. Next, we will explore the different types of electrical wiring for these outlets.
Types Of Electrical Wiring for Welding Outlets
Let’s move on to the different types. We’ll cover Non-Metallic Sheathed Cable, Metallic Conduit Wiring, Type SE Cable, Flexible Wiring Options, and Direct Burial Wiring.
-
Non-metallic Sheathed Cable
This type, also known as NM cable, is ideal for indoor use. It typically comes in sizes like 12 or 14 AWG (American Wire Gauge). It’s cost-effective and easy to work with, making it a good choice for residential welding outlets. A fundamental understanding of how to weld enhances safe and efficient installation.
-
Metallic Conduit Wiring
Metallic conduit is sturdy and protects your wiring from physical damage. You’ll often find it in commercial or industrial settings. For welding outlets, use EMT (Electrical Metallic Tubing) with a minimum of 10 AWG wire for optimal results.
-
Type SE Cable
Type SE is a service entrance cable ideal for powering welding equipment. It can handle heavy loads, often rated at 600 V. This type ensures durability outdoors and is particularly useful for permanent setups.
-
Flexible Wiring Options
Flexible wiring allows for mobility, making it perfect for portable welders. This often includes WH (Welding Helix) or similar types. Through trial and error, I’ve found it’s the best option if you regularly move your welding equipment. Having the right consumables is crucial for efficient welding processes, and understanding the cost of welding rods can assist in budgeting and planning your projects effectively.
-
Direct Burial Wiring
If you’re wiring outdoors, direct burial cable is excellent. It withstands moisture and is rated for direct grounding. Use sizes like 8 AWG for reliable functionality, especially when connecting to a remote welding outlet.
Factors Affecting Wiring a Welding Outlet
What factors influence setting up your welding outlet effectively? Here’s a quick overview.
-
Voltage Requirements
A standard welding outlet runs on 240 volts (V). Understanding the voltage needed for your welder ensures a proper connection without overloads.
-
Amperage Ratings
Different welders draw varying amperages; common ratings are 30A or 50A. Choose your outlet’s amperage rating based on your welder’s draw to avoid tripping breakers.
-
Wire Gauge Selection
It’s crucial to pick the right wire gauge. For a 50A circuit, you’ll need at least 6 AWG (American Wire Gauge) copper wire to handle the current efficiently without overheating.
-
Location and Environment
The installation site affects your wiring. Outdoor setups require weatherproof receptacles, while indoor areas might not, impacting your materials and methods.
-
Safety Regulations and Codes
Always follow local codes. These regulations dictate wiring methods and components to prevent hazards and ensure your welding outlet is safe to use.
Common Code Considerations When Wiring a Welding Outlet
Let’s go over some important code requirements and standards to know when wiring a welding outlet. Following guidelines helps keep your project safe and compliant.
-
National Electrical Code (NEC) Compliance
The NEC outlines minimum safety standards. Always consult the NEC when planning your outlet installation. Most local codes align with NEC guidelines to ensure your setup meets electrical safety standards.
-
Local Permits and Inspections
Before starting, check if you need a permit. Certain regions require inspections to confirm that your installation meets code. This added step ensures that your outlet can handle high amperages safely.
-
Amperage Ratings for Breakers
Using the wrong amperage rating for your breakers can cause serious issues. For instance, for a 50 Amp outlet, always use a double-pole 50 Amp breaker. It must match your outlet’s rating to prevent overheating and potential fire hazards.
-
Grounding and Bonding Requirements
Proper grounding is crucial for any welding outlet. The outlet needs to be grounded according to local regulations to protect against electrical faults. Grounding helps ensure you’re safe from electric shocks.
-
Wire Sizing Regulations
Refer to NEC Table 310.16 for wire sizing guidelines. As a rule, 6 AWG wire is necessary for 50 Amp circuits, while 10 AWG works for 30 Amps. Using appropriately sized wire is essential for preventing overheating.
Welding Outlet Installation Checklist
Before you wire the outlet, use this handy checklist to make sure you have everything covered:
| Item | Description | Status |
|---|---|---|
| Permit | Confirm if a permit is required for your area. | ✔️ / ❌ |
| Breaker Size | Choose a breaker matching your outlet rating (50A or 30A). | ✔️ / ❌ |
| Wire Type | Use appropriate gauge wire (6 AWG for 50A). | ✔️ / ❌ |
| Ground Connection | Ensure a proper ground is in place as per regulations. | ✔️ / ❌ |
| Outlet Type | Confirm correct outlet type (NEMA 6-50 or 14-50). | ✔️ / ❌ |
| Inspection | Schedule inspection to verify compliance. | ✔️ / ❌ |
Typical Problems to Be Aware Of
Let’s look at specific issues related to the outlet that may arise.
-
Improper Wiring Connections
Outlet wiring might not match the required gauge, leading to overheating. Check the connections with a multimeter to ensure proper voltage. Secure all wiring smoothly.
-
Overloading the Outlet
It’s crucial to avoid connecting too many devices to one outlet. Use adaptable outlet strips with a suitable amperage rating (E.g., 15A, 20A). Distribute loads evenly.
-
Inadequate Circuit Breaker Protection
Frequent tripping may indicate an insufficient rating. Use circuit breakers rated for at least 20 Amps for heavy machinery.
-
Voltage Drops During Operation
If the outlet delivers inconsistent power, it could indicate a voltage drop. Use voltmeters during operation to identify drop levels and upgrade wire size if necessary.
-
Failure to Ground Properly
Ensure the outlet has a solid ground connection to prevent electrical hazards. Use a ground tester to confirm grounding integrity.
Aftercare, Inspection, and Advanced Tips for Wiring a Welding Outlet
Here’s some direct advice on what to do after setting up your welding outlet.
Aftercare Tips
After finishing the wiring process, securely fasten all connections using wire nuts and electrical tape to prevent exposure. Test the outlet with a multimeter to ensure it delivers the correct voltage, typically 240V or 120V (Depending on the Application). Ground any outlets systematically to reduce the risk of electrical shock.
Inspection
Inspect your outlet for loose wires or damage after every use. A visual check of the housing’s integrity ensures safety; cracks could indicate an impending failure. Use a Klein Tools Voltage Tester to confirm all connections are secure and functioning correctly.
Expert Tips
For advanced setups, consider installing a grommet (A Protective Eyelet) where cables exit the box for better durability. Use 10 AWG wire for 20 Amp loads to minimize heat buildup. Periodically apply dielectric grease to wire connections to prevent oxidation and improve connectivity over time.
Top Benefits Of a Properly Wired Welding Outlet
The main benefit of learning to wire a welding outlet is safety. A friend relied on it for his business, and he never faced electrical issues, keeping his projects running smoothly.
Moreover, proper wiring increases efficiency. You’ll enjoy consistent power, reduce the risk of overheating, extend equipment lifespan, and minimize downtime. What’s not to like?
Real-world Uses for a Welding Outlet
Many people use welding outlets for various tasks. Some key uses include:
- MIG Welding: Used for metal fabrication, these outlets supply high amperage for smooth project performance. MIG welding is popular among automotive repair shops.
- TIG Welding: Ideal for thin materials like aluminum, the outlet provides stable, low voltage. Many aerospace industries prefer this method for precision.
- Stick Welding: Essential for structural steel work, it works well in both indoor and outdoor settings, especially on construction sites.
- Fabrication Shops: Support multiple welders simultaneously. Outlets enable various tasks, from creating art to building machinery, making them vital in these shops.

Alternatives for Wiring a Welding Outlet
There are several alternatives to wiring a welding outlet directly. For example, using a portable generator with sufficient capacity, such as the Honda EU7000iS, can provide a flexible power solution. Through trial and error, I’ve discovered that investing in a high-quality extension cord, like the 50-foot 50 Amp extension cord, can be a lifesaver when you need to hook up leads on a welder without permanent outlet changes.
If you’re not comfortable with wiring, consider hiring a licensed electrician. This approach ensures safety and compliance with local codes. Alternatively, you can use a plug-and-play welder, which requires no wiring expertise, but may limit your welder’s capacity. For those exploring welding processes, understanding what DCEP means in welding can enhance your knowledge.
Frequently Asked Questions (FAQs)
Now let us look at some common questions I typically get asked about welding and outlets.
What Wire Do I Need for a 220 Welder Outlet?
You’ll need at least 6-gauge (AWG) wire for a 220 welder outlet. This wire can handle 50 amps, perfect for many welders. Remember, using the right wire size ensures safety and efficiency, decreasing the risk of overheating or tripped breakers. Understanding the integral components of welding connects to knowing what is a weld and how it is formed.
What Size Wire for a 50 Amp Welder Outlet?
For a 50 amp welder outlet, 6-gauge (AWG) wire is recommended. It maintains a safe operating temperature and reduces voltage drop over distance. Using the correct size wire helps you avoid potential damage to your welder.
How Do You Wire a 3 Prong 220 Outlet?
To wire a 3-prong 220 outlet, connect the green wire to the ground, the white wire to the neutral, and the black and red wires to the two hot terminals. Proper connections ensure your welder runs smoothly with decreased electrical interference.
Can You Run a Welder Off a Regular Outlet?
No, you can’t run a welder off a regular outlet. Most welders require a dedicated 220-volt outlet to function properly. Using a regular 110-volt outlet would underpower the welder and can damage both the welder and the outlet.
What Kind Of Plug Does a Welder Use?
Most welders use either NEMA 6-50 or NEMA 14-50 plugs, depending on their amperage and voltage requirements. These plugs provide a secure connection and are standard for most residential welders, ensuring safety during operation.
Conclusion
You made it to the end. We covered how to wire a welding outlet, different types of welding outlets, prerequisites, wiring steps, and important precautions. You also learned about types of electrical wiring, factors affecting your setup, typical problems, aftercare, and the benefits of a properly wired outlet.
So, how to wire a welding outlet? Simply put, it involves understanding your welder’s requirements, selecting the right outlet type, and following precise wiring steps. Remember to consider amps like 30A, 50A, and respect all safety measures. If you have questions or need guidance, don’t hesitate to get in touch for further assistance.
For more insights and the latest articles on welding, feel free to explore our homepage at What is Welding.
References
- Lincoln Electric. (2020). The Procedure Handbook of Arc Welding (15th ed.). Cleveland, OH: Lincoln Electric Company.
- Lincoln Electric. (2020). The Procedure Handbook of Arc Welding (15th ed.). Cleveland, OH: Lincoln Electric Company.
- Blodgett, O. W. (1995). Design of Weldments. Cleveland, OH: James F. Lincoln Arc Welding Foundation.
Joe Carter is a retired welding professional with over 40 years of hands-on experience in the industry, spanning ship repair, structural welding, and even underwater projects. Joe is a master of MIG, TIG, and Stick welding. Passionate about mentoring the next generation of welders, Joe now shares his decades of expertise and practical insights to help others build rewarding careers in welding.
50 Amp Breaker, Electrical Safety, Electrical Wiring, Outlet Installation, Power Supply, Safety Precautions, Voltage Drop, Welding Equipment, Welding Outlet, Wire Gauge
