How to Weld Wrought Iron? Tips, Techniques, and Safety
Published on: January 20, 2025 | Last modified: March 4, 2025
By: Joe Carter
Wrought iron is a tough, malleable metal primarily made of iron and a small amount of carbon. It’s perfect for construction and decorative projects because it’s resistant to rust and easy to work with.
I often hear people ask how to weld wrought iron. It’s crucial to understand this process since improper techniques can weaken your structure. I remember struggling with a wrought iron gate once, and knowing the right steps made all the difference!
In this guide, you’ll find everything you need for how to weld wrought iron, such as types of wrought iron and their weldability, prerequisites before starting, step-by-step instructions, safety tips, types of welding for wrought iron, factors affecting the welding process, common issues, aftercare, inspection, advanced tips, advantages, applications, and even alternatives for welding wrought iron. You’ll feel confident to tackle your next project!
Contents
- How to Weld Wrought Iron?
- What is Wrought Iron?
- Types Of Wrought Iron and Their Weldability
- Before You Start (Prerequisites)
- Safety Tips
- Steps to Weld Wrought Iron
- Types Of Welding for Wrought Iron
- Tips for Joining Wrought Iron with Other Metals
- Factors Affecting Wrought Iron Welding
- Common Issues
- Aftercare, Inspection, and Advanced Tips for Wrought Iron Welding
- Advantages Of Wrought Iron Welding
- Applications You Should Know About
- Alternatives for Welding Wrought Iron
- Frequently Asked Questions (FAQs)
- Conclusion
- References
How to Weld Wrought Iron?
Wrought iron is a tough, malleable metal ideal for welding. To weld wrought iron, use a MIG or TIG welder set at 120-140 amps (0.12-0.14 Ka). It’s fairly easy, great for furniture or railings.
What is Wrought Iron?
Wrought iron is a tough, malleable metal containing about 0.04% carbon, much less than other types of iron. This low carbon content gives wrought iron its distinctive fibrous texture. Its composition makes it resistant to corrosion, perfect for outdoor applications.
When welding wrought iron, it’s essential to understand its properties. I’ve enjoyed welding it for projects like fences and furniture. Its malleability makes handling easy, and it joints (Joins) together beautifully.
Let me share a story. The first time I welded iron railings, I was amazed at how easily the rods fused together. Learning to weld wrought iron railings opened up many creative projects for me. Whether it’s railings or furniture, understanding the nuances of welding wrought iron helps achieve a strong bond.
Types Of Wrought Iron and Their Weldability
What types of wrought iron should you know about for welding?
-
Pure Wrought Iron
Pure wrought iron is nearly 100% iron with minimal carbon. To join this type effectively, use a MIG welder with argon shielding gas. Preheat the metal to about 260°C (500°F) for a solid connection. When preparing materials for welding, it’s crucial to understand the techniques used in welding edge joints effectively.
-
Wrought Iron Alloys
Wrought iron alloys contain additives like nickel or chromium, which enhance strength. For welding alloys, use a TIG welding process for precision. Choose filler metals that match the alloy’s composition for the best results.
-
Architectural Wrought Iron
This type is used mainly in decorative and structural applications. For welding architectural wrought iron, a stick welder is effective. Use a low-hydrogen electrode and maintain a steady speed to avoid warping. Welding is a task that requires understanding safety considerations, so it’s important to consider how dangerous welding is.
-
Forged Wrought Iron
Forged wrought iron is shaped through hammering, making it strong yet malleable. Clean the surfaces beforehand for effective welding. Use a MIG setup and adjust the voltage for the metal thickness.
-
Historical Wrought Iron
This type dates back to ancient times and has unique characteristics. When welding historical wrought iron, focus on preserving its original appearance. Use a low-heat method, like TIG, to prevent damage.
We’ve wrapped up the different kinds of wrought iron and their welding properties here. Next up, we’ll look at essential prerequisites.
Before You Start (Prerequisites)
What do you need to weld wrought iron?
- MIG Welder: You’ll need a MIG welder, such as the Hobart Handler 140 or Lincoln Electric Easy MIG 140. It’s essential for a smooth, strong weld.
- Wrought Iron Rods: You’ll need wrought iron rods, specifically 3/16 inch (4.76 Mm), for strong joints. This thickness provides sturdy connections while remaining workable.
- Flux-Cored Wire: You’ll need flux-cored wire, like ER70S-6, 0.030 inch (0.76 Mm). It shields the weld from contaminants, ensuring quality welds.
- Welding Cart: You’ll need a welding cart, like the Chicago Electric 60408, to keep your setup organized. This makes your workspace efficient and safe.
- Steel Brush: You’ll need a steel brush, such as the DEWALT DW4775. It’s crucial for cleaning the wrought iron surfaces before welding, as a clean surface improves weld quality.
You should now have a good understanding of the necessary prerequisites. In the next part, we’ll discuss essential safety tips.
Safety Tips
Here are essential precautions for welding wrought iron.
- Proper Ventilation: Ensure good airflow to avoid harmful fumes; consider a Spin-On Ventilation Fan.
- Electric Shock Protection: Wear insulated gloves and boots; rubber latex boots provide a solid barrier.
- Fire Safety: Keep a Class D fire extinguisher nearby to combat sparks or flames.
- Protective Gear: Use a welding helmet and a long-sleeved jacket; the Lincoln Viking 3350 is great for eye protection.
Taking safety precautions is vital; I won’t weld without them.
You should now have a good understanding of safety precautions, essential tools, and techniques. In the next part, we’ll discuss the welding process for wrought iron.
Steps to Weld Wrought Iron
We’ll cover the steps to master welding wrought iron. Follow each action step closely to achieve strong, lasting joints.
-
Clean the Surface
Start by cleaning the wrought iron surfaces you want to weld. Remove rust, paint, or oil using a wire brush or grinding wheel. Aim for less than 5 mm² (0.02 In²) of contamination. This step ensures strong weld penetration and joint integrity. A crucial aspect to consider is welding at specific angles, which can significantly affect the quality of your projects. For those interested in precise fabrication techniques, you can explore welding 45-degree angles for better structural outcomes.
Use a degreaser if oils are present. Skipping this step often leads to failures, so take the time to prepare properly. A clean surface makes a big difference in your final product.
-
Adjust Your Welder Settings
Tweak the welder settings to match the thickness of your wrought iron. For metal around 3 mm (0.125 In), set your MIG welder to 170 A (Amps). If you’re using stick welding, choose a 3.2 mm (1/8 in) rod with approximately 130 A. These settings help achieve a better bead without burn-through.
Experiment within +/- 15 A to find what works best for your iron thickness. Adjust the wire feed speed for MIG welding—aim for 4-6 m/min, depending on the thickness.
-
Set the Welding Technique
Use a stringer technique, moving in a straight line along the joint. Maintain a distance of 5-10 mm (0.2-0.4 In) between the contact tip and the workpiece for optimal arc stability. I usually weave slightly if there’s a gap—this technique helps avoid undercuts.
If you encounter a thicker section, pause slightly to let the heat merge the metals better. This adds strength to the welds as they fuse more effectively than rushed passes.
-
Weld the Joint
Now, start welding! Aim for a consistent speed and keep the nozzle angle at about 15 degrees. Practice smooth movements; jerky motions create defects. You should see a nice puddle forming, around 6-10 mm in width (0.24-0.39 In).
For thicker wrought iron, you may need multiple passes. Wait for each layer to cool slightly before applying another. This prevents overheating and warping.
-
Finish and Clean Up
After welding, grind down any rough areas for a clean finish. If you used filler material, remove any slag buildup with a wire brush. This may take some elbow grease, but it’s essential for appearance and function.
Finally, paint or coat your welds to prevent rust. I recommend using a rust-inhibiting primer; it greatly enhances durability over time. Don’t skip this last step!
So far we covered the steps involved in welding wrought iron. Next, let’s look at the various welding methods for wrought iron.
Types Of Welding for Wrought Iron
Let’s explore different welding techniques: MIG, TIG, Stick, Oxy-Acetylene, and Resistance welding.
-
MIG Welding
MIG (Metal Inert Gas) welding is an excellent choice for wrought iron, especially when considering various welding techniques used in the industry. It uses a continuous feed of electrode wire and shielding gas to protect the weld. With a travel speed of about 50-75 inches (127-190 cm) per minute, this method provides fast and clean welds, which is particularly advantageous for a range of metal types, as outlined in the welding by metals category.
Welding techniques vary significantly based on material thickness, and mastering how to weld thin metal can optimize your results.
-
TIG Welding
TIG (Tungsten Inert Gas) welding is another option for wrought iron. It employs a non-consumable tungsten electrode and operates at a lower temperature, which helps prevent warping. Typical heat input ranges from 2 to 4 kilowatts for better control.
While TIG welding provides precision and minimizes material distortion, it is important to be aware of the potential risks associated with eye safety that can arise from the intense light produced during the welding process. To explore whether welding can harm your eyes, consider understanding the potential hazards.
-
Stick Welding
Stick welding, or SMAW (Shielded Metal Arc Welding), is ideal for thicker wrought iron. It uses a consumable electrode coated in flux to protect the weld from contaminants. Amperage usually ranges from 80 to 200 amps, depending on the material and thickness. Proper adjustment of a welding helmet is crucial to ensure safety and precision during welding; learn more about adjusting a welding helmet.
-
Oxy-acetylene Welding
Oxy-acetylene welding combines oxygen and acetylene gas for high-temperature welds. This method is simple yet effective for delicate wrought iron furniture. Welding temperatures can reach up to 6,300°F (3,482°C).
-
Resistance Welding
Resistance welding joins wrought iron by applying pressure and electric current. It’s a fast process that works well for points or seams. Typical resistance weld durations last only a few milliseconds.
Tips for Joining Wrought Iron with Other Metals
Welding wrought iron to other metals can be tricky, but it’s quite common in fabrication. Here’s how to do it right:
Common Metal Pairings
- Wrought Iron to Steel: Use a MIG welder with ER70S-6 wire. Preheat both metals to avoid cracking. A preheat of around 150°C (302°F) works well.
- Wrought Iron to Aluminum: TIG welding is ideal here. Use an aluminum filler rod and ensure clean surfaces. A heat input of 2 to 3 kilowatts usually suffices.
- Wrought Iron to Stainless Steel: A special filler metal, like ER309L, is required. Maintain a heat input of about 3 to 4 kJ/mm to minimize distortion.
Welding Techniques for Pairings
When joining wrought iron to other metals, control is key. Here are some techniques:
- Interpass Temperature: Keep the interpass temperature below 150°C (302°F) for carbon steels to avoid weak welds.
- Bead Width: Aim for a bead width of 5-10 mm (0.2-0.4 in) to ensure strong fusion.
- Multi-pass Welding: Use multi-pass welding for thicker materials but wait for each pass to cool before applying the next.
Table of Recommended Techniques and Materials
| Joining Method | Filler Material | Heat Input | Welding Technique |
|---|---|---|---|
| Wrought Iron to Steel | ER70S-6 | 150°C (302°F) preheat | MIG |
| Wrought Iron to Aluminum | Aluminum Filler Rod | 2-3 kW | TIG |
| Wrought Iron to Stainless Steel | ER309L | 3-4 kJ/mm | TIG |
Factors Affecting Wrought Iron Welding
What factors affect the effective welding of this unique material?
-
Material Thickness
Thicker wrought iron requires more heat and a wider weld pool. For every 1 mm in thickness, increase heat input by about 10-15% for proper fusion.
-
Weld Joint Design
The joint design affects accessibility and heat distribution during welding. A V-joint may need a bevel and can better handle thicker pieces than a butt joint.
-
Welding Environment
Your environment plays a significant role. Wind, temperature fluctuations, and humidity can affect weld quality. Welding outdoors on windy days can introduce defects due to rapid cooling.
-
Electrode Type
The choice of electrode is crucial. A 6011 electrode is commonly used for iron, providing good penetration and strong bonds. Different electrodes allow adaptation based on the specific type of wrought iron.
-
Heat Input and Control
Excess heat can cause warping, while insufficient heat results in weak joints. Aim for about 1.5 to 2.5 kJ per mm of weld width to maintain control and achieve optimal results.
Common Issues
Let’s look at specific welding issues related to wrought iron.
-
Cracking in Welds
Wrought iron can crack due to rapid cooling. To spot cracks, look for surface fissures. Control cooling rates by preheating the wrought iron to 200°F (93°C) before welding.
-
Inadequate Penetration
Inadequate penetration in wrought iron results in weak bonds. Inspect weld joints for poor fusion. Use a lower travel speed and increase heat to ensure you’ve got a strong join.
-
Inconsistent Bead Appearance
An inconsistent bead appearance in wrought iron indicates uneven settings. Check amp settings and travel speed. Consistent voltage and patterns produce a neat bead!
-
Warping Of Material
Wrought iron can warp from uneven heating, making the piece sit unevenly. Use tack welding to reduce heat build-up. Always weld in interspersed patterns to minimize stress!
-
Oxidation and Contamination
Wrought iron rusts easily, resulting in a reddish-brown surface. Clean thoroughly and use the Tigris welding technique to avoid further oxidation during welding. Apply protective coatings after welding!
Aftercare, Inspection, and Advanced Tips for Wrought Iron Welding
Here’s focused advice on caring for your welded wrought iron, spotting issues, and techniques to improve your skills.
Aftercare Tips
After finishing your wrought iron work, let it cool to room temperature (About 20°C or 68°F). Apply a rust inhibitor like Boeshield T9 for lasting protection. Periodically touch up small chips or scratches with anti-corrosive paint every 6 months.
Inspection
Inspect joints every 6 months for signs of cracks or gaps. Look for discoloration, which might indicate overheating or stress fractures. Use a dolly (A Sturdy Tool) to hold the iron steady while you gently tap the welds; listen for changes that signal flaws.
Expert Tips
Adjust your heat settings based on iron thickness—use 140-160 amps for 10 mm thickness. Preheat larger sections to about 300°C (572°F) to prevent thermal shock. Experiment with different welding speeds and travel angles for artistic designs without compromising strength.
Advantages Of Wrought Iron Welding
The strength of wrought iron welding is notable. It creates durable and resilient structures that can last for generations.
This technique also allows for intricate designs, flexibility in shaping, quick repair capabilities, and excellent corrosion resistance. You can easily adapt wrought iron for various projects, from railings to furniture.
Applications You Should Know About
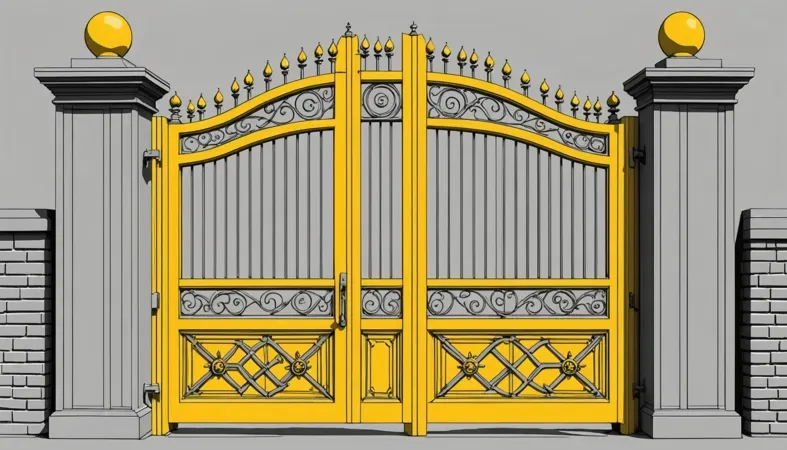
I’ve used welded wrought iron for custom gates, but it has many applications, including:
- Decorative Fencing: Ideal for ornate (Elaborate) designs. Wrought iron provides strength and aesthetic appeal. It’s popular in residential and commercial spaces.
- Garden Trellises: Supports climbing plants. Wrought iron is durable and withstands weather conditions, making it a go-to for gardeners.
- Fireplaces: Perfect for custom grates and screens. Wrought iron resists heat while adding charm to the home.
- Furniture Framework: Common for sturdy bases. Wrought iron’s strength ensures longevity and beauty in both casual and formal settings.
Alternatives for Welding Wrought Iron
There are various alternatives to achieve results similar to how to weld wrought iron. Options such as MIG welding and stick welding can be practical methods, especially for beginners. In my professional journey, I’ve found that using a quality MIG welder, like the Lincoln Electric SP-175 Plus, simplifies the process and reduces distortion.
Additionally, you might consider using special adhesives for lighter wrought iron projects, such as Loctite PL Premium. This method is often chosen for intricate wrought iron furniture or decorative pieces. It gives you smooth finishes without the heat and distortion that welding can sometimes cause.
Frequently Asked Questions (FAQs)
Now let us look at some common questions I typically get asked about welding wrought iron.
Is It Possible to Weld Wrought Iron?
Yes, it is possible to weld wrought iron. Wrought iron has a low carbon content, which makes it easier to weld than other metals. This low carbon level helps reduce the risk of cracking during the welding process.
What Welder is Best for a Wrought Iron Fence?
The best welder for a wrought iron fence is a MIG welder. This type of welder provides a clean finish and excellent control over heat input, which is crucial for thin materials like wrought iron. Also, a MIG welder works well with gas to enhance the quality of your welds.
Can You Weld Wrought Iron With a Stick Welder?
Yes, you can weld wrought iron with a stick welder. Stick welding, or SMAW, uses an electrode to create the weld. While it’s effective, you need to control the welder’s heat to avoid warping since wrought iron can easily distort under high temperatures.
Can You Weld Wrought Iron With 7018?
Yes, you can weld wrought iron with a 7018 electrode. The 7018 electrode offers a strong, ductile weld suitable for structural applications. It also minimizes the chance of hydrogen cracking, ensuring a reliable bond in your wrought iron projects.
How to Weld Round Bar Together?
To weld round bar together, use a TIG or MIG welder for the best results. These methods provide strong welds with good penetration, ensuring a sturdy joint. Make sure to prepare the surfaces properly for a clean, reliable weld.
How to Weld Wrought Iron Railings?
Welding wrought iron railings requires preciseness. Clean the surfaces, choose appropriate filler materials, and maintain consistent heat to avoid warping. This ensures strong connections and a smooth finished product.
How to Weld Iron Railings?
To weld iron railings, you should use a MIG welder for better penetration and control. Ensure you grind the edges of your iron to enhance the weld quality. This creates a stronger joint while promoting a clean appearance.
Conclusion
I hope this gave you what you needed on how to weld wrought iron. We covered the types of wrought iron, the welding methods, safety tips, prerequisites before welding, and common issues you might face. We also went through the aftercare, inspection techniques, and advantages of wrought iron.
In essence, welding wrought iron is straightforward with the right tools and knowledge. It’s all about understanding the materials, using the right techniques, like MIG or TIG welding, and keeping safety in mind throughout the process. Don’t hesitate to get in touch for further assistance on this journey of how to weld wrought iron, and let’s get those projects rolling smoothly.
For a more comprehensive exploration of welding concepts, be sure to check out our homepage: What is Welding.
References
- American Society of Mechanical Engineers. (2019). ASME Section IX: Welding and Brazing Qualifications. New York, NY: ASME.
- American Welding Society. (2020). AWS A3.0: Standard Welding Terms and Definitions. Miami, FL: AWS.
- American Welding Society. (2020). AWS C5.6: Recommended Practices for Gas Metal Arc Welding. Miami, FL: AWS.
Joe Carter is a retired welding professional with over 40 years of hands-on experience in the industry, spanning ship repair, structural welding, and even underwater projects. Joe is a master of MIG, TIG, and Stick welding. Passionate about mentoring the next generation of welders, Joe now shares his decades of expertise and practical insights to help others build rewarding careers in welding.
American Welding Society, MIG Welding, Safety Tips, Types Of Welding, Weld Wrought Iron, Welding, Welding Equipment, Welding Techniques, Wrought Iron Properties
