How to Weld Aluminum With a Wire Welder? Techniques, Steps, Precautions
Published on: January 11, 2025 | Last modified: March 4, 2025
By: Joe Carter
A wire welder is a tool that uses a continuous wire to create a strong bond between metals. It’s popular for its efficiency and ease of use.
One question I get asked a lot is how to weld aluminum with a wire welder. It’s crucial to know the right techniques because welding aluminum offers unique challenges like melting too quickly. In my experience, following proper methods not only results in better joints but also saves time and material.
In this guide on how to weld aluminum with a wire welder, we’ll cover types of wire welders, prerequisites needed, steps for welding, precautions to take, factors influencing aluminum welding, unique issues you may face, aftercare, inspection tips, and the top benefits of aluminum welding. You’ll also learn about real-world uses for aluminum welding and when to consider a different approach. Plus, we’ll tackle some frequently asked questions that often arise, including can you use a wire feed welder to weld aluminum.
Contents
- How to Weld Aluminum With A Wire Welder?
- What is a Wire Welder?
- Types Of Wire Welders
- Prerequisites
- Precautions
- Steps to Weld Aluminum With a Wire Welder
- Types Of Welding for Aluminum
- Factors Influencing Aluminum Welding
- Unique Issues
- Aftercare, Inspection, and Advanced Tips for Welding Aluminum
- Advanced Techniques for Welding Aluminum with a Wire Welder
- Top Benefits Of Welding Aluminum
- Real-world Uses for Aluminum Welding
- When to Try A Different Approach
- Frequently Asked Questions (FAQs)
- Conclusion
- References
How to Weld Aluminum With A Wire Welder?
A wire welder uses a continuous electrode to fuse metal. To weld aluminum, set the voltage to 13-15 volts and use 4047 wires. It’s tricky but great for auto repairs and bike frames, requiring some practice.
What is a Wire Welder?
A wire welder, also called a wire feed welder, is an essential tool in metalworking. It automatically feeds a continuous wire electrode through a welding gun to create an electric arc. This arc melts the wire and the base metal, fusing them together. Wire welders are popular in fields like manufacturing and construction due to their efficiency and speed.
When welding aluminum with a wire welder, you need to choose the right wire type. Typically, ER4043 or ER5356 wires work best for aluminum projects. I first experienced this during a family project and was amazed at how seamless the aluminum joint turned out, thanks to the proper settings and technique.
I used a wire welder frequently for my job, particularly for repairing aluminum parts in vehicles. This tool can weld aluminum efficiently, making it a go-to for many professionals. If you’re wondering about related options, yes, you can use a wire feed welder to weld aluminum. It’s all about the right settings and wire choice. In my experience, monitoring voltage and wire speed settings can be a game-changer. These factors significantly influence weld quality.
Types Of Wire Welders
-
Gas Metal Arc Welding (GMAW)
GMAW, or MIG welding, uses a continuous wire feed and shielding gas. To join aluminum, set your machine to the correct voltage and wire speed. For an effective weld, clean the aluminum surface, use ER4043 or ER5356 wire, and maintain a travel speed of about 12 inches per minute (30 Cm/min).
-
Flux-cored Arc Welding (FCAW)
FCAW uses a tubular wire filled with flux for automatic protection during welding. To weld aluminum, choose aluminum-compatible flux-cored wire. Use a travel speed of 6 to 12 inches per minute (15 – 30 Cm/min) and keep a steady hand for consistent penetration.
-
MIG Welding Machines
MIG welding machines excel at quick, effective aluminum welds with minimal cleanup. Use 100% argon gas and set the machine to around 200 to 250 amps, depending on thickness. Aim for a travel speed of 10 to 12 inches per minute (25 – 30 Cm/min) for clean welds.
-
Multiprocess Welders
Multiprocess welders can switch between MIG and TIG welding, making them versatile. For aluminum, select MIG mode, use aluminum wire, and follow voltage and feed speed guidelines for optimal results. Always clean aluminum before welding.
-
Stick Welders
Stick welders use an electrode to create an arc. They’re less common for aluminum. If you must use one, select a specialized aluminum electrode. Set the amperage to 120-150 amps, and move quickly to prevent warping.
We’ve wrapped up the different types of wire welders here. Next up, we’ll look at the necessary prerequisites.
Prerequisites
What do you need to get started with this wire welder process?
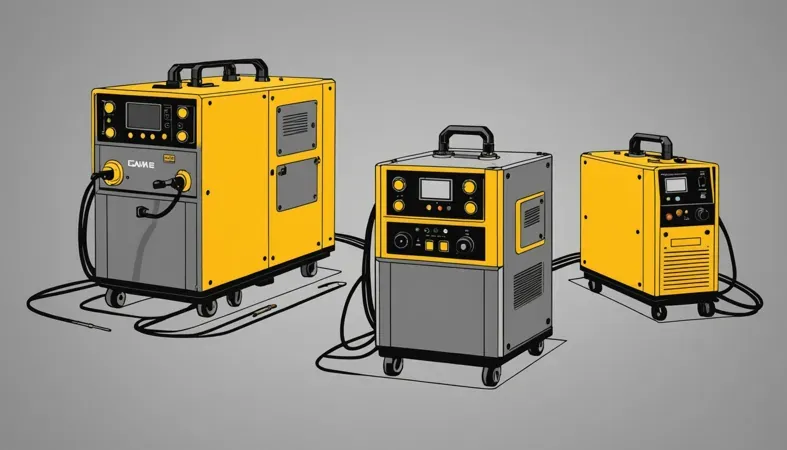
- Spool Gun: You need a spool gun, like the Miller Spoolmate 100 Series. It’s essential for feeding aluminum wire smoothly and prevents bird nesting.
- Aluminum MIG Wire: Use 4047 aluminum MIG wire, such as the Hobart .030 in (0.76 Mm). It’s designed specifically for welding aluminum with better flow.
- Welding Gas: Get 100% argon gas, like the Lincoln Electric Argon Cylinder. It’s required for shielding to prevent oxidation during the weld.
- Welder Settings: Check your machine’s settings; adjust the voltage and wire speed using a chart, like the Lincoln Electric Aluminum MIG Settings Chart. Proper settings ensure strong welds.
We covered prerequisites and requirements here. Next, we will cover precautions to take.
Precautions
Let’s cover essential safety measures for welding aluminum.
- Protective Gear: Always wear a welding helmet and gloves. I recommend a Miller Elite welding helmet for maximum UV protection.
- Ventilation: Ensure proper ventilation. Use a fan or work outside; fumes can pose serious health risks.
- Clean Workspace: Keep your area free of flammable materials to prevent fire hazards.
- Check Equipment: Inspect your wire welder and connections regularly to avoid electrical shorts. Consistent maintenance ensures your safety.
Prioritizing safety is critical—I’m passionate about keeping you safe.
We’ve wrapped up safety guidelines, equipment checks, and preparation steps here. Next up, we’ll look at the steps to weld aluminum with a wire welder.
Steps to Weld Aluminum With a Wire Welder
Now, let’s cover the steps to effectively weld aluminum using a wire welder. Be sure to follow them for the best results!
-
Clean the Aluminum Surface
Start by cleaning the aluminum surface to remove oxidation and contaminants. Use a stainless steel brush or a chemical cleaner designed for aluminum. Clean until you see a shiny surface to help the weld bond better. A clean area lowers defects and improves weld quality. Ensuring a clean work area is just one way to reduce issues; similarly, you can take steps to avoid spatter in welding.
Don’t skimp on this step! Spend a few minutes ensuring everything is spotless. I can’t stress how crucial this is for achieving a strong, clean weld.
-
Adjust Your Welder Settings
Next, set your wire feed welder parameters. For aluminum, aim for a voltage between 16-20 volts and a wire feed speed (WFS) of 200-350 inches per minute (Ipm). Adjust based on the aluminum gauge; thicker aluminum may require a higher WFS. Check the manufacturer’s settings to optimize your machine.
Using the right settings is key! I often use a test piece to calibrate my settings before actual welding. This little test can save you a lot of hassle.
-
Choose the Right Electrode and Filler Wire
Select an appropriate filler wire for your aluminum job. Use 4043 or 5356 aluminum wire, depending on the type of aluminum you’re welding. 4043 is best for general purposes, while 5356 is better for higher strength applications. Ensure the diameter matches your machine; a 0.035-inch (0.89 Mm) wire is common.
I can’t stress how vital the filler wire is! Choosing the wrong wire can lead to a brittle weld. Check your project’s specifications to find the best match!
-
Begin Welding With a Steady Motion
Start your welding motion with a steady hand. Maintain a travel speed of 12-20 inches per minute (Ipm) for consistent beads. Moving too fast will weaken the weld; moving too slow can cause burn-through. A steady push or drag technique works best; push the weld in most cases to shield from contaminants.
It takes practice to find the right rhythm. Don’t be discouraged if it doesn’t look perfect at first! My first aluminum welds were less than pretty.
-
Observe the Weld Pool
Pay attention to the weld pool as you work. A good pool appears shiny and smooth; if it’s humped or jagged, adjust your settings. The puddle should be fluid, allowing metal to flow together effortlessly. Too much heat causes burn-through, while too little leads to weak joints.
I’ve found that closely watching the weld pool helps identify needed adjustments quickly. Adjust your technique before moving on to avoid mistakes!
So far we covered the process of welding aluminum using a wire welder. Next, let’s look at the different welding methods for aluminum.
Types Of Welding for Aluminum
Let’s discuss the types of welding for aluminum. We’ll cover Short-Circuit Transfer Welding, Pulsed MIG Welding, Spray Transfer Welding, Helium-Enhanced MIG Welding, and Rapid-Arc Welding.
-
Short-circuit Transfer Welding
Short-Circuit Transfer Welding, or MIG welding, uses a wire feed welder to create a short circuit that melts the filler material. This method works best with thin materials, typically under 3/16 in (4.76 Mm). It’s simple and efficient for beginners.
-
Pulsed MIG Welding
Pulsed MIG Welding allows precise control of heat input. It alternates between high and low currents, minimizing distortion. This technique is great for thicker materials, especially when welding aluminum over 3/16 in (4.76 Mm).
-
Spray Transfer Welding
Spray Transfer Welding uses a steady stream of molten metal droplets. At higher voltages, this method works best for thicker aluminum, usually above 0.187 in (4.75 Mm). It offers better penetration and helps achieve cleaner welds, making it a personal favorite.
-
Helium-enhanced MIG Welding
Helium-Enhanced MIG Welding employs a mix of argon and helium gas. This increases heat and improves arc stability, making it effective for thicker aluminum and easier to weld at high speeds.
-
Rapid-arc Welding
Rapid-Arc Welding is a modern approach using a short arc length for speed. This technique can quickly join materials, making it optimal for production settings. It’s effective for aluminum sheets from 0.125 in (3.18 Mm) and thicker.
Factors Influencing Aluminum Welding
What factors affect the performance and outcome of aluminum welding with a wire welder?
-
Material Thickness
Material thickness directly impacts the heat needed for a successful weld. For aluminum, thickness greater than 1/8 inch (3.2 Mm) typically requires a higher current setting.
-
Wire Diameter
The diameter of the welding wire is crucial. Generally, a wire diameter of 0.030 inches (0.76 Mm) works well for thin aluminum sheets, while thicker materials need up to 0.045 inches (1.14 Mm).
-
Welding Speed
Welding speed influences heat input and weld pool size. A speed that’s too fast can lead to weak joints, while one that’s too slow can produce excess heat, risking warping.
-
Heat Input
Heat input should be carefully considered. It should range from 60-75 kJ/m (50-65 Kj/ft) to maintain a solid bond without compromising material integrity.
-
Base Metal Cleanliness
Cleanliness of the base metal is vital for a good weld. Oil, dirt, or oxidation can cause porosity and weak welds, so always clean aluminum with a suitable solvent.
Unique Issues
Let’s look at some unique technical problems with wire welders.
-
Weld Cracking
Wire welders can develop cracks in the weld. Look for visible fissures. To fix this, lower your travel speed or increase the preheat temperature to 70-100°F (21-38°C).
-
Porosity in the Weld
In wire welding, porosity refers to tiny holes in the weld. It’s crucial to ensure proper shielding gas coverage. Adjust your flow rate to about 20-25 cubic feet per hour (CFH) for optimal results.
-
Inconsistent Bead Appearance
If your wire welder leaves uneven beads, check your travel speed and torch angle. Maintaining a steady pace of around 6-10 inches per minute helps achieve consistent beads.
-
High Heat Sensitivity
Wire welders can create marks from excess heat. Use a lower heat setting when working with thinner metals, typically under 1/8 inch (3.175 Mm), to avoid burn-through.
-
Distortion Of the Base Metal
Using a wire welder can warp the metal. Look for bends to identify distortion. To resolve it, weld in a jump fashion, allowing the metal to cool between welds, which minimizes warping.
Aftercare, Inspection, and Advanced Tips for Welding Aluminum
Here’s helpful advice for wrapping up your welding project and ensuring top-notch results.
Aftercare Techniques
After finishing your aluminum weld with a wire welder, clean the weld area immediately with a wire brush to remove oxidation. Check the temperature: aim for cooling below 150°C (300°F) within 10 minutes to prevent distortion. Finally, apply a light protective coating, like WD-40, to prevent corrosion from exposed edges. For detailed insights into the process, understanding aluminium welding techniques can be very beneficial.
When considering the cost of welding materials, it is important to know how much welding rods are, as they can significantly affect your overall expenses. For more information, see the price of welding rods.
Inspection Checklist
Inspect weld penetration; it should reach about 1.5 mm (0.06 In) deep for optimal strength. Use a caliper for precise measurements. I rely on the Hobart Basic Weld Tester to assess strength and ensure bond quality.
Expert Tips for Professionals
Tweak voltage settings to achieve a tighter arc—experiment with 18-20 volts. Maintain a travel speed of 200-300 mm/min for consistent welds; adjust as necessary for challenging materials. Lastly, consider using a groove angle of 60° for better puddle control during strong beads.
Advanced Techniques for Welding Aluminum with a Wire Welder
Once you grasp the basics, these advanced techniques can enhance your aluminum welding skills.
Pulsed MIG Technique
Pulsed MIG is excellent for controlling heat. It alternates between high and low voltage, minimizing distortion. This method shines when working with thicker aluminum over 0.187 in (4.75 Mm). For instance, a pulse rate of about 2 Hz can yield cleaner welds with less spatter.
Weaving Pattern
Using a weaving technique helps to distribute heat more evenly. Shift the torch in a Z or figure-eight pattern. This method prevents excessive heat concentration, helping with thicker materials and reduces the risk of burn-through.
MIG Gun Angle
Adjusting the angle of your welding gun can improve the quality as well. Use a 15-degree push angle for better arc stability. A steady angle maintains a clean bead and allows better gas coverage, which is crucial for preventing oxidation during the weld.
Weld Bead Profile
A good bead profile should be slightly convex. Aim for about 1/8 in (3.2 Mm) high. This shape ensures proper penetration and minimizes the risk of cracking. For flat parts, using a slower travel speed or increasing amperage can help shape the bead correctly.
| Technique | Benefits | Ideal Application |
|---|---|---|
| Pulsed MIG | Reduces heat distortion | Thicker aluminum materials |
| Weaving Pattern | Distributes heat evenly | Preventing burn-through |
| MIG Gun Angle | Stabilizes arc and improves coverage | General aluminum welding |
| Weld Bead Profile | Ensures proper penetration | Flat surfaces and joints |
Top Benefits Of Welding Aluminum
The biggest advantage of using a wire welder for aluminum is speed. I’ve used it often for my job, especially for fabricating parts quickly while maintaining quality.
It also offers versatility, allowing you to tackle various projects, from thin sheet metal to thicker components. It’s user-friendly, making it easier for beginners to learn. You’ll have less cleanup since wire feeding reduces spatter, saving you time and effort. Finally, the welds produced are strong and durable, perfect for both industrial and DIY (Do-it-yourself) applications.
Real-world Uses for Aluminum Welding
I’ve used wire welders for various projects, but there are many applications, such as:
- Aerospace Components: Welding aluminum in aircraft parts ensures lightweight materials with high strength, which is crucial for performance and fuel efficiency. It’s popular in the aviation industry due to safety demands.
- Marine Structures: Aluminum welding is essential for building boats and marine equipment. Aluminum resists corrosion from saltwater, making it a preferred choice among manufacturers aiming for durability.
- Automotive Fabrication: Custom cars and racing parts often use aluminum. It’s lighter than steel and can enhance performance. Many car enthusiasts and professionals prefer it for performance parts.
- Heat Exchangers: These units often use aluminum for its excellent thermal conductivity. It’s widely applied in HVAC (Heating, Ventilation, and Air Conditioning) systems, driving its popularity in industrial settings.
When to Try A Different Approach
If you’re looking for alternatives, consider using a TIG welder. Machines like the Hobart Handler 210 excel in aluminum welding and provide a cleaner finish. Plus, they work great for thinner materials that a wire welder might struggle with. Over time, I’ve observed that many welders prefer TIG when precision is essential.
Another option is a gasless MIG setup, like the Lincoln Electric Handy MIG. You can also try specialized aluminum welding rods. They’re perfect in scenarios where portability is key and you don’t want to deal with gas setups. Each method has its time and place, so choose what fits your project best!
Frequently Asked Questions (FAQs)
Now let us look at some common questions I typically get asked about welding aluminum.
Can You Weld Aluminum With a Regular Wire Welder?
Yes, you can weld aluminum with a regular wire welder, but it’s not as straightforward. A standard wire welder often lacks the proper voltage and wire feed speed settings for aluminum, which usually melts at around 660°C (1220°F). Using the wrong setup can lead to burn-through or weak welds.
What Setting Should a MIG Welder Be on for Aluminum?
The MIG welder should be set between 150-250 amps based on the thickness of your aluminum. For thinner materials (1.0 Mm to 2.5 Mm or 0.040 In to 0.100 In), lower amperage is ideal, while thicker aluminum (Over 6 Mm or 0.250 In) needs higher settings. This ensures strong, clean welds.
Can I Weld Aluminum With a MIG Welder Without a Spool Gun?
No, welding aluminum without a spool gun can be difficult and isn’t recommended. A spool gun helps prevent wire feeding issues, which is crucial when using softer aluminum filler wires that can easily tangle or bird nest during the process.
Will Wire Weld Stick to Aluminum?
Wire weld won’t stick to aluminum effectively without proper preparation. Aluminum oxide can form a barrier, making it hard for wire welds to adhere. Clean the surface first using a stainless steel brush or grinder to ensure a good bond. This step boosts your chances of a strong weld.
What Can You Weld Aluminum With?
You can weld aluminum with MIG, TIG, or stick welders, each having its advantages. For example, TIG welding offers precise control and is great for thinner materials, while MIG provides faster weld speeds suitable for large projects. Choose based on your specific needs and skill level.
Conclusion
Phew, that’s a lot we’ve gone through. We covered what a wire welder is, different types of wire welders, prerequisites, steps to follow, precautions, various welding methods, factors influencing welding, unique challenges, aftercare, inspection, advanced tips, benefits of aluminum welding, its real-world uses, and when to consider a different approach. Oh, and we even tackled some frequently asked questions.
So, how to weld aluminum with a wire welder? Essentially, you’ll want to start by selecting the right wire welder, ensure you’ve got the correct setup, and then follow the step-by-step process we discussed. Remember, using the proper wire, setting voltage to about 14-19 volts (For MIG), and adjusting your feed speed can make all the difference. Don’t hesitate to refer back to those key details to ensure a successful weld.
For even more insights on welding techniques, tips, and best practices, feel free to explore What is Welding, which has a wealth of information to enhance your skills.
References
- Lincoln Electric. (2020). The Procedure Handbook of Arc Welding (15th ed.). Cleveland, OH: Lincoln Electric Company.
- Smith, D. L. (2010). Welding: A Journey to Explore Its History. Dubuque, IA: Kendall Hunt Publishing Company.
- Lincoln Electric. (2020). The Procedure Handbook of Arc Welding (15th ed.). Cleveland, OH: Lincoln Electric Company.
Joe Carter is a retired welding professional with over 40 years of hands-on experience in the industry, spanning ship repair, structural welding, and even underwater projects. Joe is a master of MIG, TIG, and Stick welding. Passionate about mentoring the next generation of welders, Joe now shares his decades of expertise and practical insights to help others build rewarding careers in welding.
Aluminum, MIG Welding, Safety Precautions, Welding, Welding Techniques, Welding Wire, Wire Diameter, Wire Welder

