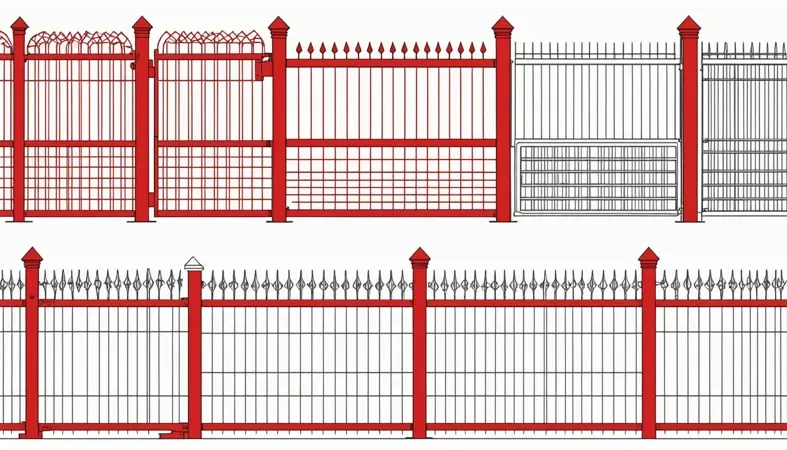
How to Install Welded Wire Fence? Steps, Tips, and Techniques
Published on: April 2, 2025 | Last modified: March 4, 2025
By: Tyler James
A fence is a barrier that marks a boundary or protects an area. It keeps things in or out, giving you privacy and security.
It’s a question I’ve heard often, how to install welded wire fence. Knowing the right steps is crucial to make sure your fence lasts. Trust me, I’ve faced mistakes early on, and proper installation saves a lot of time and money down the road.
In this guide, I’ll cover how to put up a welded wire fence, different types of welded wire fences, prerequisites to get started, installation steps, precautions, techniques for uneven ground, factors affecting installation, and aftercare tips. You’ll get a complete look at welded wire fencing, so you can confidently handle your project!
Contents
- How to Install Welded Wire Fence?
- What is Welded Wire Fence?
- Types Of Welded Wire Fences
- Prerequisites to Get Started
- Precautions
- Steps for Installing Welded Wire Fence
- Types Of Installation Techniques for Welded Wire Fences
- Advanced Installation Techniques for Welded Wire Fences
- Factors Affecting Welded Wire Fence Installation
- Unique Issues
- Aftercare, Inspection, and Advanced Tips for Welded Wire Fence
- Advantages Of Welded Wire Fences
- Applications You Should Know About
- Are There Any Alternatives to Installing Welded Wire Fence?
- Frequently Asked Questions (FAQs)
- Conclusion
- References
How to Install Welded Wire Fence?
A fence is a structure enclosing an area. To install welded wire fence, place and secure 4-6 feet posts, attach the wire, and stretch it tight. It’s moderately easy, great for gardens or keeping pets in.
What is Welded Wire Fence?
A welded wire fence is a durable structure made of intersecting wires, often galvanized for rust resistance. The wires are welded at each intersection, forming rigid panels that usually measure 1.2 meters (4 Feet) in height. Common spacing for vertical wires is about 15 centimeters (6 Inches), providing strength against animals and intruders. This makes it ideal for livestock enclosures or garden protection.
To install a welded wire fence, preparation is key. Start by marking the fence’s location. Using stakes and string can help create a straight line. You’ll also need to determine proper post spacing, typically around 2 to 3 meters (6 to 10 Feet) apart, to ensure stability.
Friends have shared how they effectively hung welded wire fence on a slope. They emphasized that proper trimming and leveling are crucial. Stretching the fence correctly can make a significant difference over uneven ground! Their installation tips have helped many avoid costly mistakes by guiding them on how to install a welded wire fence correctly.
Types Of Welded Wire Fences
Galvanized Welded Wire Fences
Galvanized fences are coated with zinc to resist rust. To install this type of fence, set your posts every 8 to 10 feet (2.4 To 3 Meters). Unroll the mesh along the line of posts and secure it with wire or clips. Proper techniques are crucial when joining fence sections, such as mastering how to weld 45-degree angles, which ensures strong and lasting connections.
Vinyl-coated Welded Wire Fences
These fences have a layer of vinyl for added protection and color. First, prepare your posts with a sturdy foundation. Next, attach the coated mesh using heavy-duty zip ties or clips, ensuring it’s taut.
Stainless Steel Welded Wire Fences
Stainless steel provides excellent corrosion resistance. For installation, use stainless posts and attach the panels with stainless clamps, ensuring a secure fit for longevity.
Electric Welded Wire Fences
These fences deter animals with electric shocks. Start with insulating posts and add electric tape or woven wire. Don’t forget to connect it to a power source for proper operation.
Welded Wire Livestock Fences
Designed for animal containment, these fences feature closely spaced wires. For installation, dig holes for heavy wooden posts 6 to 8 feet (1.8 To 2.4 Meters) apart, and stretch the wire flat across, securing it every few feet.
You should now have a good understanding of different welded wire fence types. In the next part, we’ll discuss essential prerequisites.

Prerequisites to Get Started
What do you need to install a welded wire fence?
- Welded Wire Fence Panels: You’ll need panels, such as 48-inch (1.2 M) high ground hog welded wire. They provide the necessary barrier.
- T-Posts: You’ll need 6-foot (1.8 M) steel T-posts. They support your fence and keep it stable.
- Fence Ties: Use 14-gauge (2.0 Mm) galvanized wire ties. They secure the welded wire to the posts.
- Post Driver: Get a manual post driver that weighs at least 8 lbs (3.6 Kg). It makes driving the posts into the ground easier.
- Concrete Mix: A fast-setting mix is essential, like Quikrete 50 lb (22.7 Kg). It ensures a solid foundation for your posts.
We covered essential requirements to get started. Next, we will discuss important precautions to keep in mind.
Precautions
Here are essential safety tips for installing your fence.
- Wear Protective Gear: Always use gloves, goggles, and long sleeves to prevent injuries. Consider heavy-duty gloves like Mechanix Wear for optimal safety. This gear helps avoid cuts and injuries.
- Check Your Tools: Before starting, inspect tools for defects or damage. Upgrade to a quality wire cutter like Ryobi P591 for reliable performance. This prevents tool failure during installation.
- Secure the Area: Clear the working space of tripping hazards and keep it free of children and pets. Establish a designated zone to ensure everyone’s safety from accidents.
- Mind the Weather: Avoid installation in extreme weather; windy or rainy days can be hazardous. It’s best to work in clear conditions to minimize on-site hazards and improve efficiency.
Staying safe while working is crucial; I’ve seen how safety makes a difference.
We covered safety measures, materials, and tools here. Next, we will cover the installation steps for a welded wire fence.
Steps for Installing Welded Wire Fence
Here are the steps to properly install welded wire fencing.
Mark Your Fence Line
Start by marking the entire fence line with stakes and string. Ensure you create a straight line; any deviation affects your fence’s alignment. Measure accurately to maintain consistent gaps; typically, you need about 8 to 10 feet (2.4 To 3 Meters) between posts. Taking time here saves hassle later.
On uneven ground, account for dips and slopes. Adjust post placement for stability. Using a measuring tape helps with both spacing and maintaining your desired height.
Install Fence Posts
Bore holes about 30 inches (76 Cm) deep for stability. Space your wooden or metal posts 6 to 8 feet (1.8 To 2.4 Meters) apart for a sturdy fence. Whether using wood or steel, ensure each post is set vertically and leveled. A spirit level can help achieve this balance.
Fill the holes with concrete or gravel for better anchoring. Concrete significantly maintains tension and support for the welded wire. Be patient and allow the concrete to set before continuing. It is essential to understand the safety protocols in welding as they can prevent incidents like electric shock which frequently occur in the welding industry.
Unroll and Position the Wire Fence
Unroll the welded wire fence along the installed posts, ensuring it sits flat against each post. If necessary, bury the bottom of the wire slightly, especially if you’re fencing in animals; aim for 6 inches (15 Cm) down to prevent digging. Secure it properly from the start.
Use wire clamps or zip ties to attach the fence to each post, keeping it tight but not overly strained. Adjust wire tension manually—too much tension can cause bowing or bending. Remember to check this to avoid extra work.
Stretch the Wire Properly
To stretch the wire, use a fence stretcher to prevent sagging. Anchor one end of the wire, then use the stretcher on the other end. Pull until the wire is taut and securely attaches to the posts. Allow it a little give without bowing.
Mastering the stretch is essential, especially on hills or uneven ground, as this impacts long-term durability. Marking your stretch points keeps an even look across the length.
Secure and Finish the Installation
Once the wire is stretched, secure it tightly to the posts with U-nails or hog rings, depending on your fence type. Check for any loose areas and tighten them. If you join two pieces, ensure overlaps are about 12 inches (30 Cm) for strength.
Finally, trim any excess wire and smooth out sharp edges to prevent injuries. Your installed fence should be functional and safe. This finishing touch makes a difference—don’t skip it!
You should now have a good understanding of installing welded wire fences. In the next part, we’ll discuss installation techniques.
Types Of Installation Techniques for Welded Wire Fences
Let’s cover installation techniques: manual, machine-assisted, temporary, permanent, and custom.
Manual Installation Techniques
Manual installation is hands-on. Use simple tools: a post hole digger, a level, and fencing staples. This method works well for small areas, typically under 150 feet (46 Meters).
Machine-assisted Installation Techniques
Machine-assisted techniques use equipment like post drivers and diggers. This speeds up the process, especially for large projects over 500 feet (152 Meters). A hydraulic post driver can save hours!
Temporary Installation Techniques
Temporary installations use portable fencing materials. This is great for quick solutions lasting months. Stock panels can be easily removed for livestock movement.
Permanent Installation Techniques
Permanent techniques use durable materials like concrete and galvanized steel. These fences last for years, ideal for properties needing long-term solutions. Set posts in concrete for stability.
Custom Installation Techniques
Custom methods adapt to unique terrains, like uneven ground or slopes. Assessing specific needs first leads to better results. Use special tools like stretchers to maintain fence tension on slopes.
Advanced Installation Techniques for Welded Wire Fences
Let’s explore some advanced installation techniques that can enhance your welded wire fence project.
Using Tension Wire for Enhanced Support
Tension wire can provide extra strength, especially in areas prone to bending or sagging. Here’s how to use it:
- Place the tension wire 6 inches (15 cm) above the ground to prevent sagging in lower areas.
- Attach the tension wire to the bottom of the fence using wire and secure it to each post.
- Use a tensioning tool to ensure it’s taut but not overly tight.
Utilizing Fence Stretcher Tools
A fence stretcher tool can make a significant difference in your wire installation:
- It creates even tension across the wire, which helps avoid bowing.
- Adjust the wire’s tension gradually to find the perfect tightness.
Customizing Height for Mismatched Terrain
If you’re working on uneven ground, you can elevate specific sections:
- Adjust the height of your posts so they average out to the desired fence height.
- This technique keeps your fence line visually appealing and functional across varying terrain.
Table: Pros and Cons of Advanced Techniques
| Technique | Pros | Cons |
|---|---|---|
| Tension Wire | Enhances support; prevents sagging. | Additional materials needed; slightly more complex installation. |
| Fence Stretcher | Uniform tension across the span; reduces errors. | Requires investment in tools; can be difficult for beginners. |
| Custom Height Adjustment | Maintains visibility and aesthetics; fits terrain well. | Time-consuming; requires careful planning and measuring. |
Implementing these advanced techniques can streamline your installation, making your welded wire fence more durable and visually appealing. I’ve found that these strategies significantly improve the overall quality of the fence setup! It’s important to recognize the potential risks associated with welding by exploring how dangerous welding is.
Factors Affecting Welded Wire Fence Installation
What factors affect your welded wire fencing setup? Let’s dive in.
Soil Quality
Soil quality significantly impacts installation. For sandy or loose soil, you’ll need deeper holes, about 24 inches (61 Cm), to prevent leaning.
Environmental Conditions
Weather is crucial. High winds can shift your fence, so plan installation during calm months, ideally late spring or early fall.
Post Material Selection
The posts you choose affect stability. Using treated wood or metal t-posts ensures durability. I once used untreated posts, which led to rapid rot.
Wire Gauge and Strength
The wire gauge affects strength; thicker wire like 12.5 gauge (2.5 Mm) withstands more tension. Choose high-tensile wire for security—especially if you’re fencing for dogs!
Accessibility Of the Installation Location
Access can complicate installation. For uneven ground or slopes, use ladders or tools to maintain straight lines, which is vital for aesthetic consistency.
Unique Issues
Now, let’s look at issues unique to fencing that you might face.
Corrosion Resistance Limitations
Fences often face moisture, leading to corrosion. Check for rust spots, especially on metal fences. You can resolve this by applying a rust-resistant coating or replacing it with galvanized steel.
Damage From Wildlife
Fences can suffer from animal impacts, causing dents or breaks. Look for bent wires or pushed-in sections. I once ignored this until I saw a raccoon gnawing through! Reinforce vulnerable areas with stronger materials.
Installation on Uneven Terrain
Fences on uneven ground can create gaps, causing stability issues. Check for protruding or buried sections. Level the ground before installation to ensure a tight fit.
Maintenance Challenges
Fences require regular upkeep to remain sturdy. Inspect for loose posts or sagging wires. Tightening or reseating posts regularly helps prevent issues.
Compatibility With Other Fencing Types
Combining different fence materials can create weaknesses. Look for gaps or misaligned sections. Use compatible materials to ensure a seamless installation and address compatibility during planning.
Aftercare, Inspection, and Advanced Tips for Welded Wire Fence
Here’s specific advice on maintaining and optimizing your welded wire fence.
Aftercare Recommendations
After installing the welded wire fence, spray both sides with a protective sealant. Use a rust-inhibiting spray like Rust-Oleum to prevent corrosion. Inspect the tension and re-adjust any loose wire within the first 30 days to ensure durability.
Inspection Checklist
Inspect for rust spots on the wire or posts at least every six months. Apply synthetic lubricant like WD-40 on hinges and latches biannually. I’ve noticed better durability when replacing worn u-clips with stainless steel options every two years.
Expert Recommendations
If you’re experienced, consider using tension gauges when stretching the wire. A gauge of around 5-10 kg is ideal for uniformity. Invest in a quality wire puller to maintain consistent tension, especially as soil moisture changes can affect stability. Ensure a 12-15 cm (5-6 Inches) clearance from ground vegetation to enhance fence durability.
Advantages Of Welded Wire Fences
The main advantage of welded wire fences? They’re sturdy and long-lasting! Friends have told me how well they work for keeping pets safe and secure in their yards.
Moreover, these fences are versatile; you can use them for livestock, gardening, or property boundaries. They’re easy to install, require minimal maintenance, and resist rust and corrosion.
Applications You Should Know About
Welded wire fences are commonly used for livestock management. They also have several other applications:
- Garden Protection: Use it to keep deer and rabbits out. It’s sturdy and prevents animals from munching on your vegetables. It’s popular among gardeners.
- Dog Containment: Ideal for pet owners, it keeps dogs safely in the yard. This use is gaining popularity as more people adopt dogs.
- Boundary Marking: It clarifies property lines visually. Neighbors appreciate clear dividers, making it a favorite in residential areas.
- Agricultural Fencing: Perfect for cattle and horses. Farmers rely on it to keep livestock secure due to its strength and durability.

Are There Any Alternatives to Installing Welded Wire Fence?
Yes, there are great alternatives to installing welded wire fence, depending on your needs. For instance, using chain link fences, such as those from Backyard Fence Company, offers strong security and visibility. Or you might consider vinyl fencing, which, in my experience, looks great and promises low maintenance, making it appealing for residential areas. When considering any installation techniques, understanding the methods to weld upside down can be valuable for achieving professional results in challenging conditions.
Moreover, options like electra-fence can deter certain animals, perfect if you’re keeping livestock. If aesthetics are crucial, a field fence from Red Brand combines style with functionality. Always think about your specific setup—like whether you need to secure dogs or maintain an open view—and choose what fits best. Trust me; it can save you some headaches!
Frequently Asked Questions (FAQs)
Now let us look at some questions I typically get asked about fence installation.
How Far Apart Should Posts Be for Welded Wire Fence?
Usually, posts for a welded wire fence should be spaced 6 to 8 feet (1.8 To 2.4 M) apart. This spacing ensures stability and strength, especially in windy areas. For larger animals, consider reducing spacing to 5 feet (1.5 M) to prevent gaps.
Do You Need to Stretch a Welded Wire Fence?
Yes, it’s important to stretch a welded wire fence for proper installation. Stretching ensures the wire is taut, which prevents sagging and enhances durability. Aim for at least 300 pounds (136 Kg) of tension for optimal performance.
How to Attach Welded Wire Fence to Wood?
To attach a welded wire fence to wood, use galvanized staples or fence ties. Galvanized materials resist rust, extending your fence’s lifespan. Secure wires at least every 12 inches (30 Cm) to maintain tension.
How Do You Install Welded Wire Fence on Uneven Ground?
Installing a welded wire fence on uneven ground requires adjusting post heights. Use a level between posts to maintain uniformity. Additionally, consider using tension wire at the base to accommodate any dips or rises effectively.
How to Install Welded Wire Fence for Dogs?
To install a welded wire fence for dogs, ensure the height is at least 4 feet (1.2 M). This height deters most breeds. Additionally, bury the bottom 6 inches (15 Cm) underground to prevent digging.
Conclusion
We’ve reached the end, and I appreciate you sticking around. We covered key aspects like what a welded wire fence is, types of welded wire fences, prerequisites for installation, steps for setting it up, precautions to take, and various installation techniques. We also touched on factors affecting installation, unique issues, aftercare, inspection tips, advantages of welded wire fences, and applications you should know.
To put it simply, installing a welded wire fence boils down to gathering your materials, setting posts, and stretching the fence securely. The process also involves considering uneven ground and making sure your fence is sturdy to resist pets and other variables. If you have any questions or need more guidance, contact me.
For further insights and up-to-date technical information, feel free to visit What is Welding.
References
- American Society of Mechanical Engineers. (2019). ASME Section IX: Welding and Brazing Qualifications. New York, NY: ASME.
- Lincoln Electric. (2020). The Procedure Handbook of Arc Welding (15th ed.). Cleveland, OH: Lincoln Electric Company.
- Norrish, J. (2006). Advanced Welding Processes. Boca Raton, FL: CRC Press.
Tyler is a passionate DIY welder and self-taught metal artist with years of hands-on experience transforming raw materials into functional and artistic creations. Specializing in MIG welding, Tyler crafts everything from custom furniture to outdoor sculptures, blending creativity with technical skill. Committed to making welding accessible, Tyler shares practical insights and project inspiration to help beginners and hobbyists confidently explore the world of metalworking.
45-degree Angles, Fencing Tips, Garden Protection, Installation Guide, Livestock Management, Outdoor DIY, Safety Tips, Welded Wire Fence, Welding, Welding Industry, Wire Gauge


