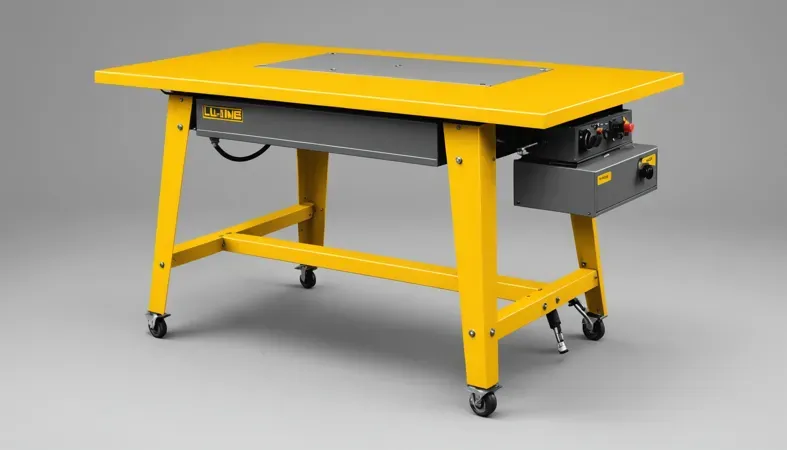
How to Build a Welding Table? Essential Steps, Tools, and Tips
Published on: November 20, 2024 | Last modified: March 4, 2025
By: Mark Carter
A welding table is a sturdy surface designed for welding projects. It provides stability and support for fabrication tasks.
I regularly hear the question: how to build a welding table? It’s crucial to get this right because a solid table ensures better accuracy, safety, and efficiency during your work. From my experience, using the right materials can save you time and frustration in the long run. A well-built table holds your projects in place, allowing you to focus on your welding skills.
In this guide on how to build a welding table, I’ll cover types of welding tables, essential tools needed, step-by-step processes, safety tips, factors that impact construction, and common issues. We’ll also discuss maintenance and care, benefits of having a good table, typical applications, and even alternatives if you don’t want to build one. You’ll find practical advice and insights into how to make a cheap welding table that works just right for your needs.
Contents
- How to Build A Welding Table?
- What is a Welding Table?
- Types Of Welding Tables
- Essential Tools Before You Start (Prerequisites)
- Steps to Build a Welding Table
- Safety Tips
- Factors Affecting the Construction Of Welding Tables
- Common Problems When Building Welding Tables
- Aftercare and Maintenance Of Welding Tables
- Benefits
- Typical Applications
- What Are Alternatives to Building A Welding Table?
- Frequently Asked Questions (FAQs)
- Conclusion
- References
How to Build A Welding Table?
A welding table is a sturdy workspace for metalwork. To build a welding table, use heavy steel (About 0.5 Inches Thick), measuring 4 feet (1.2 M) long by 2 feet (0.6 M) wide. It’s easy for beginners and ideal for furniture projects.
What is a Welding Table?
A welding table is a sturdy surface for holding metal pieces during welding. Typically made from thick steel, these tables can withstand high temperatures and heavy loads. Most welding tables measure around 4 ft x 8 ft (1.2 M X 2.4 M), but smaller and larger versions are available. For durability, choose tables with a thickness of 1 inch (25.4 Mm) or more; this ensures stability while you work.
When building a welding table, consider strong materials and a solid design. In my experience, features like adjustable legs or built-in clamps enhance its usefulness. A well-built table can significantly improve the efficiency of your welding projects.
I used my welding table frequently for my job, especially for assembling furniture. It simplified tasks like welding table frames or chairs. I saved time not worrying about stability or movement, highlighting the value of a reliable base. Remember, investing in solid plans, like 4 ft x 8 ft welding table plans, can optimize your workflow and yield cost-effective results.
Types Of Welding Tables
Let’s explore the different types and how to craft your own!
-
Portable Welding Tables
Portable welding tables are lightweight and easy to move. To create one, use a sturdy folding frame with a solid tabletop. You’ll need materials like 1-inch (25 Mm) square tubing for the frame and a 1/4-inch (6.35 Mm) thick steel sheet for the top. Investing in quality welding accessories can further enhance your setup and improve your workspace efficiency.
Welding rods play a crucial role in assembling these tables, and it is important to understand the difference between 6010 and 6011 rods to ensure efficient welding.
.
-
Fixed Welding Tables
Fixed welding tables are stable and durable. To build one, start with a solid frame made from 2-inch (50 Mm) steel tubing. Then, add a heavy-duty 1-inch (25 Mm) thick plate on top to support your projects. Understanding the mechanics behind welding machines can further enhance your setup, and more on how a welding machine works can be found here.
-
Adjustable Height Welding Tables
Adjustable height tables offer versatility for various tasks. To create one, use an adjustable base with a hydraulic mechanism. Choose a 3/8-inch (9.5 Mm) steel top and install it on the adjustable frame for flexibility.
-
Steel Welding Tables
Steel welding tables are robust and resilient to high heat. To build one, use high-strength steel for the frame and top. For example, use 2 x 2-inch (50 X 50 Mm) square tubing for the structure and a 1-inch (25 Mm) steel top for durability.
-
Aluminum Welding Tables
Aluminum tables are lightweight and rust-resistant. To make one, use aluminum extrusions for the legs and frame. Then, use a 1/2-inch (12.7 Mm) thick aluminum plate for the top to minimize weight while maintaining strength.
Essential Tools Before You Start (Prerequisites)
What do you need to build a reliable welding table?
- Metalworking Clamps: Use strong clamps, like Bessey TG Series, to hold your materials securely. This keeps everything steady while you weld.
- MIG Welder: Get a MIG welder, such as the Forney 29901, for welding thin to medium metal. It’s effective for creating sturdy joints.
- Tack Welding Equipment: Have a tack welder like the Hobart Handler 140. This helps make small welds to hold pieces before the final weld.
- Welding Table Top Material: Use a table top material like 1/4 inch (6.35 Mm) thick mild steel for durability and stability when welding heavy pieces.
- Surface Cleaner: Use a surface cleaner, like 3M Clean-N-Strip, to prep your metal before welding. Clean surfaces ensure better weld quality and adhesion.
Steps to Build a Welding Table
Here are the steps to create your own solid welding table.
-
Prepare the Work Area
Start by clearing at least 2.5 m² (27 Ft²) of space for your welding table to allow comfortable movement. Ensure there are no flammable materials nearby; safety’s key! Use a concrete floor or hard surface to prevent wobbling later on.
Set up proper lighting to see your work clearly. Good lighting helps avoid mistakes when cutting and welding. If possible, use natural light or bright LEDs. Your work area should inspire confidence and safety! Choosing the right equipment is crucial, so it’s important to determine what kind of welder you need.
-
Measure and Cut the Steel
Measure your dimensions carefully. For a versatile table, aim for a minimum size of 1.2 m x 1.5 m (4 Ft X 5 Ft) to accommodate most projects. Use a square for accuracy and mark your cuts with a chalk line.
Use a plasma cutter or circular saw with a metal blade to cut your steel. Precision is crucial; rushing cuts can lead to pieces that don’t fit. I once rushed and wasted materials!
-
Weld the Frame Together
Create a strong frame by starting with the legs: cut four 0.1 m x 0.1 m (4 in X 4 in) square tubes, each 1 m (39 in) tall. Attach them to the corners with strong welds. Ensure they’re level to avoid a crooked table, which can complicate welding.
Connect the legs with horizontal crossbars using 2.5 cm (1 in) steel tubes. This serves as a shelf and stabilizes the frame. Many folks forget this step; trust me, a solid frame pays off!
-
Add the Tabletop
Select a sturdy sheet of steel for your tabletop, ideally 3 mm (1/8 in) thick and cut to size. Secure it to your frame with several welds, spaced every 20 to 30 cm (8 to 12 in) along the edges. Consistent welding lets the tabletop support heavy materials.
Ensure the tabletop is flush with the frame for seamless work. I’ve added extra brackets in the middle for support when working with heavier pieces, enhancing stability.
-
Finish the Table
Sand down any sharp edges using a flap disc to prevent injuries. An angle grinder works well here, ensuring your table is safe to use. Don’t rush this step; it’s crucial for comfortable handling.
Consider applying a rust-resistant finish to the steel. I suggest high-temperature paint or a sealant to prolong your table’s life. A little prevention goes a long way!

Safety Tips
Let’s explore essential precautions for your welding table.
- Proper ventilation: Good airflow reduces harmful fumes. Use fans or create outdoor spaces for safety.
- Eye protection: Protect your eyes with a clear and shaded hood. I recommend a 3M Speedglas for clarity.
- Flame-resistant clothing: Wear non-flammable gear like cotton or wool to reduce burns during welding.
- Organize workspace: Keep your area tidy to prevent trip hazards. A clear space helps you focus better.
Safety precautions save lives—trust me, it’s worth it!
Factors Affecting the Construction Of Welding Tables
What factors impact creating your ideal welding table?
-
Material Selection
The material you choose affects durability and heat resistance. Steel, especially hot-rolled (like A36), is ideal for welding tables; it withstands temperatures up to 1,500°F (815°C) without deforming. A crucial step in the welding process is the hot pass which enhances the weld’s overall integrity and strength. For more understanding, see hot pass in welding.
-
Size and Dimensions
Your welding projects dictate the table size. A common dimension is 4′ x 8′ (1.22 M X 2.44 M), providing adequate space for larger items while remaining manageable for smaller projects.
-
Weight Capacity
Weight capacity is crucial for safety and effectiveness. I once underestimated the weight of a heavy frame I was working on. A table should support at least 1,000 lbs (454 Kg) for heavy-duty tasks.
-
Table Surface Finish
The surface finish minimizes spatter and rust. A flat, smooth surface made from carbon steel reduces imperfections and enhances welding performance.
-
Mobility and Stability
You need a balance of mobility and stability. Consider adding locking casters for movement, but ensure it’s stable enough to prevent tipping, even with heavy materials.
Common Problems When Building Welding Tables
Here are some specific issues that can arise when building a welding table.
-
Welding Distortion
This issue occurs when heat changes your table’s shape. To fix this, monitor the heat input at about 10-20 amps per mm. Cool sections with water and allow them to stabilize.
-
Uneven Surface
If your welding table isn’t level, your projects will be affected. I once ignored the bubble level. Just adjust the legs or add shims for a flat surface.
-
Inadequate Stability
Your welding table needs a sturdy base. If it wobbles, use thicker steel beams (At Least 1.5 Mm) for the frame. Adding weight can enhance stability.
-
Material Weakness
Weak materials can bend or break. Always choose high-strength steel plates (At Least 6 Mm) for durability and inspect for any visible defects.
Aftercare and Maintenance Of Welding Tables
Here are essential tips for post-construction care, inspections, and advanced maintenance for your welding table.
Aftercare Tips
After building your welding table, clean any spatter monthly with a metal brush. Apply a rust inhibitor, like WD-40, every few weeks to prevent corrosion. Check that all fasteners are tight every three months to maintain stability.
Inspection
Inspect your welding table by checking the surface for warping with a straightedge (Ruler) at least 4 ft (1.2 M) long. Ensure the legs are intact and look for any signs of weld failures. I use a Fluke Laser Tape for precise measurements to confirm everything is level before use.
Expert Tips
If this isn’t your first welding table, consider adding adjustable leveling feet for fine-tuning. Use a dedicated joint filler, like Lincoln Electric’s ER70S-6 wire, for perfect welds in high-stress areas. Finally, reinforce your design with gussets (Corner Brackets) at least 2 mm thick for enhanced stability during heavy-duty use.
Benefits
The main benefit of learning to build a welding table is that you get a customized workspace tailored to your needs. I used mine frequently for my job, especially for making furniture and larger metal projects.
Additionally, it saves money, offers design flexibility, improves work efficiency, and enhances safety. A sturdy table also reduces vibration, keeping your welds cleaner and more precise.
Typical Applications
I’ve built welding tables for various projects in my career. They have many uses, such as:
- Heavy Fabrication: A sturdy welding table can support large metal pieces. It’s common in manufacturing and provides stable work for welding structural beams or frames.
- Sculpture Projects: Artists often need a flat, solid surface. Custom tables for specific artwork enhance precision, making them popular in modern metal art studios.
- Auto Body Repair: Specialized tables can accommodate vehicles or parts. This application is crucial for alignment and repairs, making them favorites in auto shops.
- Custom Furniture Creation: DIY enthusiasts and professionals create unique pieces. A welded table frame offers strength and style, trending in high-demand furniture workshops.
What Are Alternatives to Building A Welding Table?
Instead of building a welding table from scratch, you could buy a DIY welding table kit for convenience. Products like the Hobart 500559 or Strong Hand Tools Welding Table come pre-designed, saving you time and effort. In some cases, you might even choose to use a sturdy workbench; it can handle the heat and weight, giving you a practical surface for welding.
From both successes and failures, I’ve learned that sometimes using a welding table top on a regular table can work just as well, especially when you’re short on space. If you want something really cheap, a cheap DIY welding table made from scrap metal can also do the trick. Whichever route you choose, just make sure your setup is rigid and fire-safe.
Frequently Asked Questions (FAQs)
Now let us look at some questions I typically get asked about welding tables.
How Thick Does a Welding Table Need to Be?
Yes, a welding table should typically be at least 1 inch (25.4 Mm) thick. This thickness provides stability and strength, which helps absorb heat and minimizes warping. A thicker table can withstand impacts and heavy workloads better, making it safer and more effective for your welding projects.
What is the Best Surface for a Welding Table?
The best surface for a welding table is usually a steel plate, preferably AR400 or AR500 grade. These grades are hard, abrasion-resistant, and ensure durability under high-pressure conditions. Using a material with a Brinell hardness of at least 400 HB ensures it can handle heavy use without deforming. To see how different welding methods maintain joint integrity, you can explore the process of seam welding.
What Can I Use for a Welding Table?
You can use various materials for a welding table, including steel plates, existing heavy workbenches, or even thick plywood as a base. However, steel is recommended due to its ability to withstand high heat and impact. A surface area of at least 4 feet (1.22 Meters) by 2 feet (0.61 Meters) is ideal for most projects.
What is the Best Metal for a Welding Table?
The best metal for a welding table is mild steel, commonly available and cost-effective. Mild steel’s thermal conductivity helps in heat dissipation, which reduces warping during welding. A table made from high-quality 3/8 inch (9.5 Mm) thick mild steel will provide a sturdy and reliable working surface.
How Do I Keep My Welding Table From Rusting?
To keep your welding table from rusting, regularly apply a protective coating of oil or rust-inhibiting paint. Stainless steel options exist that resist corrosion better, but regular cleaning and maintenance of mild steel tables are necessary to prolong their life. Wipe down the surface after each use to remove moisture.
How Much Does It Cost to Build a Welding Table?
The cost to build a welding table can range from $100 to $500 depending on materials and size. A simple design using mild steel can be done for around $200. Adding features like drawers, clamps, or adjustable height can increase costs, but they greatly enhance functionality.
Conclusion
That brings us to the end of our discussion on how to build a welding table. We covered essential tools, types of welding tables, safety tips, and aftercare. We also discussed steps to build a welding table, features to consider, and common problems you may face.
To sum it up, building a welding table involves figuring out your tools and materials, understanding the different types of tables, and using safety measures. Remember, you’ll need at least 2.54 cm (1 Inch) thickness for the tabletop and strong steel legs. Familiarizing yourself with essential welding equipment will ensure you’ve got what you need to create a sturdy, practical workspace for all your welding projects.
For a deeper dive into the world of welding, feel free to visit What is Welding for comprehensive insights and resources.
References
- American Welding Society. (2015). AWS D1.1/D1.1M: Structural Welding Code – Steel. Miami, FL: AWS.
- American Petroleum Institute. (2018). API 1104: Welding of Pipelines and Related Facilities. Washington, DC: API.
Mark is a skilled welding engineer specializing in advanced metal joining technologies and process design. With a formal education in welding engineering and a background rooted in practical experience, Mark bridges the gap between theory and application. He is passionate about making technical concepts accessible, empowering welders to embrace innovation while mastering essential skills. Mark combines his scientific expertise with a commitment to supporting the welding community alongside his uncle, Joe.
American Welding Society, Construction Guide, DIY, Metalworking, Safety Tips, Welding, Welding Equipment, Welding Table, Welding Tools


