How to Arc Weld? Essential Techniques, Tools, and Tips
Published on: December 18, 2024 | Last modified: March 4, 2025
By: Joe Carter
An arc is a type of electrical discharge that occurs when a current flows through a gas. It creates a bright, hot light and provides the heat needed for welding.
One thing people often ask me about is how to arc weld. It’s critical to understand this process because it’s the foundation for creating strong joints in metal. From my own experience, knowing how to arc weld has saved me countless hours and headaches in fabrication work.
In this article, you’ll discover what arc welding is, the types of arcs associated with how to do arc welding, the equipment you need, a step-by-step guide, crucial safety tips, various techniques, factors affecting the weld, common issues you might face, and tips for aftercare and inspections. You’ll also learn the benefits of arc welding and its applications, plus alternatives to achieve similar results.
Contents
- How to Arc Weld?
- What is Arc Welding?
- Types Of Arc in the Context Of How to Arc Weld
- Prerequisites: What Do You Need?
- Essential Precautions
- Steps for How to Arc Weld
- Types Of Arc Welding Techniques
- Factors Affecting Arc Welding
- Common Issues Unique to Arc Welding
- Aftercare, Inspection, and Advanced Tips for Arc Welding
- Advanced Techniques for Precision Arc Welding
- Key Benefits Of Arc Welding
- Applications You Should Know About
- Alternatives for Achieving Similar Results As How to Arc Weld
- Frequently Asked Questions (FAQs)
- Conclusion
- References
How to Arc Weld?
The ‘arc’ in ‘how to arc weld’ refers to an electric discharge. To arc weld, set the right amperage (Typically 70-300 A), maintain a 1/8-inch gap, and move at a steady speed. It’s fairly easy for beginners, great for metals like steel.
What is Arc Welding?
The arc is an electrical discharge between two conductive electrodes. In arc welding, this discharge creates intense heat, often exceeding 3,000°C (5,432°F). This heat melts the base metal and the filler material, allowing them to fuse. The stability of the arc is crucial, with typical working currents ranging from 50 A to 300 A.
To strike an arc, create a gap between the electrode and the workpiece. Finding the right distance takes practice, but it’s essential to maintain an even arc length.
I remember using the arc for my first welding project, a simple metal frame. It was thrilling to see how the arc contributed to the fusion of the metal. Many beginners wonder how to strike an arc with a stick welder. It takes some finesse, but once you get the hang of it, it feels like second nature.
Types Of Arc in the Context Of How to Arc Weld
-
MIG (Metal Inert Gas) Welding
MIG welding uses a continuous wire feed and shielding gas. Set up the machine with the correct voltage and wire feed speed. Connect the ground clamp, select the material type, and pull the trigger to start welding.
-
TIG (Tungsten Inert Gas) Welding
TIG welding uses a non-consumable tungsten electrode and filler rod for metal joining. Set your machine properly and maintain a steady motion. Hold the torch at a 15-degree angle and move it slowly along the joint, adding filler as needed.
-
Stick Welding
Stick welding, or Shielded Metal Arc Welding (SMAW), uses a consumable electrode coated in flux. To start, attach the ground clamp and set your amperage based on material thickness. Strike the arc by quickly touching the electrode to the metal, then lift it slightly while maintaining the arc.
-
Flux-cored Arc Welding
This method uses tubular wire filled with flux. Set your machine and attach the ground clamp. Feed the wire into the weld joint at a steady pace, using the flux to shield the arc from the environment.
-
Submerged Arc Welding
Submerged arc welding covers the arc with granular flux. Position your welding machine and keep the arc stable under the flux blanket. The molten metal from the submerged arc creates a strong weld without excessive smoke.
That covers the various types of arcs in arc welding. Let’s now take a look at the necessities for welding.
Prerequisites: What Do You Need?
What do you need before diving into arc welding?
- Arc Welding Machine: You need a reliable machine like the Miller Multimatic 215. It offers versatility for running stick or MIG (Metal Inert Gas) processes easily.
- Electrodes: Obtain E6011 or E7018 electrodes for stick welding. They’re crucial for quality welds, especially on mild steel.
- Work Clamp: A good quality work clamp, such as the Hobart 770494, is essential for creating a solid electrical connection and ensuring a stable arc.
- Welding Rod Holder: Get a holder like the Lincoln Electric KH525 that safely grips and controls the electrode.
We’ve wrapped up necessary requirements here. Let us turn our attention to important safety measures to consider next.
Essential Precautions
Let’s cover important safety measures for arc welding.
- Protective Gear: Wear welding gloves, helmets, and long sleeves to avoid burns. Consider safety products like Lincoln Electric’s welding gloves.
- Ventilation: Ensure proper airflow to minimize harmful fumes. Use fans or work outside when possible.
- Check Equipment: Inspect tools and cables for damage to prevent electrical shock or fires.
- Safe Workspace: Keep the area tidy and free from flammable materials. A clean space reduces accidents.
Always prioritize safety; it’s your responsibility to protect yourself!
We’ve wrapped up important precautions for welding here. Let us turn our attention to the steps for arc welding.
Steps for How to Arc Weld
Here are the essential steps of arc welding to get you started.
-
Strike the Arc
Begin by bringing the electrode close to the workpiece. Quickly pull it back to about 1/8 inch (3.2 Mm) when you see the spark. Maintain a steady hand for a smooth arc. If you struggle, practice this step separately.
The first time I tried to strike an arc, it took a few tries. Use a quick motion—like striking a match—to get the arc going, setting the stage for a successful weld.
-
Adjust Arc Length
Once the arc is lit, adjust its length to around 1/8 inch (3.2 Mm). A longer arc results in excess spatter, while a shorter arc may cause poor penetration. Keep your distance consistent for smooth operation. Check settings based on metal type; thin metal may need a shorter arc.
If you’re welding thick material, use a longer arc. That worked well for my initial welds on thicker steel, providing enough heat and clarity.
-
Control Travel Speed
Maintain a constant travel speed. Aim for roughly 2 inches per minute (5 Cm/min) for thinner materials and increase as needed for thicker ones. Moving too slowly will burn through, while moving too fast will hinder fusion. Your distance from the arc changes your perception of speed; focus on your workpiece.
I once rushed a critical joint, resulting in a weak weld. Remember, consistency is key to achieving a strong bead.
-
Maintain Electrode Angle
Set the electrode angle at about 15-20 degrees from vertical. This helps direct heat into the joint and controls the arc’s penetration depth. Don’t hesitate to adjust slightly; a small change can improve the arc.
Always align your electrode with the torch to avoid arc blow. I found that adjusting my stance made it easier to maintain the angle, enhancing my overall weld quality.
-
Move in a Steady Pattern
Choose a pattern—zigzag, stringer, or weave—based on your material. A zigzag is best for thinner metals, while a stringer bead works for thicker ones. Ensure each pass overlaps slightly for consistency in appearance and strength. Keep the pace slow enough to observe the puddle as it forms and solidifies.
I learned not to rush the pattern. On my first day, slowing down resulted in a more appealing and strong weld. It’s worth taking the time to master.
We have now covered the steps for arc welding. Next, we will explore various types of arc welding techniques.
Types Of Arc Welding Techniques
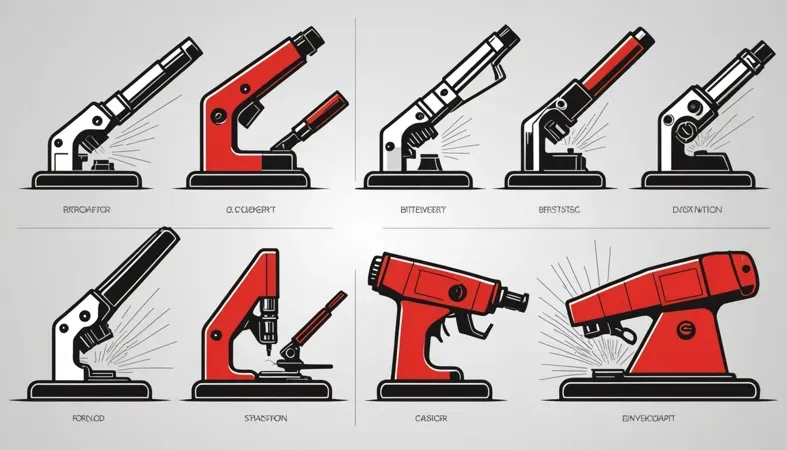
Let’s move on to the various types of arc welding techniques: MIG, TIG, Stick, Flux-Cored, and Submerged Arc welding.
-
MIG Welding Techniques
MIG (Metal Inert Gas) welding uses a continuous wire feed as an electrode and an inert gas to shield the weld. It’s best for thin metals, operating at 18-30 volts, with a feed rate of 10-25 inches (25-64 Cm) per minute. This method is excellent for beginners due to its ease of use.
-
TIG Welding Techniques
TIG (Tungsten Inert Gas) welding employs a non-consumable tungsten electrode to produce the weld. It requires a gas flow rate of 10-20 cubic feet per hour (Cubic Meter Rates May Vary) and operates within a current range of 10-300 amps. This method demands skill but yields high precision and clean results. A crucial step in this method is performing a hot pass, which ensures the removal of any slag or impurities during a hot pass in welding.
-
Stick Welding Techniques
Stick welding, or Shielded Metal Arc Welding (SMAW), uses a consumable electrode coated in flux. It operates at 20-60 amps, generating heat through an arc between the electrode and the workpiece. It’s versatile, but knowing how to strike an arc is crucial for a good weld.
-
Flux-cored Techniques
Flux-Cored Arc Welding (FCAW) employs a tubular wire filled with flux that produces gas when heated. It can be used without shielding gas, making it ideal for outdoor work, operating at 20-70 amps. This method offers good penetration and weld quality. Regular maintenance of the welding machine is crucial for optimal performance; if issues arise, learn how to fix a welding machine.
-
Submerged Arc Techniques
Submerged Arc Welding (SAW) forms an arc beneath a blanket of granular flux. It typically operates between 500-600 amps. This method’s deep penetration is perfect for thick materials, creating strong weld seams with minimal smoke.
Factors Affecting Arc Welding
What factors can impact your weld quality and success?
-
Welding Material Type
The material type dictates your approach. For example, carbon steel requires different settings than stainless steel, which melts at around 1,500°C (2,732°F). Choosing the wrong material can lead to weak welds and joint failure.
-
Electrode Choice
Selecting the right electrode is crucial. E6011 rods work well on rusty or dirty surfaces, while E7018 provides greater penetration and can handle thicker materials. Using the wrong electrode can cause porosity or uneven bead appearance.
-
Welding Position
Your welding position significantly affects your technique. I once tried to weld overhead without adjusting my settings, resulting in an inconsistent arc. Positions like flat, vertical, or overhead have unique challenges and require adjustments in settings and techniques.
-
Machine Settings
Tuning your machine settings is essential. For stick welding, balance your amperage with the electrode size; generally, use 1 amp for every 0.025 inches (0.64 Mm) of electrode diameter. Poor settings lead to weak bonds or excessive spatter. While optimizing welding techniques, it’s important to be aware that exposure to welding fumes and certain materials might raise health concerns, including the potential for welding-related cancer risks.
-
Environmental Conditions
Your surroundings can impact welding. High winds can blow away shielding gas, while humidity can cause rust. The ideal condition is a dry, calm environment for a clean weld.
Common Issues Unique to Arc Welding
Let’s look at some specific problems you might face when arc welding.
-
Inconsistent Arc Length
An inconsistent arc length can weaken welds. Watch the arc as you weld; it should remain steady. Adjust your travel speed or electrode angle to resolve this.
-
Electrode Sticking
Electrode sticking often occurs in arc welding, especially if the arc’s too short. I once made this mistake by not maintaining the proper distance, forcing me to start over. Pull the electrode back slightly to fix this.
-
Poor Penetration
Poor penetration occurs when the arc is too long or the travel speed is too fast. Look for a shallow bead; if you see one, adjust the angle and speed to improve it.
-
Weld Porosity
Poor shielding gas flow during the arc can lead to porosity. Check for bubbles in the weld. To fix this, ensure a steady gas supply and clean the metal before welding.
-
Excessive Spatter
Excessive spatter during arc welding usually indicates high current. If you notice too many splatters, lower the amperage slightly and review your technique.
Aftercare, Inspection, and Advanced Tips for Arc Welding
Here’s essential advice for care and maintenance after arc welding.
Aftercare Guidelines
After finishing, clean your welding tip with a wire brush rated for 0.1 mm (0.004 In) bristles. Store your equipment in a dry space to prevent rust. Keep electrodes sealed in moisture-proof bags to maintain quality.
Inspection Recommendations
Inspect your arc welder for faulty cables or damaged insulation by checking for wear. Always examine your ground clamp to ensure a solid connection; if it’s loose, you could lose conductivity by up to 20%. I use DuraMax cables, which I find reliable.
Expert Tips
For advanced users, adjust your amperage to minimize heat-affected zones (HAZ). Too much HAZ can lead to weld failure—aim for 5 to 10 mm for the best results. Use “stringer beads” in vertical welding to prevent sagging, which ensures an even fill. It’s a game changer!
Advanced Techniques for Precision Arc Welding
When you’ve grasped the basics of arc welding, it’s time to explore advanced techniques to enhance your skills.
1. Stringer vs. Weave Beads
- Stringer Beads:
Best for flat or horizontal positions. Keep a steady, uniform motion for a narrow weld bead, ensuring better penetration.
- Weave Beads:
Ideal for wider joints. Create a zigzag pattern to fill gaps, ensuring an even build-up without overheating. This is useful on thicker materials.
2. Multi-Pass Welding
For thick metals, consider multi-pass welding. Here’s how:
- Start with a root pass; maintain tight arc control.
- Follow with fill passes, overlapping previous beads slightly.
- Finish with a cap pass for smooth appearance and uniform strength.
3. Backhand vs. Forehand Technique
Your approach can affect penetration:
| Technique | Description | Use Case |
|---|---|---|
| Backhand | Pull the electrode away from the weld pool. | Great for thick materials. It provides deeper penetration. |
| Forehand | Push the electrode into the weld pool. | Best for thin materials. It allows control and minimizes spatter. |
4. Post-Weld Heat Treatment (PWHT)
Applying heat post-weld can relieve stresses and improve joint properties. Typically, heat to around 200°C (392°F) for a few hours, then allow to cool slowly. This is crucial for preventing future cracks.
5. Practice with Different Positions
Try various welding positions, such as:
- Flat: Easiest! Use stringer beads for quick results.
- Horizontal: Maintain your angle for consistent welds.
- Vertical: Requires a steady hand; practice the weave technique.
- Overhead: More challenging; you may want to use the forehand technique.
Key Benefits Of Arc Welding
The main benefit of learning arc welding is its versatility. I used it for everything from repairing metal gates to building structures.
Additionally, arc welding is cost-effective, easy to learn, suitable for various materials like steel and aluminum, and creates strong, durable joints.
Applications You Should Know About
I’ve used arc welding for various tasks. It has many applications, such as:
- Heavy Equipment Repair — Professionals use arc welding to fix bulldozers and cranes. It’s ideal for repairing cracks and breaks due to its strength. This method is popular in construction.
- Pipes and Pressure Vessels — You’ll find it in industries like oil and gas. Arc welding ensures strong seams in these vessels, resisting high pressure. It’s trusted for safety and durability.
- Automotive Frame Fabrication — Mechanics use arc welding to create and repair frames. It provides excellent structural integrity, keeping cars safe and reliable. It’s often used in custom vehicle projects.
- Artistic Metalwork — Sculptors use arc welding for artistic creations. It allows for unique designs and easily joins different metal types. This emerging niche is gaining traction in art communities.
Alternatives for Achieving Similar Results As How to Arc Weld
You’ve got options if you’re looking for alternatives to achieve the same results. Consider MIG welding, for instance, with machines like the Lincoln Electric MIG Welder. It’s often preferred for its ease of use, especially for beginners. From my unique perspective, I’ve noticed that TIG welding, using equipment like the Miller Dynasty, offers precise control for thin metals, making it ideal for delicate projects.
If you’re after portability, a gas welder like the Oxy-Acetylene setup could be your go-to. It’s versatile and works well in outdoor settings. Also, laser welding is becoming popular for industrial applications; it’s fast and cuts down on cleanup time. Each method has its strengths, so choose what fits your project best!
Frequently Asked Questions (FAQs)
Now let us look at some questions I typically get asked:
What is the Proper Way to Arc Weld?
Yes, there is a proper way to arc weld. First, you need to set up your equipment correctly, including selecting the right electrode and amperage settings. Proper technique ensures a stronger weld, with penetration levels between 6 to 10 mm (1/4 to 3/8 in) and less chance of defects. Knowing how to effectively separate welded parts enhances repair and alteration work, emphasizing the importance of mastering weld cutting skills.
What Are the Steps Of Arc Welding?
The steps of arc welding include preparing the materials, selecting the right electrode, striking an arc, and controlling the bead. Each step is crucial for quality; for instance, proper joint fit-up leads to better penetration and reduces the risk of failure. Understanding the various welding processes involved can significantly enhance the effectiveness of the welding operation.
Is Arc Welding Stronger Than MIG?
Yes, arc welding can be stronger than MIG welding depending on the application. Arc welding delivers deeper penetration, which makes it ideal for thicker materials, achieving strengths of 500 MPa (About 72,500 Psi) and higher when done correctly. Understanding the role of a combo welder in various welding processes can further enhance the choice of welding techniques for specific tasks.
How Do You Reduce Arc Blow in Welding?
You can reduce arc blow in welding by keeping the workpiece clean and adjusting your setup. Arc blow often occurs due to magnetic fields, causing unstable arcs that can affect quality. Securing your workpiece allows for better control and reduces blow.
How Do You Strike an Arc With a Stick Welder?
To strike an arc with a stick welder, you need to tap or drag the electrode on the workpiece. This action creates the initial arc and establishes the welding process. Proper technique can set up a stable arc, making your work easier and more effective.
How to Strike an Arc in TIG Welding?
To strike an arc in TIG welding, use a high-frequency start or scratch method with the tungsten electrode. This creates an arc between the electrode and the material. Achieving a clean start is essential for preventing contamination and ensuring a strong weld.
Conclusion
That brings us to the end of our arc welding journey. We covered what arc welding is, types of arcs, prerequisites, steps for welding, essential precautions, techniques, factors affecting the process, common issues, aftercare, key benefits, and possible alternatives. Each section aimed to arm you with the essential knowledge needed to become proficient in how to arc weld.
I hope these welding tips prove valuable to you in mastering how to arc weld. Remember, it’s all about setting up correctly: gather your equipment, understand the techniques, and keep safety in mind. With practice and patience, you’ll soon become skilled at this craft.
To continue enhancing your welding knowledge and find additional tips and techniques, visit What is Welding.
References
- Lincoln Electric. (2020). The Procedure Handbook of Arc Welding (15th ed.). Cleveland, OH: Lincoln Electric Company.
- British Standards Institution. (2018). BS EN ISO 9606-1: Qualification Testing of Welders. London, UK: BSI.
Joe Carter is a retired welding professional with over 40 years of hands-on experience in the industry, spanning ship repair, structural welding, and even underwater projects. Joe is a master of MIG, TIG, and Stick welding. Passionate about mentoring the next generation of welders, Joe now shares his decades of expertise and practical insights to help others build rewarding careers in welding.
Arc Welding, MIG Welding, Safety Tips, Structural Integrity, TIG Welding, Welding, Welding Safety, Welding Techniques, Welding Tools
