How to Wire a 220 Outlet for a Welder? Step-by-step Guide on Types, Wiring, and FAQs
Published on: April 22, 2025 | Last modified: March 4, 2025
By: Joe Carter
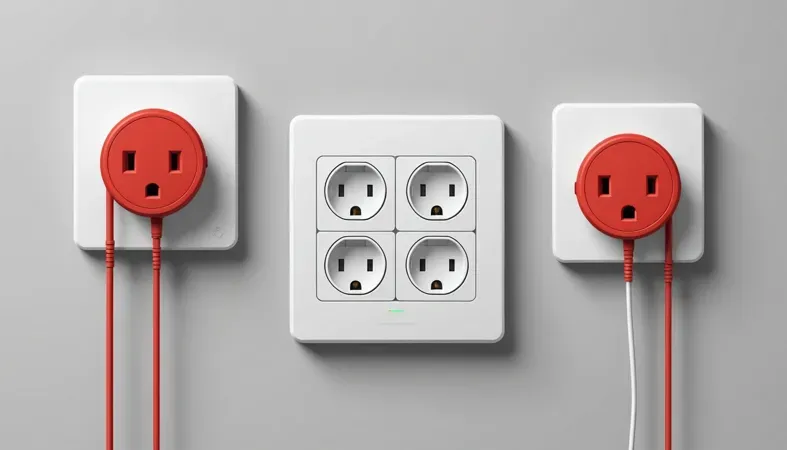
A 220 outlet is a type of electrical outlet designed for high-powered tools. It usually delivers 240 volts (V), making it perfect for devices like welders and dryers.
One question I get asked a lot is how to wire a 220 outlet for a welder. It’s crucial to follow safety guidelines. In my own experience, skipping steps can lead to dangerous situations and costly repairs.
In this guide on how to wire a 220 outlet for a welder, we’ll cover what a 220 outlet is, types of outlets available, steps to wire one, factors affecting the wiring process, and frequently asked questions. You’ll gain all the knowledge you need to ensure safe and efficient usage like how to wire a 240 volt outlet for a welder.
Contents
How to Wire A 220 Outlet for A Welder?
A 220 outlet provides high voltage for heavy-duty tools. To wire it, use a double-pole 30-amp breaker and 10 AWG wire. It’s crucial for welders. Most find it a bit challenging, mostly in residential settings. Wondering how prescription glasses fit into welding safety? Discover the differences between glasses for welding and other eyewear to ensure optimal protection.
.

What is a 220 Outlet?
A 220 outlet is a higher-voltage electrical outlet designed for certain appliances, including heavy-duty tools like welders. It typically supplies 240 volts (V), though in the U.
S., it’s often called a 220V outlet. This outlet features two hot wires and either one or two ground wires, depending on the type. It’s essential for providing the power needed to run equipment that requires more energy than a standard 120V outlet can supply.
If you plan to use a 220 outlet for a welder, you’ll need to wire it properly. I went through this when I set up my workshop. Having the right setup, like a 50 amp (A) breaker and understanding the three-prong welder plug wiring diagram, is crucial.
This setup proved useful when I had to weld something significant during a project. I realized how important it is to wire a 240V outlet for a welder safely. Not having the proper outlet can delay work and lead to accidents, so I strongly suggest you learn how to wire a 220 breaker for welder needs.
Types Of 220 Outlets
-
NEMA 6-50 Outlets
NEMA 6-50 outlets are for high-power applications. To wire this for your welder, use a dedicated 50 amp circuit. Install a 50 amp circuit breaker, run 6-gauge wire (6 AWG or About 10 Mm²), and connect it to the outlet and breaker panel. Proper welding setup involves understanding all aspects of safety including protection against weld flash impacts.
-
NEMA 6-30 Outlets
NEMA 6-30 outlets are rated for 30 amps. If your welder needs a 30 amp circuit, install a 30 amp breaker. Use 10-gauge wire (10 AWG or About 6 Mm²) and connect the hot wires to the outlet and your circuit panel. Discover more about welding from a distance and ensure safe operating practices.
-
NEMA L6-30 Outlets
NEMA L6-30 outlets are locking types that prevent accidental disconnection. To wire them for your welder, you’ll need a locking plug and connector. Run 10-gauge or larger wire and connect it to a 30 amp breaker. Welders often need medical imaging to check their health and it is important to consider their exposure to magnetic fields, as seen in discussions about whether a welder can get an MRI.
-
NEMA 14-50 Outlets
NEMA 14-50 outlets have a versatile design for various appliances. For a welder, install a 50 amp breaker and use 6-gauge wire. Connect the wires correctly according to the manufacturer’s guide to ensure safety. Proper ventilation in your workspace is crucial to prevent health risks associated with inhaling welding fumes.
You should now have a good understanding of various 220 outlet types. In the next part, we’ll discuss wiring steps for welders.
Steps to Wire a 220 Outlet for a Welder
Here are the steps to wire a 220-volt outlet for a welder. Follow them closely to ensure a proper connection.
-
Turn Off Power
First, turn off the circuit breaker for the outlet. You don’t want any electricity running through while you work—it’s not worth the risk. Use a voltage tester to confirm no power is present at the outlet. I can’t stress how important this step is; you can’t be too careful!
Label the breaker for future reference. If you’re unsure which breaker controls your outlet, inspect it first. Safety comes first!
-
Install the Junction Box
Select a spot for your junction box, at least 12 inches (30 Cm) from the ground for easy access. Secure the box to the wall with proper screws and ensure it’s level. This will simplify your wiring later.
Use a 4×4 inch (10×10 Cm) metal or plastic box for your outlet. A metal box provides better grounding and can handle heat more effectively—a smart choice for a welder’s power supply.
-
Run the Cable
Run a 6-gauge (AWG) wire rated for at least 50 amps between the electrical panel and your junction box. If you’re unsure, check local codes; 6 AWG is commonly used for this. Leave enough slack on both ends for connections.
You might face challenges threading the cable through tight spaces. If the material is tough, consider using fish tape to guide it through. Proper positioning is vital for ensuring adequate wire length for your connections.
-
Connect the Wires
Strip about 1 inch (2.5 Cm) off the ends of each wire with wire strippers. Connect the hot wires (Usually Black or Red) to the breaker in the panel, securing the screws tightly. Connect the ground wire (Green or Bare) to the grounding terminal. Lastly, connect the neutral wire (Usually White), if required.
In a 240-volt circuit, you’ll typically find two hot wires and a ground. If your welder requires both legs, ensure both are connected to the breaker. Keep those connections tight; loose connections can lead to overheating!
For those considering a career in underwater welding, it’s important to understand how dangerous underwater welding can be.
-
Secure the Outlet
Insert the wire ends into the outlet and tighten them for a snug fit. Screw the outlet back into the junction box, aligning all mounting holes. A tight fit prevents wires from vibrating loose over time—I’ve seen plenty of issues arise from loose connections!
Use a cover plate to protect the outlet from dirt and damage. Ensure it’s installed correctly and doesn’t impede the outlet’s function. A well-sealed outlet is a safe outlet!
-
Restore Power
Finally, double-check all connections before flipping the circuit breaker back on. Take a moment to look everything over. Turn the breaker back on and test your connection with a voltage tester. You should see 220 volts (240 V), confirming everything is working as expected.
If something isn’t working right, don’t hesitate to go back and check your wiring. It’s better to find and fix an issue now than to deal with it later!
We covered the process of wiring a 220 outlet for a welder. We will now cover common issues encountered during wiring.

Common Issues When Wiring a 220 Outlet for a Welder
Wiring a 220 outlet can sometimes lead to problems. Here are some common issues and how to troubleshoot them.
| Issue | Possible Cause | Solution |
|---|---|---|
| No Power to Outlet | Breaker Tripped | Check the breaker; reset if necessary. Inspect for overloaded circuits. |
| Voltage Drop | Long Cable Run | Consider using a larger wire gauge or relocating the outlet closer to the power source. |
| Overheating Outlet | Loose Connections | Turn off power and check all wire connections. Tighten any loose screws. |
| Inconsistent Welder Performance | Incorrect Wiring | Double-check the wiring diagram. Ensure hot wires are connected to the correct terminals. |
| Frequent Circuit Breaker Trips | Exceeding Amperage Rating | Verify welder specs and adjust the breaker size accordingly. |
So far, we covered common problems encountered when wiring a 220 outlet for a welder. Let’s look at factors influencing this wiring.
Factors Affecting Wiring a 220 Outlet for a Welder
What factors influence wiring a 220 outlet for your welder?
-
Wire Gauge Requirements
Use a wire gauge that suits your welder’s amperage. For a 50 amp (42 A) welder, use at least 6 AWG (American Wire Gauge) to ensure safety and reduce heat build-up.
-
Breaker Ratings
Your circuit breaker must match the welder’s requirements. For a 240 volt (220 V) welder, use a double-pole breaker rated for 50 amps (42 A) or higher to prevent overload.
-
Distance From Power Source
Distance impacts voltage drop. For long runs, a larger wire gauge may be needed to maintain adequate voltage at the welder, especially over 100 feet (30 M).
-
Voltage Drop Considerations
A voltage drop over long distances can affect your welder’s performance. Aim for a drop of less than 3% for efficiency; this typically requires careful calculation based on amperage and distance. Proper welding techniques are crucial to avoid injuries during welding projects, and understanding how to prevent and manage ocular damage is essential. You can find effective methods to treat flash burn in eyes from welding.
-
Local Electrical Codes
Follow local codes to ensure safety and legality. These regulations may dictate wire sizes, breaker ratings, and outlet types, which are crucial for proper installation.
We covered factors affecting wiring a 220 outlet for a welder. We will now cover frequently asked questions.
Frequently Asked Questions (FAQs)
Now let us look at some questions I typically get asked about wiring for welders.
What Size Wire Do I Need for a 220v Outlet for a Welder?
The size wire you need for a 220v outlet for a welder is typically 6-gauge (AWG). This wire can handle up to 50 amps, helping to prevent overheating and potential hazards.
Can I Plug a Welder Into a Regular Outlet?
No, you can’t plug a welder into a regular outlet. A typical 120v outlet can’t provide the power most welders need. They usually operate on 220v or 240v with specific amperage requirements.
What Size Wire for a 50 Amp Welder Outlet?
You should use 6-gauge (AWG) wire for a 50 amp welder outlet. This wire effectively supports the load while minimizing voltage drop, ensuring optimal performance.
How Do You Wire a 220 Plug With 3 Wires?
To wire a 220 plug with 3 wires, connect the two hot wires to the terminals and the ground wire to the grounding terminal. One hot wire carries 120 volts, while the other provides the second 120 volts for 240 volts total.
How Do I Make a 220v Extension Cord for My Welder?
To make a 220v extension cord for your welder, use a 6-gauge (AWG) wire and a proper 220v plug. Ensure the length is within limits to avoid voltage drop for safety and efficiency. Keep it at a maximum of 25 feet (7.6 M) if possible. Proper grounding can prevent electrical hazards and ensure the smooth operation of your equipment, so it’s crucial to understand how to ground a welder.
Conclusion
That brings us to the end of our discussion on how to wire a 220 outlet for a welder. We covered what a 220 outlet is, the different types, the essential steps to wire it correctly, and factors to consider. Plus, we answered common questions to ensure you’re fully informed.
In short, wiring a 220 outlet for a welder involves following clear steps: select the right outlet, use a suitable breaker (Usually 30 Amps), connect your wires properly, and follow local codes. For safety, always double-check your connections and features, ensuring the right voltage. Wishing you success in your welding projects, and may you achieve the results you desire.
If you would like to delve deeper into the topic, visit What is Welding for more comprehensive information.
References
- Lincoln Electric. (2020). The Procedure Handbook of Arc Welding (15th ed.). Cleveland, OH: Lincoln Electric Company.
- Richardson, R. (2010). MIG Welding Guide. Cambridge, UK: Woodhead Publishing.
- Welding Institute (TWI): https://www.twi-global.com
- Parmar, R. S. (1997). Welding Engineering and Technology. New Delhi, India: Khanna Publishers.
Joe Carter is a retired welding professional with over 40 years of hands-on experience in the industry, spanning ship repair, structural welding, and even underwater projects. Joe is a master of MIG, TIG, and Stick welding. Passionate about mentoring the next generation of welders, Joe now shares his decades of expertise and practical insights to help others build rewarding careers in welding.
220 Outlet, 50 Amp Breaker, Electrical Safety, NEMA Outlets, Voltage Considerations, Voltage Drop, Welder, Welding, Welding Techniques, Wire Gauge, Wiring


