How to Read Welding Blueprints? Understanding Symbols, Steps, & Applications
Published on: June 19, 2025 | Last modified: March 4, 2025
By: Joe Carter
Blueprints are detailed drawings that show how to build or assemble things. They’re crucial in industries like construction and welding.
One question I get asked a lot is: how to read welding blueprints? It’s really important to follow these blueprints; they ensure you create accurate and safe welds. From my personal experience, skipping over minor details can lead to major mistakes, like misaligned parts that can’t be fixed easily.
In this guide on how to read welding blueprints, I’ll cover types of welding blueprints, prerequisites for reading them, steps involved, factors affecting comprehension, typical problems to watch out for, aftercare and inspection recommendations, advantages of understanding these blueprints, industry applications, and alternatives to reading them. You’ll get a clear view of how to master the skill of reading welding blueprints.
Contents
- How to Read Welding Blueprints?
- What Are Blueprints?
- Types Of Blueprints in Welding
- Prerequisites
- Steps to Read Welding Blueprints
- Factors Affecting Welding Blueprint Comprehension
- Common Welding Symbols and Their Meanings
- Typical Problems to Be Aware Of
- Why This is Worth It: Advantages
- Industry Applications for Welding Blueprints
- What Are the Alternatives to Reading Welding Blueprints?
- Frequently Asked Questions (FAQs)
- Conclusion
- References
How to Read Welding Blueprints?
Welding blueprints are detailed guides for welders. To read welding blueprints, focus on scale (1:1), symbols, and dimensions. Familiarity with common symbols simplifies tasks. It’s challenging yet essential for fabricating structures, components, or pipelines. Mastering the craft includes practical skills in actual welding processes, which is crucial for effective project execution. For practical advice, you can explore how to weld.
.
What Are Blueprints?
Blueprints are detailed drawings that guide construction and manufacturing. They show dimensions, materials, and the relationships between parts. Traditionally, these drawings were created on large paper using blue ink. Today, blueprints often use design software, providing precision of 0.1 millimeters (0.004 Inches).
A welding blueprint serves as a guide for creating structures. It’s like a roadmap for welders. I remember when I first started; understanding welding blueprints was a game-changer. Every line and symbol tells a story about assembling metal pieces.
In my work, I use blueprints to ensure accurate welds and fit for complex projects. They keep everything on track, especially for custom welding jobs. Learning to read welding blueprints helped me understand the symbols that represent welding process details.
Types Of Blueprints in Welding
What are the main types of blueprints you’ll encounter?
-
Architectural Blueprints
Architectural blueprints show the overall design of a project. Look for the layout and dimensions of structures. Focus on the scale, usually marked as 1:100 (1 Inch = 100 Inches), and study key details like doors and windows.
-
Engineering Blueprints
Engineering blueprints provide the technical specifications of a project. Identify components and their measurements. Tolerances (Like ±0.5 Mm) are crucial for assembly accuracy.
-
Fabrication Blueprints
Fabrication blueprints provide trade information on parts to be made. Check material specifications and welding processes. Notice the welding types (MIG or TIG)? They’re vital for the fabrication process.
-
Welding Symbols Blueprints
Welding symbols blueprints detail how to weld joints. Familiarize yourself with standard symbols, like the zigzag line for a groove weld. Each symbol has meanings and specifications to follow.
-
Assembly Blueprints
Assembly blueprints outline how parts fit together. Pay attention to assembly sequences and connections. You’ll also find information on fastening details, like bolt sizes and types.
You should now have a good understanding of the various welding blueprints and their applications. In the next part, we’ll discuss prerequisites.
Prerequisites
What do you need to get started?
- Welding Blueprint Samples: You need actual samples, like the Miller Electric welding blueprints. These provide practical examples for reference.
- Welding Symbols Guide: Get a guide such as the AWS A3.0 document. It’s crucial for understanding the specific welding symbols you’ll encounter.
- Annotator Software: Use software like Adobe Acrobat Reader for PDFs. It’ll help you zoom in on details and measure accurately.
- Drafting Scales: Invest in a 1:10 scale ruler. It’s essential for interpreting dimensions correctly, helping you translate scale drawings into real sizes.
That covers what you need to know before starting. Next, we will examine the steps to read welding blueprints.
Steps to Read Welding Blueprints
Here are the steps to read welding blueprints effectively. Follow them closely for the best results.
-
Understand the Blueprint Legend
Start by locating the legend on the blueprint. It explains the symbols used throughout the drawing. Familiarize yourself with common symbols, like line types and weld symbols. This is crucial; without understanding the legend, you can misinterpret vital information.
For example, a short, thick line usually indicates a weld, while dashed lines show hidden elements. Knowing these can save you confusion and time. Precise legends might use a numbering system, typically from 1 to 12, to distinguish different weld types, with each number corresponding to distinct parameters you must follow.
-
Interpret the Welding Symbols
Next, dive into the welding symbols section. Each symbol provides specific data about the weld type, size, and location. Pay attention to the arrow placement and size designation; they dictate the weld’s nature. Keep a welding symbol chart handy for quick reference—it makes understanding easier!
Besides their usual applications welding tools can also be surprisingly versatile by knowing how to use a welder to thaw pipes.
For instance, a filled triangle (V-weld) indicates a beveled joint—typically with a 45° angle. Missing that detail can lead to improperly executed welds, wasting time and materials. Use the chart until you’ve memorized common symbols.
-
Analyze the Dimensions and Scales
Next, focus on the dimensions and scales on the blueprint. Check the scale used—blueprints often use an engineering scale where 1 inch (In) represents a specific measurement, like 1 foot (Ft). These numbers show the actual size of the components, which is crucial for precise fabrication. Guessing dimensions is a recipe for disaster!
Always double-check the dimensions against the scale. For example, if the drawing indicates 10 cm but the scale shows centimeters, confusion can result. Use a ruler or scale tool to ensure accurate alignment; that’s key to effective welding. To achieve precision and avoid errors, it is equally important to pay attention to visibility aspects during welding, which you can enhance through better visibility techniques.
-
Identify the Material Specifications
Look out for the material specifications indicated on the drawing. These details usually include the material type, thickness, and specific grades—such as ASTM A36 for carbon steel. Knowing this helps you select the right filler materials, ensuring weld integrity and strength.
To ensure precise and accurate welding, it is crucial to be adept at reading weld symbols which convey essential instructions on the welding process.
For instance, using ER70S-6 with A36 steel provides a strong bond. Neglecting this could lead to poor welds and project delays. Watch for any specific treatments like heat treatments or galvanization, as these can impact your welding technique. It’s crucial to recognize the risks of welding galvanized steel to ensure safety and project success.
-
Review the Notes and Additional Instructions
Lastly, don’t skip the notes and additional instructions. These often hold valuable information about the project, like tolerances, schedule considerations, or special process requirements. Reviewing these can minimize misunderstandings and streamline your workflow.
Ensure you’re aligned with the notes; for example, they may specify pre-weld cleaning conditions or post-welding heat treatments. Ignoring these details could compromise your welding project, so stay alert!
We’ve wrapped up the steps to interpret welding blueprints here. Next up, we’ll look at the factors influencing blueprint understanding.
Factors Affecting Welding Blueprint Comprehension
What factors influence understanding welding blueprints? Let’s break it down.
-
Design Complexity
Blueprints vary in complexity. Intricate designs may include multiple components and details that require close attention to interpret accurately, sometimes needing a professional.
-
Welder’s Experience Level
A welder’s experience significantly impacts their ability to interpret blueprints. Newer welders might struggle with symbols and notations that seasoned professionals recognize instantly.
-
Blueprint Clarity
Clear blueprints make a significant difference. If the drawings are smudged or poorly scanned, understanding the specifications becomes much harder. High-quality blueprints are critical for effective reading.
-
Material Quality
The materials specified in the blueprint matter. High-quality materials may have specific welding requirements that affect how you read the instructions, impacting your welding fundamentals and safety protocols.
A thorough understanding of machine maintenance can enhance your safety practices, ensuring you know how to fix a welding machine.
-
Compliance With Standards and Codes
Different projects follow various codes. Understanding compliance standards, such as those from the American Welding Society (AWS), affects how you read and implement the specifications in the blueprints. Exploring the difference between welding and soldering can offer deeper insight into the nuances of these applications.
Common Welding Symbols and Their Meanings
Understanding welding symbols is key to interpreting blueprints correctly. Here’s a rundown of common symbols you’ll encounter.
| Welding Symbol | Type of Weld | Description | Common Applications |
|---|---|---|---|
| V | V-groove weld | Indicates a beveled joint; useful for thicker materials. | Structural steel connections |
| ∩ | Fillet weld | Joint created between two parts, provides strength. | Frame assembly |
| + | Spot weld | Used for joining sheet metal pieces at specific points. | Automotive body assembly |
| Zigzag Line | Groove weld | Shows a groove along the joint edges for a strong connection. | Pipelines and structural joints |
| Circle with Slash | Seam weld | Specifies a continuous weld along the joint. | Long joint assemblies |
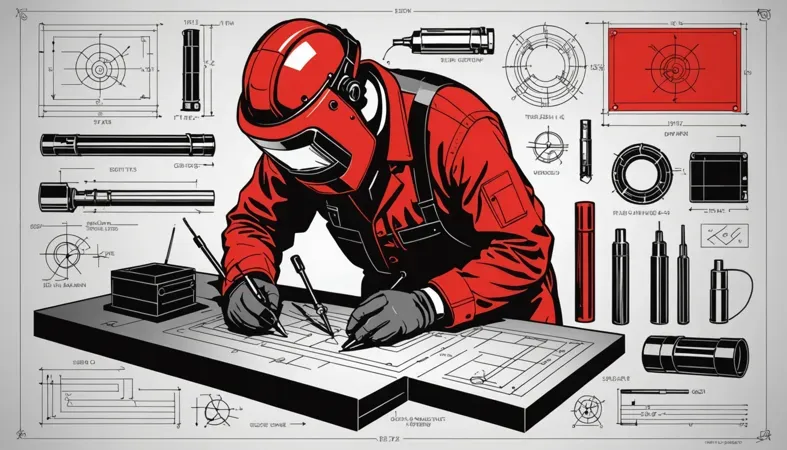
Familiarizing yourself with these symbols can accelerate your welding comprehension. Having a visual reference always helps during projects. I keep a welding symbols chart handy when I’m working; it makes interpretation smoother!
Typical Problems to Be Aware Of
Let’s examine common issues associated with blueprints.
-
Ambiguous Symbols
Blueprints often use unclear symbols. Identifying them can be tricky. Always double-check the legend and ask the project team for clarification.
-
Missing Information
Outlines that lack details can complicate your work. Watch for missing weld sizes or joint types in blueprints. Communicate with engineers to fill these gaps.
-
Inconsistent Measurements
Blueprints may contain varied dimensions. Measure them with a caliper and compare against specified tolerances. Use standard units (Metric and Imperial), and correct any discrepancies.
-
Misinterpretation Of Welding Requirements
Blueprints might not clearly express weld types. Watch for notation errors. Verify with experienced welders and follow prescribed procedures.
-
Failure to Follow Specifications
Results suffer when blueprints aren’t followed. Regularly review welding specifications during work. If issues arise, report them immediately to project managers to align with the original design. To effectively tackle such challenges, it’s vital to comprehend what you need to weld.
Why This is Worth It: Advantages
The main benefit of reading welding blueprints is clarity. I’ve used it to minimize mistakes and ensure accurate fabrication.
Moreover, mastering blueprints saves time, improves communication with teammates, and enhances the overall quality of projects. It helps you understand specifications, identify materials, and quickly recognize dimensions.
Industry Applications for Welding Blueprints
I’ve known people to use blueprints for intricate welding tasks. However, they have many uses, including:
- Pressure Vessel Design: These blueprints provide critical specifications (Specs) for fabricating pressure vessels. They’re essential for meeting safety standards, making them popular in the oil and gas industry.
- Pipe Welding: They outline joint types and welding techniques for pipes. Accurate reading ensures code compliance and structural integrity, which is crucial in construction projects.
- Automotive Frame Fabrication: Blueprints detail the assembly and welding required for car frames. This precise information reduces errors during fabrication, making it popular in manufacturing.
- Marine Applications: Welders use blueprints to construct and repair ship hulls. These designs ensure durability against water pressure, which is valuable in boat building.
What Are the Alternatives to Reading Welding Blueprints?
There are practical alternatives to reading welding blueprints. One option is using welding simulation software, such as SolidWorks or Autodesk Inventor. These tools let you visualize welding processes in 3D, making it easier to understand the end result.
Another choice is to attend hands-on training sessions or workshops. In-person experience with experts can clarify complex symbols rapidly, especially for beginners. There’s nothing like real-time feedback to improve your skills without poring over countless pages of welding drawings. For a structured approach, consider utilizing welding guidance resources available online.
Frequently Asked Questions (FAQs)
Now let us look at some common questions I typically get asked about welding.
How Do You Read a Welding Blueprint?
Reading a welding blueprint involves understanding symbols, dimensions, and notes. Each symbol represents a specific type of weld, and the dimensions show you where to apply them. Familiarity with these elements helps achieve accurate fabrication.
Is Reading Welding Blueprints Hard?
No, reading welding blueprints isn’t hard once you know the basics. Practice identifying symbols and understanding the layout can drastically improve your skills. With time and experience, confidence grows, making it easier to interpret complex designs.
What Are the Three Major Parts Of a Welding Blueprint?
The three major parts of a welding blueprint include the title block, welding symbols, and detailed drawings. The title block gives crucial project info, while welding symbols convey joint types and specifications. Detailed drawings illustrate the components and assembly methods visually. A foundational understanding of these elements can significantly aid in learning how to operate a welding machine.
What’s the Importance Of Welding Symbols?
Welding symbols are vital for clear communication between designers and welders. Each symbol specifies joint types, sizes, and welding processes. Accurate interpretation prevents errors, ensuring structural integrity and compliance with safety standards.
Can I Learn to Read Welding Blueprints Online?
Yes, you can learn to read welding blueprints online through various resources. Many websites and courses offer tutorials and examples to practice with. These platforms are accessible and often free or low-cost, allowing you to hone your skills at your own pace.
What Types Of Welding Processes Are Shown in Blueprints?
Welding blueprints often depict processes like MIG, TIG, and stick welding. Each process has unique characteristics, and blueprints indicate the suitable method for the project. Understanding these processes helps ensure proper technique during fabrication.
Conclusion
We are almost done. We covered the types of blueprints in welding, prerequisites, steps to read welding blueprints, factors affecting comprehension, typical problems, aftercare, advantages, applications, and alternatives. Knowing these items equips you to tackle any welding blueprint head-on.
Happy reading those welding blueprints. To put it simply, understanding how to read welding blueprints means grasping the symbols and steps we discussed, like matching weld types with areas and interpreting values correctly. By wrapping your head around these concepts, you’ll gain confidence in your welding projects and enhance your skills quickly.
For additional insights and resources on welding, visit What is Welding.
References
- American Society of Mechanical Engineers. (2019). ASME Section IX: Welding and Brazing Qualifications. New York, NY: ASME.
- Little, R. L. (1999). Welding and Welding Technology. New York, NY: McGraw-Hill Education.
Joe Carter is a retired welding professional with over 40 years of hands-on experience in the industry, spanning ship repair, structural welding, and even underwater projects. Joe is a master of MIG, TIG, and Stick welding. Passionate about mentoring the next generation of welders, Joe now shares his decades of expertise and practical insights to help others build rewarding careers in welding.
American Welding Society, Construction, Fabrication, Industry Applications, Pipe Welding, Reading Blueprints, Structural Integrity, Welding, Welding Blueprints, Welding Symbols, Welding Techniques
