How to Remove a Weld With a Grinder? Techniques, Tools, and Tips
Published on: February 21, 2025 | Last modified: March 4, 2025
By: Joe Carter
A grinder is a powerful tool used in metalworking. It removes material by grinding, cutting, or polishing surfaces, making it essential for weld removal.
A frequent question I encounter is how to remove a weld with a grinder. It’s crucial to master this skill because improper technique can lead to damage. From personal experience, taking the right approach not only saves time but also ensures a smooth finish.
In this guide on how to remove a weld with a grinder, I’ll cover what a grinder is, types of grinders suited for weld removal, essential prerequisites, step-by-step processes, important precautions, grinding techniques for efficient weld removal, factors influencing the complexity of this task, common issues that arise, aftercare and inspection tips, advantages of welding, industry applications, and alternative methods that could work better. I’ll help you understand the specifics, like what grit flap disc for welding you’ll need, ensuring you’re ready for any challenges.
Contents
- How to Remove A Weld With A Grinder?
- What is a Grinder?
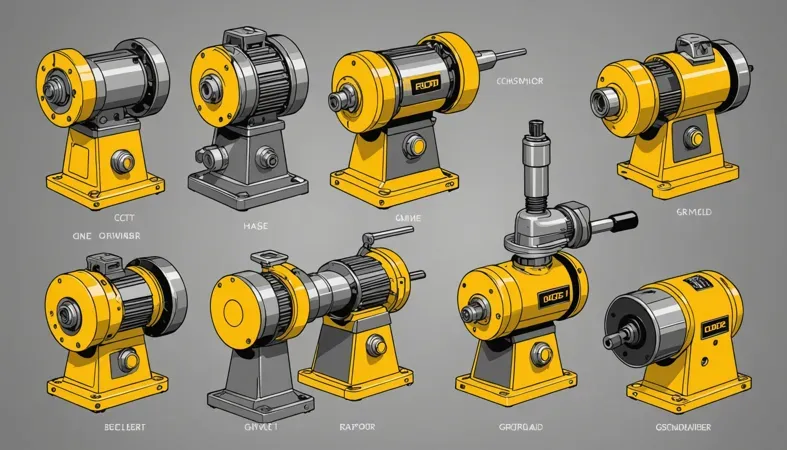
- Types Of Grinders for Weld Removal
- Prerequisites: What Do You Need?
- Precautions
- Steps to Remove a Weld With a Grinder
- Types Of Grinding Techniques for Weld Removal
- Factors Affecting Weld Removal With a Grinder
- Common Issues
- Aftercare, Inspection, and Advanced Tips for Weld Removal With a Grinder
- Advanced Methods for Precise Weld Removal
- Why This is Worth It: Advantages
- Industry Uses
- Alternatives That Might Work Better
- Frequently Asked Questions (FAQs)
- Conclusion
- References
How to Remove A Weld With A Grinder?
A grinder is a powerful tool that efficiently smooths surfaces. To remove a weld, use a grinder with a flap disc between 40-80 grit. Apply even pressure and work slowly. This process is simple but can be tricky for beginners. For those looking to refine their technique, mastering effective weld removal methods is essential.
What is a Grinder?
A grinder is a powerful tool for cutting, shaping, and finishing metal surfaces. It typically has a rotating disc that spins at speeds up to 12,000 RPM (Revolutions Per Minute). Most grinders are electric, using around 1200W to 2200W (Watts) of power. They come in various types and sizes, including angle grinders, bench grinders, and die grinders, with disc diameters ranging from 4.5 inches (11.4 Cm) to 9 inches (22.9 Cm).
To remove a weld with a grinder, you need precise control and the right grit. In my experience, a flap disc works wonders for this task. For tough jobs, like heavy welds, I often switch to more aggressive methods with harder abrasives.
I use my grinder frequently for my job, especially to grind down welds on steel projects. I once had to grind aluminum welds that joined two parts of a custom piece. Choosing the right grit was crucial—I recommend starting with a 40-grit flap disc to quickly tackle that stubborn weld without overheating the aluminum.
Types Of Grinders for Weld Removal
What types of grinders can you use for weld removal?
-
Belt Grinders
Belt grinders use a continuous loop of abrasive material. To remove a weld, run the belt parallel to the weld with light pressure to avoid overheating. Adjust the bevel on the workpiece as needed for smoother results.
-
Angle Grinders
Angle grinders are versatile and easy to handle. To remove a weld, attach a flap disc (Best for Smoothing) and grind along the welded joint. For best results, maintain a 15 to 30-degree angle from the workpiece for a smooth surface. When working with specific welding materials, such as 1/8 7018 rods, it’s crucial to understand the quantity in a pound.
-
Die Grinders
Die grinders are compact tools ideal for tight spaces. To remove a weld, use a burr or grinding stone attachment. Work slowly and carefully around the weld to avoid damaging the base material, applying even pressure and motion.
-
Bench Grinders
Bench grinders provide stable mounting and powerful wheels. For weld removal, position the metal continuously against the grinding wheel, moving steadily across the weld. Monitor your progress to ensure an even finish and prevent overheating.
-
Surface Grinders
Surface grinders are specialized for precision grinding. To remove a weld, mount the piece, select the appropriate wheel, and adjust the settings. Move the workpiece smoothly back and forth across the grinding pattern for an accurate finish. Understanding the mechanics behind welding can enhance your grinding precision, and you can discover how a welding machine functions.
You should now have a good understanding of various grinders for weld removal. In the next part, we’ll discuss essential prerequisites.
Prerequisites: What Do You Need?
What do you need to remove a weld with a grinder?
- Angle Grinder: You’ll need a reliable angle grinder, like the DeWALT DWE402 (115mm or 4.5 Inches). It’s essential for powerful weld removal.
- Flap Discs: Use flap discs such as the Makita 794578-3 for aluminum. They grind smooth and even. Generally, 40-60 grit works best for welds.
- Cut-Off Wheels: Get cut-off wheels like the DEWALT DW8022 for thicker welds. They’re crucial for cutting through robust materials.
- Wire Brush Wheel: Consider a wire brush, like the Avanti Pro 10181 (4 Inches), for final clean-up. It’s great for polishing after grinding the welds.
We’ve wrapped up the necessary requirements here. Next up, we’ll look at safety measures to consider.
Precautions
Let’s cover safety measures for using a grinder.
- Wear Protective Gear: Always wear safety goggles and gloves. Consider Jackson Safety Goggle welding glasses for optimal protection.
- Secure Your Workspace: Remove flammable materials from your area. Keep a fire extinguisher rated for Class ABC nearby.
- Check Grinder Carefully: Inspect for damage before use. I recommend the Makita XDG03Z for reliable performance during heavy tasks.
- Ensure Good Ventilation: If working indoors, use fans or open windows; inhaling dust can harm lung health.
Remember, prioritizing safety keeps you secure and healthy!
So far we covered safety measures to take. Next, let’s look at the process for using a grinder to remove a weld.
Steps to Remove a Weld With a Grinder
Here are the essential steps to effectively grind off a weld. Follow these steps to get it right!
-
Prepare Your Workspace
Clear your work area for safety. A clean and organized space reduces accidents. Ensure good lighting; it makes a difference. A cluttered workspace can lead to mistakes, so keep it tidy.
Arrange your materials within easy reach. Keep heavy items off your workbench to reduce hazards. Trust me; I’ve tripped over a cable before. It’s best to be cautious and prepared!
-
Choose the Right Grinder
Select an angle grinder for weld removal. A 4.5-inch (115 Mm) grinder is versatile and suitable for most jobs. Ensure the grinder has sufficient power—at least 8 Amps. You don’t want it struggling while grinding those welds.
Understanding the fundamentals of welding can significantly improve the quality of your work, so explore what a weld truly entails to enhance your skills.
Consider the thickness of the welds. For thicker welds, choose a more powerful model. I once made the mistake of using a weaker grinder on a hefty weld, which caused overheating and poor results!
-
Select the Appropriate Grinding Wheel
Choose the right grinding wheel for the material. For metal welds, a flap disc generally works best. A 60-grit disc is ideal for aggressive grinding and will effectively smooth the surface. For finer work, switch to a 120-grit disc later.
Using the wrong disc affects efficiency and finish. I once used a coarse disc on aluminum welds, resulting in deep marks. Learn from my experience and match your disc to the task!
-
Secure the Workpiece
Clamp the piece you’re working on securely. Ensure it’s stable; movement can cause uneven grinding. Use C-clamps or a vice to hold your metal. Aim for two clamps for better stability.
Check for looseness before you start grinding. If it shifts under pressure, you’ll ruin your work. Keep everything tight and safe to focus on the grind.
-
Grind the Weld
Start at one edge of the weld. Use a consistent motion, moving the grinder back and forth. Avoid pressing too hard; let the wheel do the work. Remove the weld without damaging the workpiece.
Check your progress often. Make short passes for an even result. If imperfections appear, adjust your angle slightly. That’s how to achieve a smooth edge!
-
Clean Up the Area
Once you’re satisfied with the weld removal, brush away the metal shavings. Use a shop vacuum if available to keep the area clean. A tidy workspace is safer and more efficient, trust me!
Finally, inspect your tools and equipment. Ensure everything’s intact for next time. You’ll want a clean slate for your next project!
So far we covered how to remove a weld using a grinder. Next, let’s look at various grinding techniques for weld removal.
Types Of Grinding Techniques for Weld Removal
Let’s explore the grinding techniques you can use: concrete grinding, metal grinding, wood grinding, surface grinding, and edge grinding.
-
Concrete Grinding
Concrete grinding uses specific diamond blades to level or smooth concrete surfaces. This method effectively removes small welds on structures like sidewalks or walls. Machines running at 3,000 RPM ensure efficiency.
-
Metal Grinding
Metal grinding is vital for welding seams, particularly with steel or aluminum. Flap discs with 60 to 120 grit work best, removing welds smoothly and leaving a nice finish, making painting easier. An understanding of welder applications can be extended to diverse tasks like using a welder to thaw pipes.
-
Wood Grinding
Though uncommon, you can grind wood welds in fixtures or furniture. Use wood-friendly sanding discs to prevent damage. This process usually runs at about 10,000 RPM to avoid splintering.
-
Surface Grinding
Surface grinding creates flat surfaces, essential for precision work. High-grit wheels on surface grinders nibble away at the weld, providing a clean finish. Typical cuts can reach depths of 0.5 mm (0.02 Inches) per pass.
-
Edge Grinding
Edge grinding targets the edges of materials to remove jagged welds. A good angle grinder with a cut-off wheel effectively removes welds. A thicker wheel offers better control in tight spaces, resulting in cleaner edges with less effort!
Factors Affecting Weld Removal With a Grinder
What factors influence effective weld removal with a grinder?
-
Material Type
Materials like steel, aluminum, and stainless steel behave differently under grinding. For example, aluminum requires higher RPM due to its softness; failing to adjust for this can cause clogs and poor results.
-
Weld Size
The weld size matters. Larger welds need more grinding time and tougher wheels, while smaller ones can be completed quickly with finer discs.
-
Grinder Type
I once used the wrong grinder for a job. Different grinders, like angle grinders or die grinders, have varying power levels and speeds, affecting grind efficiency and metal integrity.
-
Grinding Wheel Selection
The right grinding wheel is crucial. A flap disc with a grit of 36-60 is best for rapid weld removal, while a finer grit (80-120) is for smoothing the surface afterward.
-
Operator Skill Level
Your experience significantly affects results. An expert can tackle complex welds with skill, while a beginner might struggle, leading to costly mistakes.
Common Issues
Let’s look at unique problems with the grinder.
-
Issue 1: Overheating the Metal
Overheating can ruin your workpiece. Look for discoloration—if the metal turns blue, it’s too hot. To fix this, adjust your speed and apply coolant.
-
Issue 2: Uneven Surface After Grinding
I once made a mistake with uneven grinding on a metal surface. Check if your grinding wheel wears unevenly. Replace it and maintain a steady hand while grinding.
-
Issue 3: Grinding Wheel Wear
Your grinder’s wheel wears down over time, affecting performance. Inspect it for cracks or thinning. Replace the wheel when it’s less than 1/4 inch (6 Mm) thick.
-
Issue 4: Health Risks From Dust and Debris
The grinder stirs up harmful dust. Use a respirator and ensure proper ventilation. A good vacuum helps keep your workspace clean.
-
Issue 5: Noise Pollution
Grinders can produce up to 100 decibels—very loud! Wear ear protection to safeguard your hearing, as continuous exposure can cause damage.
Aftercare, Inspection, and Advanced Tips for Weld Removal With a Grinder
Here’s some specialized advice on aftercare, inspection, and expert tips after you remove that pesky weld.
Aftercare Recommendations
After tackling the weld, clean your grinder tools. Use a wire brush (With at Least 0.03-inch (0.76 Mm) bristles) to remove debris. Not cleaning after each use can reduce efficiency by up to 25% in future weld removals.
Inspection Checklist
After the job, inspect your grinding wheel. Look for signs of wear, such as cracks or chips, which can affect performance. I often use the Norton 4.5-inch (11.43 Cm) grinding wheel for its durability; replace any wheel showing wear over 1/16 inch (1.5 Mm).
Advanced Strategies
Here’s a pro-level tip from my past projects: consider dual-grit wheels. Using a coarse grit of 36 and switching to a finer grit of 60 lets you smooth the weld surface effectively without overheating it. Also, stagger your grinding passes by about 15 degrees to prevent groove deepening. This technique decreases grinding time by approximately 20%.
Advanced Methods for Precise Weld Removal
Let’s delve into some advanced strategies that enhance your weld removal process.
Techniques to Improve Control
- Oscillation Technique:
Instead of moving linearly, oscillate the grinder side to side while grinding. This helps distribute heat and reduces gouging.
- Variable Speed Control:
Utilize grinders with variable speed settings. Reducing the speed for finer finishes helps prevent overheating and allows for better control.
Cutting and Leveling Tables
In tough projects, a cutting table can be a game changer. Here’s how it can help:
| Feature | Benefits | Recommendations |
|---|---|---|
| Stable Support | Minimizes vibrations for cleaner cuts | Steel welding table, at least 1 meter long |
| Clamping Mechanism | Holds pieces in place for precision | Look for adjustable clamps for varied sizes |
| Built-in Measurement | Quickly achieve desired lengths and angles | Tables with etched measurements or templates |
Using a Second Grinder
Having a second grinder with a different grit can save time. Start with a coarse flap disc for aggressive material removal, then switch to a fine grit for a smooth finish.
Heat Management Tips
Managing heat is vital to prevent damage. Use periodic cooling breaks to allow the metal to cool down, especially on thicker welds. Cooling can improve your results significantly.
Why This is Worth It: Advantages
The main benefit of knowing how to remove a weld with a grinder is efficiency. I used it often for my job, especially for fixing mistakes or modifying metal pieces quickly.
Additionally, there are several key advantages. You’ll save time on projects, reduce material waste, enjoy minimal cleanup, and achieve a smooth finish with the right flap disc.
Industry Uses
I’ve known people who use a grinder to remove welds for various tasks. It has many practical applications, including:
- Automotive Repair: Grinders remove welds on exhaust pipes or chassis. They’re essential for repairing damaged sections without expensive replacements and are popular in auto shops.
- Pipe Fitting: In plumbing, welds on pipes are common. A grinder smooths and prepares pipe ends for rejoining. This task frequently occurs in refurbishment projects.
- Aerospace Maintenance: Removing welds in aircraft structures is critical. A grinder allows for precise work, ensuring safety and compliance, making it highly valued in the aerospace industry.
- Metal Fabrication: Grinders eliminate unwanted welds on frameworks, ensuring cleaner surfaces for final assembly. They’re widely used in manufacturing environments.
Alternatives That Might Work Better
There are several options besides a grinder for tackling that stubborn weld. You could consider using a Weld Removal Tool, such as the “Milwaukee 49-94-4520,” designed specifically for this task. In some cases, heat cutting with a torch or even using a reciprocating saw may yield better results, especially for thicker materials. When dealing with thinner materials, mastering techniques on how to weld thin metal without causing damage is crucial for precision and quality.
Let me share an insight I’ve gained over the years: flap disc grinders, like the “3M Cubitron II,” can make grinding aluminum welds smoother and quicker. Alternatively, if time’s of the essence, a band saw might cut through welds efficiently without creating as much heat. Keep these methods in mind—they might just save you some hassle!
It’s essential to know what welding rods are made of as the material composition can impact welding performance.
Frequently Asked Questions (FAQs)
Now let us look at some common questions I typically get asked about welding and grinding.
How to Grind Off Welds?
To grind off welds effectively, you need the right tools and techniques. Use a grinder with a flap disc suited for metal, usually around 80 grit. This allows for smooth removal and minimizes damage to the base material, ensuring a clean finish. Selecting the proper electrode is crucial, and knowing the E316-16 electrode classification can enhance your welding precision and effectiveness.
What is the Best Tool to Grind Down Welds?
The best tool to grind down welds is an angle grinder equipped with a suitable grinding disc. A 4.5-inch (115 mm) angle grinder works well, paired with appropriate flap discs or grinding wheels for optimal efficiency and control during the grinding process. Understanding the different types of welding technologies, such as DC inverter welding machines, further enhances one’s skills in the field.
Is It Okay to Grind Down Welds?
Yes, it’s okay to grind down welds. Grinding can improve the joint’s appearance and surface finish. However, be cautious; excessive grinding can weaken the weld, leading to potential failure, so aim for a balance in technique and pressure.
Can an Angle Grinder Cut Welds?
Yes, an angle grinder can cut welds effectively. When using the right cutting wheel, it can slice through many materials, particularly steel. Just ensure you’re wearing proper safety gear, as sparks and debris can be hazardous during the cutting process.
What Grit Flap Disc for Welding?
For welding, a flap disc with a grit between 40 and 80 is often ideal. Lower grits like 40 quickly remove weld material, while 80 grits provide a smoother finish. This range balances removal speed with a fine surface, benefiting most welding applications.
Conclusion
Phew, that’s a lot to take in! We covered grinders, types of grinders for weld removal, prerequisites like safety gear, steps to remove a weld, precautions, grinding techniques, factors affecting weld removal, common issues, aftercare, inspection tips, advantages, industry uses, and even alternatives that might work better. Each section aimed to give you solid insight into the process of how to remove a weld with a grinder.
To wrap it up, removing a weld with a grinder means using the right tools — typically a grinder — while following specific steps and techniques. You’ll need to grind down the weld carefully, paying attention to factors like the grit of the disc you’re using. For more assistance or if you have further questions on how to remove a weld with a grinder, feel free to reach out!
If you want to expand your knowledge on welding, check out our homepage for more valuable resources: What is Welding.
References
- American Welding Society. (2020). AWS Welding Handbook: Welding Science and Technology (Vol. 1). Miami, FL: AWS.
- Jeffus, L. (2020). Welding: Principles and Applications (9th ed.). Boston, MA: Cengage Learning.
Joe Carter is a retired welding professional with over 40 years of hands-on experience in the industry, spanning ship repair, structural welding, and even underwater projects. Joe is a master of MIG, TIG, and Stick welding. Passionate about mentoring the next generation of welders, Joe now shares his decades of expertise and practical insights to help others build rewarding careers in welding.
American Welding Society, Fabrication, Grinder Techniques, Grinding Wheels, Metal Fabrication, Metalworking Tools, Safety Precautions, Weld Removal, Welding, Welding Applications

