How to Weld a Straight Bead? Essential Techniques, Tools, and Tips
Published on: November 19, 2024 | Last modified: March 4, 2025
By: Joe Carter
A bead is the raised pattern left on the metal after welding. It forms from the melted filler material and is key to a strong joint.
A popular question I get is how to weld a straight bead. This skill’s crucial for strong, clean joints. From my experience, mastering this technique can save you time and effort later on.
In this guide, I’ll cover what a bead is, types of beads in welding, essential tools you need, steps for welding straight, precautions to take, welding techniques to use, factors influencing bead quality, common issues, and aftercare for a perfect bead. We’ll explore how to weld in a straight line while stressing the advantages and typical applications of this vital skill.
Contents
- How to Weld A Straight Bead?
- What is a Bead?
- Types Of Beads in Welding
- Essential Tools Before You Start (Prerequisites)
- Steps to Weld a Straight Bead
- Precautions
- Types Of Welding Techniques for Straight Beads
- Factors Influencing Straight Bead Welding
- Issues Unique to Beads
- Aftercare, Inspection, and Advanced Tips for Beads
- Advantages
- Typical Applications
- What Are Alternatives for Welding a Straight Bead?
- Frequently Asked Questions (FAQs)
- Conclusion
- References
How to Weld A Straight Bead?
A bead is the weld’s raised line. To weld a straight bead, use a consistent travel speed around 5 inches (12.7 Cm) per minute. Maintain a steady arc length of 1/8 inch (3.2 Mm). It’s tricky, but crucial for pipework and frame joints.

What is a Bead?
A ‘bead’ in welding is the continuous line of metal formed as a welder fuses pieces together. It’s important for both appearance and function. Typically, a bead’s height ranges from 1.5 mm to 3.0 mm (0.06 In to 0.12 In) and should cover the base material thoroughly to ensure strength. Beads can be classified, such as MIG (Metal Inert Gas) welding beads and TIG (Tungsten Inert Gas) welding beads, each affecting the final quality and size of the bead.
Now let’s discuss how to weld a straight bead. Achieving a straight bead requires focus and steady hands. From my experience, maintaining a consistent speed helps keep the weld bead’s width and height uniform. A small wobble can lead to an uneven bead, so practice is essential.
I once relied on precise bead control for a project when welding aluminum. The tips I learned about welding in a straight line made the difference between a subpar job and a professional finish. Proper technique enhances not just appearance but also the structural integrity of welded joints, especially in projects like automotive frames or metal furniture.
Types Of Beads in Welding
Stringer Beads
Stringer beads are long, linear welds with minimal side-to-side motion. To create a straight bead, maintain a consistent speed while moving the torch or electrode in a straight line. Keep your wrist steady and your angle even, aiming for about 10-15 degrees from vertical for proper penetration.
Weave Beads
Weave beads involve a side-to-side pattern, creating a wider weld. To weld a straight line, control the width while keeping the motion even. Establish your center line and move slightly left and right while progressing forward, ensuring the weave stays aligned with your desired path.
Stacked Beads
Stacked beads consist of multiple layers piled on top of each other. To maintain a straight weld, layer each bead precisely over the previous one. Start with a stringer bead, then make another pass along the same line, keeping the torch steady and watching for uniform overlap.
Curved Beads
Curved beads follow a non-linear path, useful for specific projects. To create a straight effect, practice curving consistently along a marked line. Position your hand on a straight edge while guiding the weld along the curvature, adjusting your pace to stay aligned.
Multi-layer Beads
Multi-layer beads stack multiple passes to build depth and strength. For a straight result, use precise control for each layer. Start with a stringer bead as the base, then add parallel layers, maintaining even spacing and angle between them.
We covered the different types of beads in welding here. Next, we will cover essential tools you need before starting.
Essential Tools Before You Start (Prerequisites)
What do you need to weld a straight bead?
- MIG Welder: You need a reliable MIG welder, like the Lincoln Electric Weld Pak 140HD. It’s crucial for providing consistent heat, which helps create a smooth bead.
- Welding Wire: Choose ER70S-6 welding wire, such as Hobart 0.030 in (0.76 Mm). This wire produces strong, clean welds, especially for mild steel.
- Welding Torch: You’ll need a quality welding torch, like the Tweco #1. A good torch ensures tight gas coverage, reducing oxidation in your weld.
- Extra Nozzle Tips: Keep a selection of nozzle tips available, such as the 0.035 in (0.89 Mm) tip. Different projects may require varying gas flow rates.
- Workpiece Material: Use a clean piece of mild steel, 1/8 in (3.2 Mm) thick, for practice. Using consistent material is essential for developing even beads.
We covered the essential tools and prerequisites for welding. Next, we will cover the steps to weld a straight bead.
Steps to Weld a Straight Bead
Here are the steps for achieving a perfect straight weld bead.
Set Your Speed
Start by adjusting your travel speed. A steady pace is crucial; aim for about 10-12 inches per minute (25-30 Cm/min). If it’s too slow, you’ll have too much material; if too fast, you won’t fuse well.
When I first learned, I went too fast and ended up with weak spots. Practice on scrap metal until you find the right speed. With each bead, observe how it looks; it reveals a lot!
Maintain a Consistent Angle
Hold the welding torch at a consistent 15-degree angle for even heat distribution. If you’re using a MIG welder, a slightly upright position works best.
Watch for changes in angle during the weld. I once tilted too much and ended up with an uneven line. Stick to that angle for better control of bead width!
Control Your Voltage
Check and adjust your voltage based on the material. For steel, 18-24 volts usually works well. Higher voltage creates a wider bead but can cause burn-through.
If you’re welding aluminum, keep the voltage lower, around 14-18 volts. I learned the hard way that too much voltage can ruin aluminum, so always monitor your settings for each job!
Maintain a Steady Hand
As you start your weld, focus on keeping your hand steady. Your hand speed directly affects the width and height of your bead. If your grip’s unsteady, your bead will be too!
I suggest using your other hand for support if needed. It made a huge difference in my control when I started. A solid foundation helps keep that bead straight!
Watch Your Bead Size
Create uniform bead sizes; a 1/8 inch (3.2 Mm) wide bead is ideal for most tasks. Beads that are too thick can lead to excess buildup; too thin, and you risk compromising strength.
Look back after a few passes. I found that adjusting the travel speed after a couple of beads helped maintain consistency. This way, you retain better control as you proceed!
You should now have a good understanding of how to prepare for welding, set up equipment, and execute a straight bead. In the next part, we’ll discuss important precautions to take during the welding process.
Precautions
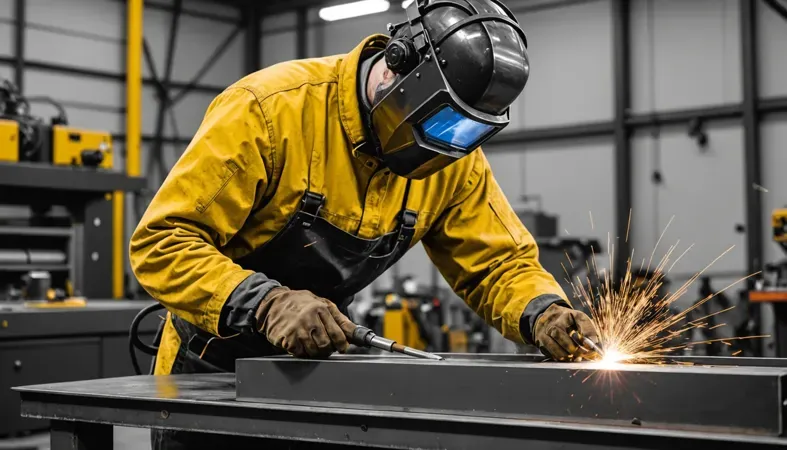
Let’s review essential safety measures for welding a straight bead.
- Protective Gear: Always wear a welding helmet and gloves to prevent burns and UV exposure. I recommend a 3M Speedglas welding helmet.
- Ventilation: Ensure proper airflow to avoid inhaling toxic fumes; use a work area with at least 6 air changes per hour.
- Fire Safety: Keep a fire extinguisher nearby, preferably one rated for Class B fires (E.g., A-B-C Type).
- Material Check: Inspect the metal for grease and rust to ensure proper adhesion. A wire brush can help clean more effectively.
Remember, safety precautions are vital for your well-being—don’t take them lightly; I care about your safety!
Types Of Welding Techniques for Straight Beads
Let’s cover various welding techniques: MIG, TIG, Stick, Flux-Cored Arc, and Submerged Arc welding.
MIG Welding Techniques
MIG (Metal Inert Gas) welding suits beginners. It uses a solid wire electrode and inert gas to produce a clean, strong bead with minimal spatter. You can achieve speeds of up to 20 inches per minute (51 Cm/min) while maintaining a straight line.
TIG Welding Techniques
TIG (Tungsten Inert Gas) welding offers more control, making it ideal for thin metal. You manually feed a filler rod while the tungsten electrode creates an arc. For a straight bead, maintain a consistent speed and angle, usually about 1/8 inch (3 Mm) from the workpiece. Many welders also explore the versatility of using a multi-process welder in different applications.
Stick Welding Techniques
Stick welding, or Shielded Metal Arc Welding (SMAW), uses a consumable electrode covered in flux, which protects the weld pool from contamination. It’s less precise, but with practice, you can achieve a straight bead—even on rusty or dirty surfaces.
Flux-cored Arc Welding Techniques
Flux-Cored Arc Welding is ideal for outdoor projects. It uses a hollow electrode filled with flux, shielding the weld from wind. Feed your wire at a speed of 1 to 2 inches per minute (2.5 To 5 Cm/min) while maintaining the angle for a straight weld. The level of illumination from a welding arc can directly affect how effectively these techniques are applied, and you can explore how bright a welding arc is during different conditions.
Submerged Arc Welding Techniques
Submerged Arc Welding (SAW) requires a continuous wire feed and relies on a layer of flux to shield the arc. It’s often used for thick metal plates and offers high deposition rates of about 20 pounds per hour (9 Kg/h). For a flawless straight bead, stability is key—keep your travel speed consistent. Understanding the composition of welding rods can enhance your knowledge of various welding techniques and materials. Whether constructing intricate designs or undertaking heavy-duty tasks, knowing what welding rods are made of is essential.
So far in this section we covered various welding techniques for straight beads. In the next section we will talk about factors influencing straight bead welding.
Factors Influencing Straight Bead Welding
What factors affect your ability to weld a clean line? Here are key considerations.
Welding Speed
Welding speed impacts bead consistency. If you go too fast, the weld may not fuse well; if too slow, you risk excessive heat, leading to warping.
Travel Angle
The angle of the torch affects the bead’s shape. A correct 10-15° angle helps achieve a smooth, even bead.
Heat Input
I once overloaded the heat input while welding aluminum, resulting in a messy bead. Keeping heat input between 300-450 °C (572-842 °F) ensures clearer, straighter beads.
Metal Thickness
Different metal thicknesses require adjustments in technique. For instance, a 1/8 inch (3.2 Mm) thick metal may need more power than a thinner strip for proper fusion.
Electrode Type
The type of electrode you choose greatly affects bead formation. For example, a tungsten electrode in TIG welding offers better control than a standard stick electrode.
You should now have a good understanding of the factors affecting straight bead welding. In the next part, we’ll discuss issues unique to beads.
Issues Unique to Beads
Here are common problems you might encounter with beads during welding.
Porosity in Beads
Bead defects from trapped gas appear as small holes. Inspect the bead closely; 100% visibility is crucial. Reduce moisture and adjust shield gas flow.
Inconsistent Width
Your bead may look uneven if you don’t move steadily. I once made the mistake of traveling too fast. Maintain a consistent pace for uniform bead width.
Undercut Formation
An undercut appears as a groove along the edge of the bead. Check your angle; steep angles cause this issue. Adjust your technique for improved metal flow.
Bead Overlap
Bead overlap happens when the next bead doesn’t fully melt the previous one. Look for shiny spots; they indicate a lack of fusion. Slow down to fix this!
So far we covered the unique issues related to beads. Next, let’s look at aftercare, inspection, and advanced care tips.
Aftercare, Inspection, and Advanced Tips for Beads
Here’s essential advice on caring for and inspecting your welds, plus expert tips for perfecting a straight bead.
Aftercare Tips
After welding, cool your bead slowly to avoid cracking; maintain it around 21°C (70°F) for at least an hour. Clean it with a wire brush for stainless steel or a flap disc grinder; aim for 100-120 grit for the best results. Using blanket insulation can help maintain a steady temperature.
Inspection
Start inspection by measuring bead width—aim for 3-4 mm (0.12-0.16 In) for optimal strength. Use weld quality gauges, like the Lincoln Electric MP210, to check for consistency. I use a caliper for precision; it helps catch discrepancies in the bead profile. Understanding these measurements is crucial for mastering the nuances of arc welding techniques.
Expert Tips
If you’re experienced, consider adjusting your welding speed. Keep it around 100-150 mm/min (4-6 In/min) for a cleaner bead. Fine-tune your arc length to 3-4 mm (0.12-0.16 In) based on your welder’s specifications for a flatter surface. Lastly, interpass temperature shouldn’t exceed 150°C (302°F) for optimum electron flow. Selecting the appropriate minimum shade for arc welding can enhance protection and visibility.
So far we covered aftercare, inspection, and advanced tips for beads. Next, let’s look at the advantages of using beads.
Advantages
Welding a straight bead is crucial for strong, neat joints. I relied on it for a project, and it made a big difference in the final appearance.
It also improves structural integrity, increases speed and efficiency, reduces cleanup time, and enhances your overall skills.
Typical Applications
People use welding to create a straight bead for various projects. Its applications include:
- Automotive Frames: Welders use straight beads to strengthen joints and ensure frame integrity. It’s common in manufacturing for better durability.
- Pipe Fabrication: Straight beads are crucial for welding pipes. They provide uniform strength and help prevent leaks, particularly in pressure piping.
- Metal Fencing: Welders often create fences with straight beads. This technique enhances appearance and offers strength, making it popular for residential and commercial installations.
- Aerospace Components: Precision is essential. Straight beads ensure components, like wing structures, are securely bonded. This method is widely adopted for its reliability in aviation.
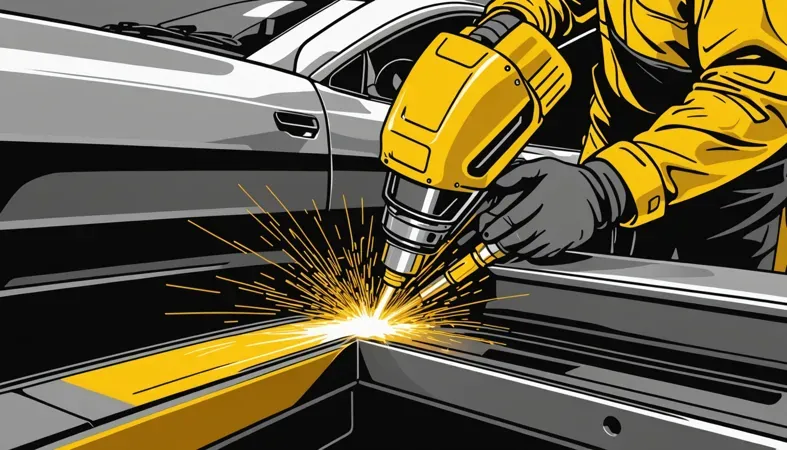
Ensure steady hand movement for a flawless straight bead.
What Are Alternatives for Welding a Straight Bead?
There are several methods to achieve a straight bead besides conventional welding practices. For instance, using a MIG welder with a spool gun, such as the Lincoln Electric Pro-MIG 180, can streamline the process. I’ve learned through hands-on experience that this setup can allow for greater control with aluminum or when welding in tighter spaces.
Another option is employing a laser welder like the TenSMART TRCW-1000. This method offers precision in thin materials and minimizes heat distortion. You might find these alternatives useful when working in diverse environments, improving your results without the hassle of mastering traditional techniques.
Frequently Asked Questions (FAQs)
Now let us look at some common questions I typically get asked.
How to Run a Good Weld Bead?
To run a good weld bead, follow proper technique and control your speed. A steady hand ensures an even distribution of heat and filler material, resulting in a stronger connection. Aim for a travel speed between 5-10 inches (12.7-25.4 Cm) per minute to maintain quality. Selecting and storing welding rods correctly is crucial, and you can find essential guidelines on how to store welding rods.
What is the Best Welder for Beginners?
The best welder for beginners is often a MIG (Metal Inert Gas) welder. A MIG welder is user-friendly, leading to fewer mistakes and faster learning. Many entry-level models cost around $200-$500, giving you a great mix of affordability and effectiveness. Choosing the right welding rod amperage can influence your welding quality, so consider checking the proper amps for a 3/32 welding rod.
What Materials Can I Weld?
You can weld various materials, including steel, aluminum, and stainless steel. Each material requires specific settings and techniques. For example, mild steel uses a temperature range of 1400°F to 1900°F (760°C to 1040°C) for optimal results. When considering welding equipment for personal projects, you may wonder what welding machine suits home use.
How Do I Prepare Metal for Welding?
Preparing metal for welding starts with cleaning the surface. Remove rust, grease, and paint. This ensures proper bonding during welding. Using a wire brush or grinder can be effective, improving weld penetration and overall strength, which are key aspects of welding fundamentals.
Exploring welding techniques often involves understanding different welding tools and methods, such as the inverter welder.
Is Welding Dangerous?
Yes, welding can be dangerous if safety precautions aren’t followed. Risks include burns, eye injuries, and toxic fumes. Always wear protective gear like gloves, helmets, and proper clothing to minimize these dangers. It is crucial to understand how dangerous welding can be by exploring welding’s potential hazards.
How Do I Prevent Warping When Welding?
To prevent warping when welding, control heat input and use a backstep welding technique. Maintaining a temperature below 350°F (177°C) minimizes stress on metals. Welding in short bursts helps keep the heat localized and reduces distortion.
Conclusion
I’m glad we could cover this together. We discussed how to weld a straight bead, what a bead is, different types of beads in welding, essential tools you need, various welding techniques, and important precautions. We also touched on factors affecting straight bead welding, unique issues related to beads, aftercare and inspection, plus advantages and typical applications.
Now, let’s wrap things up. To weld a straight bead, focus on using the right techniques and tools, like your welding machine, clamps, and filler rods. Remember, keeping a steady hand and a consistent speed (around 5-10 inches per minute or 12-25 cm/min) helps create an even weld. With practice, you’ll master how to weld a straight bead.
For further insights and tips on your welding journey, explore What is Welding.
References
- American Welding Society. (2020). AWS Welding Handbook: Welding Science and Technology (Vol. 1). Miami, FL: AWS.
- Lincoln Electric. (2020). The Procedure Handbook of Arc Welding (15th ed.). Cleveland, OH: Lincoln Electric Company.
Joe Carter is a retired welding professional with over 40 years of hands-on experience in the industry, spanning ship repair, structural welding, and even underwater projects. Joe is a master of MIG, TIG, and Stick welding. Passionate about mentoring the next generation of welders, Joe now shares his decades of expertise and practical insights to help others build rewarding careers in welding.
American Welding Society, MIG Welding, Straight Bead Welding, Welding, Welding Equipment, Welding Safety, Welding Techniques, Welding Tips, Welding Tools, Welding Wire
