How to Weld Floor Pans in a Car? Step-by-step Guide, Tips, Tools, and Safety!
Published on: June 12, 2025 | Last modified: March 4, 2025
By: Joe Carter
Floor pans are the flat metal sheets that form the base of a car’s interior. They offer structural support and help protect the car from moisture and debris.
I get asked quite often how to weld floor pans in a car. It’s crucial to get this right because weak or poorly installed floor pans can lead to dangerous situations on the road. Personal experience taught me, a solid floor pan can prevent rust and safety hazards.
In this article, we’ll cover what floor pans are, different types of floor pans, steps to properly weld floor pans in a car, factors influencing the welding process, and answer some frequently asked questions. We’ll also touch on related topics like how to install floor pans without welding, providing you with a comprehensive understanding of the process.
Contents
How to Weld Floor Pans in A Car?
Floor pans are the flat metal sections at the bottom of your car. To weld floor pans in a car, cut, fit, and weld using a MIG welder at 100-200 amps. It’s challenging, mostly for rust repair in classic cars.

What Are Floor Pans?
Floor pans are metal sheets that form the base of a car’s interior. They’re typically made from steel or aluminum, with a thickness of about 0.8 to 1.2 mm (0.031 To 0.047 Inches). These pans play vital roles in structural integrity and protection against the elements. A good floor pan can withstand forces up to 10,000 N (2248 Lbs) before deformation begins.
When welding floor pans in a car, it’s crucial to use the right equipment and techniques. I’ve found that a MIG welder provides the best penetration and a cleaner finish. It’s not just about the machine; it’s also about knowing the right settings—generally, a voltage of around 21 to 24 volts and a feed speed of 0.9 to 1.5 meters per minute yield solid welds.
In my experience, I installed new floor pans as part of a restoration project. Ensuring proper overlaps was crucial to avoid rust. I learned a lot about welding techniques during this process, especially in welding new floor pans effectively. Accurate bead placement can make the difference between a good repair and a future leak, which I always consider when welding floor pans.
Types Of Floor Pans
What types of floor pans might you encounter?
-
Front Floor Pans
These pans sit just under the front seats. To fix them, prepare the edges and use a MIG welder for a solid joint. Cut out the damaged area, clean the edges, and align the new pan before welding it in place.
-
Rear Floor Pans
Located under the rear seats, these pans often face rust. Use stencil templates for accurate cuts and lap weld the pieces together. Ensure the surfaces are clean, overlap the edges slightly, and use stitch welding for strength.
-
Transverse Floor Pans
These span across the vehicle horizontally, connecting both sides. Measure carefully, as mishandling can cause structural issues. Cut out the old pan and continuously tack weld along the seams for an even hold.
-
Flat Floor Pans
These create a flat surface under the car’s interior. To weld a flat floor pan, prepare both surfaces evenly for a better bond. Clean all rust, apply protective galvanizing primer, and use continuous welding for a sturdy application.
-
Heavy-duty Floor Pans
These are designed for vehicles that carry loads or are used off-road. Ensure you have adequate welder power for repairs. Cut a section large enough to accommodate a new heavy-duty piece, and use a flux-core welder for superior penetration in thick metal. Mastering different welding positions, including welding upside down, can enhance versatility in challenging repair situations.
We have now covered the different types of floor pans available. Next, we will examine the steps to weld floor pans in a car.
Welding Techniques for Floor Pans
Common Welding Methods
When you’re welding floor pans, two popular methods stand out: MIG and TIG. Let’s break ’em down:
- MIG Welding: This method uses a continuous wire feed. It’s quick and great for beginners. Ideal for thin metal like floor pans, it minimizes burn-through.
- TIG Welding: More precise, this method uses a non-consumable tungsten electrode. It requires more skill but offers a cleaner finish. Best for detailed work or thin sheet metal.
Choosing the Right Filler Material
Don’t forget, the filler rod or wire you select matters. For steel floor pans, ER70S-6 MIG wire or 4047 TIG filler works best. These options ensure strong, durable joints.

Steps to Weld Floor Pans in a Car
Now, we’ll cover the steps to weld in new floor pans safely and effectively.
-
Remove Damaged Floor Pans
Start by using a grinder or cutoff tool to remove the rusted or damaged sections of the floor pan. Expose clean metal for a solid weld by cutting back 1 inch (2.54 Cm) into the unaffected metal if possible. Don’t rush—precision is key for a strong fit.
After cutting, use a wire brush or sandblaster to eliminate any lingering rust or debris. This cleaning process can significantly improve weld quality. I find that using 120-grit sandpaper works best for this step. The cleaner the surface, the better the weld will adhere!
-
Prepare Surface for Welding
Your exposed area needs a thorough cleanup. Use a degreaser to remove oils or contaminants that can weaken your weld. Once cleaned, use a filler wire, if necessary, to fill in any gaps or holes that can cause weak points in the weld. I recommend a gap of no more than 1/8 inch (0.32 Cm) for a solid weld joint. Cameras can potentially suffer damage due to intense light exposure from welding; understanding the risks ensures better equipment safety during operations. welding light damage to cameras.
Next, use a grinder to bevel the edges of the new panels and existing structure to create a V groove. This method allows for better penetration in the weld, enhancing strength. I suggest testing different settings on your welder to see what gives you the best result for your materials.
For precise techniques, exploring how to cut welds can be beneficial when modifying structures.
-
Fit New Floor Pans Into Place
Place the new floor pan section into position, aligning it with the old area. You may need a helping hand—having someone hold it ensures accurate alignment. Make this initial fitting snug. Adjust as needed but keep it within the material thickness—typically around 18-20 gauge (0.047-0.0516 Inches, 1.19-1.31 Mm).
Clamp the panel down securely. I recommend using C-clamps or locking pliers; this keeps everything steady during welding. Ensure equal gaps along seams to prevent warping from heat. Take your time to get it perfect; the fit is essential for the strength and durability of the weld!
When joining metals that involve electronics, it’s important to follow proper techniques. Discover how to weld thermocouple wire effectively to ensure a reliable connection.
-
Weld Floor Pans Securely
Now it’s time to start welding! Begin with tack welds at four points, one at each corner of your panel. This secures the panel while allowing adjustments if needed. Use a medium heat setting for thin materials, usually around 160-200 amps. Be methodical—too fast or too slow can lead to issues!
Choosing the correct class of fire extinguisher is crucial for safety in welding environments; find guidance on appropriate fire safety measures.
After securing with tacks, continue welding along the seams in a continuous motion. I often recommend weaving the weld back and forth to spread the heat. Maintain a consistent speed—too much heat can cause distortion, while too little won’t penetrate properly. Aim for about 2-3 inches (5.08-7.62 Cm) per minute to keep it even!
-
Clean and Finish Welded Areas
Once the welding is complete, it’s time to clean up. Use a wire brush or flap disc on your grinder to remove slag or burn-throughs. Afterward, apply a rust-inhibiting primer to your welds to prevent future rust. This is vital for longevity—your goal is to avoid a repeat of the damage!
Finally, consider sealing the seams with silicone or seam sealer to guard against moisture. Wait 24 hours for the primer to cure before painting. A good finish not only looks better but also extends your repair’s life. Take pride in your work and enjoy driving your repaired car!
We’ve wrapped up the steps for welding floor pans in a car. Next up, we’ll look at factors influencing the welding process.
Factors Influencing the Welding Of Floor Pans
What factors impact your technique for fusing floor pans in a vehicle?
-
Material Thickness
Material thickness directly affects heat settings and weld penetration. For example, 18-gauge steel (1.2 Mm) needs less heat than 16-gauge (1.5 Mm). Excessive heat on thinner materials can warp or burn through the pan.
-
Welding Technique
The technique you use, such as MIG or TIG, also matters. MIG (Metal Inert Gas) is often preferred for floor pans due to its speed and ease of use compared to TIG. It allows for continuous welds, which are essential for strong bonds.
-
Preparation Quality
Clean and prepare all welding surfaces before starting. Rust, dirt, or old paint can compromise weld quality and create weak points. A clean surface ensures better adhesion and a stronger result.
-
Environmental Conditions
Humidity and temperature can affect the welding process. For instance, high humidity increases the risk of contamination during welding. Aim for a dry, clean environment for the best results.
-
Welder Skill Level
Your skill significantly influences weld quality. Experience matters—a seasoned welder has better control, resulting in cleaner, stronger welds. Beginners should practice on scrap steel before working on actual floor pans.
We’ve wrapped up the factors affecting floor pan welding. Next up, we’ll look at common questions and answers.
Frequently Asked Questions (FAQs)
Now let us look at some common questions I typically get asked about welding floor pans in cars.
What Gauge Steel is Used for Floor Pans?
For floor pans, the commonly used gauge steel is 18 gauge (1.2 Mm) or 20 gauge (0.9 Mm). This thickness provides the necessary strength while remaining manageable for welding. Thinner materials may not hold up under stress, while thicker options can be challenging to weld properly.
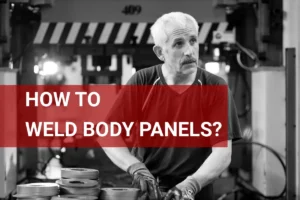
What Kind Of Welder is Best for Body Panels?
The best welder for body panels is usually a MIG welder. A MIG welder allows for easier control and less warping in thin materials. An output range of 30-140 amps is typically adequate for auto body work, providing versatility for various projects.
How Much Does It Cost to Replace a Floor Pan in a Car?
The cost to replace a floor pan can range from $300 to $1,500, depending on the car model and labor rates. OEM parts tend to be pricier, while aftermarket options can save you money, but may not match the quality.
Can You Weld Car Body Panels?
Yes, you can weld car body panels using techniques suited for thin materials. Spot welding or MIG welding is usually recommended to avoid warping. Proper settings and technique are essential for strong, clean welds on thinner metal.
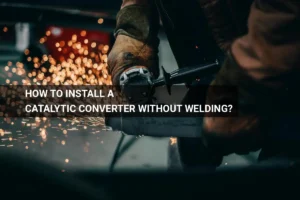
How to Install Floor Pans Without Welding?
To install floor pans without welding, you can use adhesive, rivets, or self-tapping screws. This method suits those who lack welding skills or equipment and is usually less labor-intensive. However, the bond’s strength might not be as reliable as welded joints.
How to Weld a Floor Pan Patch?
Welding a floor pan patch involves cutting out the damaged area and fitting the patch securely. Use a MIG welder or TIG welder with 18 gauge (1.2 Mm) steel for durability. Ensure you clean the edges for a better weld bead and avoid moisture during the process.
Conclusion
That brings us to the end of our discussion on how to weld floor pans in a car. We covered what floor pans are, different types, the steps to weld them, factors influencing the welding, and some frequently asked questions. Whether you’re working on a classic restoration or a repair, knowing these details is key.
In simple terms, welding floor pans involves cleaning, setting up your workspace, and using the right techniques. You’ll need tools like a MIG welder, clamps, and protective gear. Remember, it’s all about precision—getting that perfect fit ensures durability and safety for your car.
If you’ve found this guide helpful, consider exploring more insightful resources on What is Welding to enhance your understanding and skills.
Additional Reading
- American Society of Mechanical Engineers. (2019). ASME Section IX: Welding and Brazing Qualifications. New York, NY: ASME.
- Kou, S. (2003). Welding Metallurgy (2nd ed.). Hoboken, NJ: Wiley.
- Jeffus, L. (2020). Welding: Principles and Applications (9th ed.). Boston, MA: Cengage Learning.
Joe Carter is a retired welding professional with over 40 years of hands-on experience in the industry, spanning ship repair, structural welding, and even underwater projects. Joe is a master of MIG, TIG, and Stick welding. Passionate about mentoring the next generation of welders, Joe now shares his decades of expertise and practical insights to help others build rewarding careers in welding.
Automotive Restoration, Car Repair, Floor Pans, MIG Welding, Safety Tips, Spot Welding, Structural Integrity, TIG Welding, Welding