How to Weld Cutting Edge on Bucket? A Guide to Types, Steps, and Tips
Published on: April 21, 2025 | Last modified: March 4, 2025
By: Tyler James
A cutting edge refers to the leading part of a tool or implement that whittles or slices through material. It’s crucial for efficient operation, especially in construction and agriculture.
I’ve been asked many times about how to weld cutting edge on bucket. It’s important because a well-installed cutting edge improves bucket performance and extends its lifespan. Trust me, I’ve seen the difference firsthand—poor welding leads to frequent repairs and wasted time.
In this article, I’ll cover what a cutting edge is, the different types of cutting edges, the steps involved in welding them onto buckets, factors that affect the welding process, and address common questions. You’ll also learn how to grind welds in corners for a smoother finish. Get ready to enhance your welding skills!
Contents
How to Weld Cutting Edge on Bucket?
The cutting edge is the part that directly digs into materials. To weld a cutting edge on a bucket, clean the area, position the edge, and use a 7018 rod at 140-160A. It’s medium difficulty, mostly used in heavy machinery.
What is a Cutting Edge?
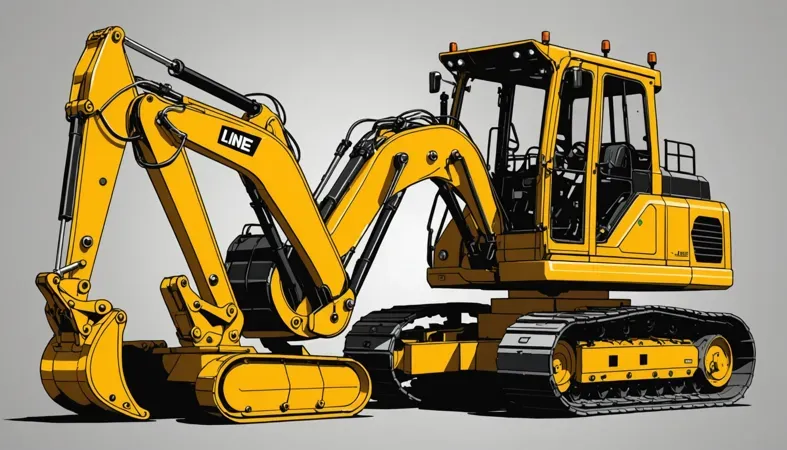
A cutting edge is the part of a tool designed for cutting. It’s often found on equipment like bucket loaders and excavators. Typically made of high-strength steel, its hardness ranges from 50 to 60 HRC (Rockwell Hardness Scale). This allows it to withstand significant wear while digging or lifting materials.
Now, how do you weld a cutting edge onto a bucket? When I did this, I first prepped the bucket surface meticulously. It’s all about creating a solid bond, right? I used a 3/16-inch (4.76 Mm) weld bead to ensure strength and longevity.
Let me share a quick story. I once had to weld in a tight space, and it was tricky. I used techniques for grinding corner welds, especially for hard-to-reach spots. You need precision here; a sharp corner can easily become a weak point. Knowing how to grind welds in corners is a game changer. It keeps your work strong and neat!
Types Of Cutting Edges
-
Steel Cutting Edges
Steel cutting edges are strong and durable, perfect for heavy-duty jobs. To attach one to a bucket, clean the area thoroughly. Use a MIG welder with 0.035 in (0.89 Mm) steel wire and weld around the edge for a strong bond. For those tackling complex projects, mastering techniques such as welding upside down can significantly enhance your skill set.
-
Composite Cutting Edges
Composite cutting edges combine materials for lightweight strength. Start by preheating the bucket edge to 250°F (121°C). Then, use a TIG welder to fuse the composite securely, keeping the heat even to prevent warping.
-
Wear-resistant Cutting Edges
Wear-resistant edges resist abrasion from rough terrain. To attach these, use a double pass with flux-cored welding. First, lay a bead on both sides to enhance strength and longevity.
-
Reversible Cutting Edges
Reversible edges maximize usage with two working sides. Clean the surface and align the edge properly. Then, use high-heat welding to secure it, ensuring both sides remain accessible for wear adjustments.
-
Performance Cutting Edges
Performance edges are designed for efficiency and precision. To install, use a certified adhesive for initial setup, then weld along the entire length with a consistent pattern to create a robust joint.
We have now covered various types of cutting edges. Next, we will examine the steps to weld a cutting edge on a bucket.
Steps to Weld a Cutting Edge on a Bucket
Here are the essential steps to weld a cutting edge onto a bucket. Follow them closely for the best results.
-
Prepare the Bucket Surface
Start by thoroughly cleaning the bucket’s surface. Remove rust, dirt, and old paint using a wire brush or grinder. I’d recommend using an angle grinder for its speed and efficiency; this typically takes about 15-20 minutes. Ensure you clean an area of at least 50 mm (2 Inches) around the welding zone for a strong bond.
Next, check for dents or weak spots that may compromise the weld. If you find any, repair them first, as a strong surface is crucial for a solid weld joint. Use a grinder to feather the edges for better fusion.
-
Select the Appropriate Welding Method
Choose a welding method suitable for your bucket material, usually mild steel. MIG (Metal Inert Gas) welding is commonly preferred for its ease of use and speed. If you opt for flux-cored welding, be prepared for more spatter, requiring cleanup afterward. For best results, set your amperage between 130 to 180 A, depending on the material thickness. It is critical to understand the challenges associated with welding zinc plated steel to avoid potential issues in your projects.
Using a gas shield provides a cleaner weld seam. Consider a gas mix of Argon and CO2 to reduce impurities in the weld. I recommend testing your settings on scrap metal first to ensure you have the right heat and wire speed. To perfect welding techniques, especially when working with pipes, explore strategies on how to weld pipe with 6010.
-
Align the Cutting Edge
Position the cutting edge on the bucket, ensuring it overhangs equally on both ends. Use clamps to secure the edge firmly; any movement while welding can weaken your weld. It’s a good idea to leave a gap of about 2-3 mm (0.08-0.12 Inches) between the edge and the bucket for a proper weld pool.
Check your alignment by measuring from several reference points to ensure consistency. Take your time—alignment mistakes can cause an uneven weld and premature wear on your cutting edge. Remember, accuracy leads to efficiency, saving time later.
-
Begin Welding the Cutting Edge
Start welding from one end of the cutting edge and work to the other. Use a weaving pattern to fill the joint for better penetration and a more uniform bead. For better control, keep your welding torch at a 15-degree angle. I’ve found that maintaining a steady speed of about 30 cm/min (12 Inches/min) yields the best results. Understanding different welding positions can significantly enhance your technique. Learn more about the 1F 2F 3F 4F positions.
Ensure your beads overlap slightly for a stronger connection. Don’t forget to pause every 15-20 cm (6-8 Inches) to allow cooling. Rushing this part can lead to overheating or warping the cutting edge, which is something you’ll want to avoid.
We have now covered the steps to weld a cutting edge on a bucket. Next, we will examine factors impacting welding.
Factors Affecting the Welding Of Cutting Edges
What factors influence attaching a cutting edge to a bucket?
-
Material Type
The cutting edge material significantly affects weldability. For example, high-carbon steel may require preheating, while mild steel is easier to weld.
-
Welding Technique
Your choice of technique—like TIG, MIG, or stick welding—impacts strength. MIG is popular for bucket edges, providing good penetration and less post-weld cleanup.
-
Heat Input
Monitor heat input closely. Excessive heat can warp the cutting edge, while insufficient heat may result in inadequate fusion.
-
Welding Position
Your position can change everything. Welding overhead or in tight spots increases difficulty and can lead to poor results.
-
Environmental Conditions
Wind and moisture affect arc stability. If it’s windy, consider using a windbreak, especially for TIG or MIG welding.
That covers the factors influencing welding of cutting edges. Let’s now take a look at the best practices for welding.

Best Practices for Welding Cutting Edges
To ensure long-lasting performance, follow these best practices when welding a cutting edge onto a bucket.
Pre-Welding Inspection
- Check alignment of cutting edge thoroughly. Misalignment can lead to increased wear.
- Inspect bucket and cutting edge for surface defects. Remove any contaminants like grease or oil.
- Measure for even overhang on both sides to ensure uniform wear.
Welding Techniques
- Use stringer beads for better penetration if the edge is thick.
- Implement a ‘stitch welding’ method to prevent overheating—alternate welding areas to allow cooling.
- Control your travel speed: typically, around 30 cm/min (12 in/min) provides optimal results.
Post-Weld Treatment
- After welding, allow the joint to air cool, avoiding water quenching which can lead to cracking.
- Clean the weld area to remove slag and contamination. This ensures a strong finish.
- Consider applying a protective coating like anti-rust paint to prevent corrosion.
Common Issues & Solutions
| Issue | Cause | Solution |
|---|---|---|
| Undercutting | Excessive heat input | Reduce amperage and travel speed. |
| Warping | Inconsistent heat application | Work in layers and allow adequate cooling time. |
| Poor penetration | Incorrect welding technique | Adjust angle and speed; use proper filler material. |
We have now covered best practices for welding cutting edges. Next, we will examine frequently asked questions.
Frequently Asked Questions (FAQs)
Now let us look at some common questions I typically get asked.
How Do I Grind Welds in Tight Corners?
To grind welds in tight corners, use a right-angle grinder with a narrow wheel. This allows you to access those hard-to-reach spots efficiently. Another option is a die grinder, which provides better maneuverability in constrained areas.
What is the Best Way to Cut Welds in Tight Spaces?
The best way to cut welds in tight spaces is by using a reciprocating saw or a compact grinder. These tools give you versatility and control, especially when space is limited. Use proper safety gear to avoid injuries, as sparks can fly. It’s essential to consider health risks associated with welding as certain practices in welding may lead to increased cancer risks.
What is the Proper Technique for Welding in Tight Spaces?
The proper technique for welding in tight spaces is to maintain a comfortable position and use tools designed for accessibility. This may include adjustable torch angles and smaller workpieces. For those interested in practical applications, exploring DIY welding projects can enhance your skills. Control and steadiness are crucial in avoiding poor welds.
Seam welding is one such technique that exemplifies precision and accessibility, and you can find more information on what seam welding involves.
How Can I Prevent Warping While Welding?
To prevent warping while welding, practice controlled heat application. Use lower settings on your welder and try to work in short bursts. Remember, excessive heat can cause significant warping in thin materials.
What Safety Precautions Should I Take When Welding?
Safety precautions when welding include wearing protective gear like gloves, a helmet, and fire-resistant clothing. Ensure adequate ventilation to avoid inhaling harmful fumes. It’s also wise to keep a fire extinguisher nearby for emergencies.
Conclusion
We’ve gone through a lot. Thank you for sticking it out with me on this journey. We covered what a cutting edge is, types of cutting edges, steps to weld a cutting edge on a bucket, factors affecting the welding, and even some frequently asked questions.
To wrap it up, welding a cutting edge on a bucket involves prepping the metal, fitting the edge, and using proper techniques to ensure a strong bond. Remember, you refine your skills by learning how to grind inside corner welds, grind corner welds, and tackle welding in tight spaces. Wishing you success in your welding projects as you create durable, efficient equipment.
For more expert welding insights and tips, feel free to visit What is Welding.
References
- American Welding Society. (2015). AWS D1.1/D1.1M: Structural Welding Code – Steel. Miami, FL: AWS.
- American Welding Society. (2020). AWS A3.0: Standard Welding Terms and Definitions. Miami, FL: AWS.
- Jeffus, L. (2020). Welding: Principles and Applications (9th ed.). Boston, MA: Cengage Learning.
Tyler is a passionate DIY welder and self-taught metal artist with years of hands-on experience transforming raw materials into functional and artistic creations. Specializing in MIG welding, Tyler crafts everything from custom furniture to outdoor sculptures, blending creativity with technical skill. Committed to making welding accessible, Tyler shares practical insights and project inspiration to help beginners and hobbyists confidently explore the world of metalworking.
American Welding Society, Bucket Maintenance, Construction, Construction Equipment, Cutting Edge, Metalworking, MIG Welding, Welding, Welding Techniques


