How to Stick Weld Vertical? A Guide to Techniques, Tips, and Troubleshooting
Published on: May 13, 2025 | Last modified: March 4, 2025
By: Joe Carter
Vertical welding is a technique where you weld in a vertical position rather than flat or horizontal. This method poses unique challenges due to gravity’s influence on molten metal.
People are frequently curious about how to stick weld vertical. It’s crucial to grasp this because vertical stick welding is common in various projects, from pipelines to framework. From my own experience, mastering this skill opens doors to better job opportunities and enhances overall welding proficiency.
In this guide on how to stick weld vertical, we’ll cover the basics of vertical welding, different types, prerequisites you’ll need, practical steps for vertical stick welding, essential precautions, common issues you might face, advantages of this technique, typical applications, and some advanced tips to improve your skills.
Contents
- How to Stick Weld Vertical?
- What is Vertical Welding?
- Types Of Vertical Welding
- Prerequisites: Things You’ll Need for Vertical Welding
- Steps to Stick Weld Vertically
- Precautions
- Factors Affecting Vertical Welding
- Common Issues and Troubleshooting
- Aftercare, Inspection, and Advanced Tips for Vertical Welding
- Tips for Mastering Vertical Stick Welding
- Advantages Of Vertical Welding
- Typical Applications Of Vertical Welding
- Other Options You Can Consider
- Frequently Asked Questions (FAQs)
- Conclusion
- Additional Reading
How to Stick Weld Vertical?
How to stick weld vertical involves vertical welding, which is welding in an upright position. To do this, maintain a 20-30 degree angle. Use E7018 rods for uphill welding. It’s more difficult but great for building frameworks.
What is Vertical Welding?
Vertical welding is a technique used to join metals in a vertical position. It’s often necessary in construction and fabrication projects where structures are tall. Vertical welding employs different positions, such as vertical up and vertical down, to ensure arc stability. This method requires precision and adaptability; according to the American Welding Society (AWS), it accounts for a significant percentage of welding applications, especially in heavy industries.
When tackling vertical stick welding, it’s crucial to understand the dynamics. Choose the right electrode; I often opt for 7018 or 6013 for their reliability. Controlling your travel speed and angle makes a significant difference when moving upward.
I’ve seen many use this technique for structural steel projects. For instance, constructing towers or bridges highlights how vertical stick welding can solve complex challenges. Adjusting your amps, especially for uphill applications, is key to preventing sagging welds. Mastering this technique opens numerous opportunities in steel framing and reinforced concrete work.
Types Of Vertical Welding
What are the types of vertical welding techniques?
-
Shielded Metal Arc Welding (SMAW)
SMAW, or stick welding, uses an electrode to create a shield around the weld. In a vertical position, keep a steady hand and angle the electrode about 10 to 15 degrees. To prevent sagging, maintain a travel speed of 4-6 inches per minute (10-15 Cm/min) while moving upward. Additionally, it is crucial to understand the risks involved in welding without protective gear, especially knowing how welding without a mask can lead to severe hazards.
-
Tungsten Inert Gas Welding (TIG)
TIG welding employs a non-consumable tungsten electrode to join metals. For vertical applications, combine short bursts of heat while moving upward. Create a small puddle, then move up about 1/8 inch (3 Mm) and pause briefly to allow it to solidify before continuing higher.
-
Gas Metal Arc Welding (GMAW)
GMAW, or MIG welding, uses a continuously fed wire and gas to protect the weld. For vertical work, set a lower voltage. Maintain a distance of 1/2 inch (1.3 Cm) from the joint and move in a steady zig-zag pattern to control heat input.
-
Flux-cored Arc Welding (FCAW)
This method uses a tubular wire filled with flux to join metals. In vertical welding, adjust the amperage based on material thickness. Minimize dripping by keeping the wire close to the work surface while moving at about 3-5 inches per minute (7-13 Cm/min).
-
Submerged Arc Welding (SAW)
SAW places a blanket of granular flux over the weld pool for protection. For vertical applications, adjust the feeding speed. Maintain a constant travel speed and keep the angle perpendicular to the work surface for optimal control.
We have now covered the different types of vertical welding. Next, we will examine the necessary prerequisites for vertical welding.
Prerequisites: Things You’ll Need for Vertical Welding
What do you need to get started?
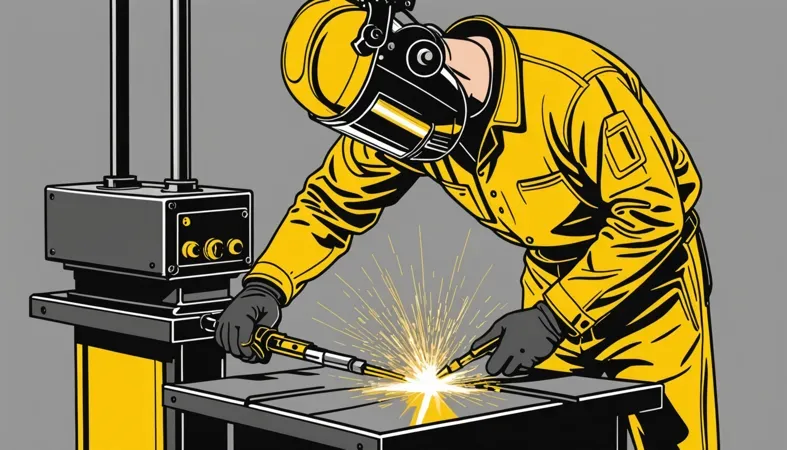
- Welding Machine: A reliable machine like Lincoln Electric’s AC/DC 225/125 is required. It provides sufficient power for vertical welding, typically 120-240 A (Amps).
- Electrodes: Use E7018 or E6013 rods. These rods excel in vertical positions, offering low spatter and good penetration.
- Welding Clamp: Get a heavy-duty clamp like the Hobart 1HP. This secures the workpiece, ensuring stability during vertical welds.
- Chipping Hammer: Choose a basic chipping hammer, such as the Forney 70550. It helps remove slag after welding, revealing your work’s beauty.
You should now have a good understanding of the essentials for vertical welding. In the next part, we’ll discuss the steps for vertical stick welding.
Steps to Stick Weld Vertically
Here are the steps for successful vertical stick welding. Follow them for better results.
-
Set Your Angle
Start by positioning the electrode holder at a 15 to 30-degree angle from vertical. This angle helps achieve an optimal bead. If you tilt it too much, you’ll get uneven welds. Maintain consistency in your angle for every pass; it makes a big difference.
When vertical welding, remember that a flatter angle gives you better control over the puddle. I recommend starting at a steeper angle and working your way down as you become comfortable with the melting rate. It’s a fail-safe method!
-
Adjust Your Settings
Next, set your welder to the correct amperage. For 1/8 inch (3.2 mm) electrode rods, use about 100-130 amps; for thinner rods, reduce it to 70-90 amps. An incorrect setting can lead to poor penetration or excessive spatter. Check the manufacturer’s recommendations for the specific rods in use. Argon gas plays a crucial role in shielding the weld area from atmospheric contamination, ensuring a cleaner and more precise weld, which you can understand further by exploring what argon is used for in welding.
A lower current generally makes it easier to control the puddle as you move upward. But be cautious! If the amps are too low, the weld won’t penetrate. Regularly testing your settings can help avoid mishaps later—trust me!
-
Start Welding
It’s time to start welding! Begin at the bottom and make quick, sweeping motions upward. Go steady but avoid lingering in one spot, or you’ll lose your pool. This motion helps create a strong fusion along the vertical joint.
I once slowed down too much and ended up with a sagging bead. It taught me to keep moving fluidly. Practice what you preach: speed and control will guide the molten metal better!
-
Identify the Right Rod
Choose a rod suited for vertical welding, like 6010 for fast freeze or 7018 for a smooth bead. The type makes a significant difference; 6013 may work but requires more clean-up. Understand each rod’s characteristics for touch and finish. Switching rods changes everything!
For overhead and vertical positions, 7018 excels with a softer arc and less spatter—definitely my go-to. Always check the condition of your rods; old rods can become brittle and fail to melt correctly. Porosity in welding can lead to weak joints and compromises in the integrity of the weld. It is essential to understand what causes porosity in welding to prevent such issues.
-
Control Your Speed
Keep a steady pace as you move upward. Your speed directly impacts weld quality. Move too fast, and the weld risks being weak; too slowly, and the metal may flow uncontrollably. A moving speed of 2 inches per minute (50 Mm Per Minute) works well for many vertical projects.
Experiment with your speed, but remember, rapid movement yields less distortion. Control is crucial! Record what works best for your setup; you’ll want to replicate it later.
-
Clean Your Bead
After welding, cool down the bead and clean it. Use a wire brush to remove slag and impurities. A clean bead looks better and strengthens the bond with the base metal. Proper cleaning can improve weld integrity, potentially adding years to its life.
After all, who doesn’t want a clean finish? A good tip is to scrub your weld while it’s still hot; it makes it easier. A clean bead can turn mediocre results into something impressive!
We have now covered the steps for vertical stick welding. Next, we will examine important precautions to take.
Precautions
Let’s cover essential precautions for stick welding vertically.
- Personal Protective Equipment: Always wear gloves, goggles, and a welding helmet like the Lincoln Electric VIKING for eye protection. This prevents severe injuries from sparks and UV rays.
- Ventilation: Ensure your workspace is well-ventilated or use a fan like the Lasko Wind Machine. This reduces the risk of harmful fumes affecting your health.
- Fire Safety: Keep a fire extinguisher rated for electrical fires nearby, such as the Kidde Pro 210. This protects against accidental ignitions that can occur during welding.
- Work Surface Stability: Ensure your workpiece is securely anchored. Loose materials can shift and cause accidents while you weld.
Your safety matters! I prioritize precautions every time I weld.
So far we covered safety measures in welding. Next, let’s look at the elements influencing vertical welding techniques.
Factors Affecting Vertical Welding
What factors impact your technique when you’re learning to weld vertically?
-
Welding Position
Your position plays a big role in how you weld. If you’re welding upward, keep your body steady and face the target to maintain control.
-
Electrode Angle
The electrode angle, typically set at 10 to 20 degrees, affects the weld. Too steep, and you’ll get uneven beads and defects.
-
Travel Speed
I once moved too quickly, creating a weak weld. Keep your speed consistent at 5 to 10 inches per minute (12.7 To 25.4 Cm/min) to ensure good heat input.
-
Heat Input
Heat input should balance between too hot and too cool. Aim for 100 to 130 amps for a standard 1/8-inch (3.2 Mm) electrode to prevent warping.
-
Base Material Preparation
Preparation is crucial! Clean metal surfaces ensure a solid bond. Remove rust or paint, which can compromise weld quality.
Common Issues and Troubleshooting
Let’s examine specific technical issues in vertical welding.
-
Inconsistent Bead Appearance
In vertical welding, you may notice uneven bead sizes, which could indicate improper speed. Check your travel speed at about 4-10 inches per minute (10-25 Cm/min). Adjust and practice for uniformity.
-
Poor Penetration
In vertical welding, insufficient arc length often leads to poor penetration. I once made the mistake of keeping it too long, resulting in weak bonds. Maintain the arc length at 1/8 inch (3.2 Mm) for better results.
-
Excessive Spatter
This spatter issue in vertical welding stems from high amperage. Reduce the amperage by 10-20% and maintain a steady technique to help clean up the workspace.
-
Overheating Of Material
In vertical welding, overheating can warp the material. Use a whisking motion and slow down if you notice glowing edges to prevent distortion.
-
Difficulty Maintaining Arc Stability
If you’re struggling to maintain the arc in vertical welding, focus on keeping a steady hand. Hold the electrode at a consistent angle of 15° for stability and better control.
Aftercare, Inspection, and Advanced Tips for Vertical Welding
Here’s key information on aftercare, inspection, and advanced tips for vertical welding.
Aftercare Tips
After vertical welding, cool the weld area immediately with compressed air (or a fan) to reduce heat distortion. Use an infrared thermometer to check that the fused materials are below 149°C (300°F) before handling. Finally, apply a spatter removal product, like Weld-Aid, to keep your worksite clean and ensure best practices for welding processes are followed.
Inspection
Inspect your vertical welds for undercutting, especially at the edges, to prevent weakness. Use a digital caliper (Micrometer) to measure the groove for evenness, aiming for a consistency of 1-2 mm (0.04-0.08 In). I use the INSPOR visual inspection kit to quickly assess weld quality.
Expert Tips
To maintain a 45-degree angle while dragging and avoid slag buildup, control your speed. For improved penetration, move upwards at 0.2 m/min (8 In/min) and adjust your amperage based on the material thickness—typically 80-90 A for 3.2 mm (1/8 in) stick rods. Regularly clean your rod with a wire brush to enhance arc stability.
Tips for Mastering Vertical Stick Welding
Here are some advanced strategies to enhance your vertical stick welding skills.
| Tip | Description | Benefit |
|---|---|---|
| Use a Filler Material | When welding thick sections, add a filler material like a 7018 rod. This helps maintain a strong bond. | Improves the overall strength of the weld joint. |
| Practice Different Patterns | Experiment with zigzag, whip, or circular motions to find what works best for you in vertical welding. | Enhances bead appearance and allows better control through varied heat application. |
| Watch for Stringers | As you weld, focus on minimizing stringers (excess material) that can form at the weld’s edge. | Ensures a smoother finish and reduces the need for extra cleanup. |
| Keep Your Workspace Organized | Maintain a clean and clutter-free workspace to avoid distractions and improve safety. | Increases efficiency and focus during your welding process. |
| Evaluate Your Technique Regularly | Periodically film yourself welding to critique your technique and see areas for improvement. | Allows you to identify mistakes and refine your approach over time. |
Advantages Of Vertical Welding
The main benefit of learning to stick-weld vertically is its versatility. I’ve seen people use it for various projects, especially in construction and repair jobs.
Additionally, it improves your skill set, enhances your ability to work in tight spaces, and provides better penetration in thick materials. Moreover, mastering vertical welding helps you effectively tackle both uphill and downhill techniques. It is crucial to select the appropriate wire size for a welder to ensure optimal performance and precision in your work, which can be further understood by exploring what size wire for a welder.
Typical Applications Of Vertical Welding
I’ve used vertical welding for various metal projects, but it has several applications, such as:
- Pipe Fitting: Stick welding pipes in vertical positions ensures strong joints. This method is popular on construction sites where pipes need quick and efficient installation.
- Structural Steel Assembly: Vertical welds join steel beams or columns in buildings. They’re valued for their strength and reliability.
- Metal Fabrication: You’ll find vertical stick welding in fabricating parts like frames or brackets. It’s favored for its versatility and ability to handle different metal thicknesses.
- Heavy Equipment Repairs: This technique is ideal for fixing large machinery in construction. It’s popular because it easily reaches hard-to-access areas while ensuring robust welds.
Other Options You Can Consider
There are alternatives to vertical stick welding that you might find useful. For example, MIG welding can provide similar results while reducing cleanup time. Products like the Lincoln Electric Power MIG 210 MP offer great versatility for different positions, such as vertical welding. Ensuring you have the right power source is essential when considering what size generator is needed for a welder used for various applications and environments, so make sure your setup is adequate for your equipment.
Another option is using flux-cored welding, like the Lincoln Electric K2278-1, which excels in situations with wind or outdoor environments. Over time, I’ve observed that some welders prefer these methods for their speed and ease, especially when tackling large projects. It’s fascinating to explore how to create a welding machine purely from everyday items, such as understanding making one with a 12v battery.
Frequently Asked Questions (FAQs)
Here are some questions I typically get asked about vertical welding.
Do You Stick Weld Vertically Up or Down?
Yes, you can stick weld vertically up or down. Vertically up is often preferred for stronger welds, while vertically down is easier but may produce weaker joins. Choose based on your project and comfort level.
How to Weld Vertical Up for Beginners?
To weld vertical up as a beginner, start with a lower amperage for better control. Use a short arc length plus a steady movement. This technique helps prevent excess weld pooling at the base.
What is the Best Welding Rod for Vertical Up?
The best welding rod for vertical up is usually an E7018. This rod offers a stable arc, low spatter, and excellent penetration. It’s also your go-to for all-position welding, making it ideal for various tasks.
How Do You Prevent Slag From Hanging When Stick Welding Vertically?
You can prevent slag from hanging by using a medium travel speed. Keep a tight arc and hold the electrode at a slight angle. This helps the molten metal flow smoothly and keeps slag manageable.
What Safety Gear Do I Need for Vertical Welding?
For vertical welding, you’ll need a welding helmet with a suitable shade, gloves, and protective clothing. A fire-resistant jacket and safety boots are also recommended to keep you safe during the process.
What Position Should the Workpiece Be in for Vertical Welding?
For vertical welding, position the workpiece at a comfortable height and angle. Ideally, it should be at eye level. This position allows you to see the joint clearly and maintain a stable posture while welding.
Conclusion
We are almost done. We covered what vertical welding is, the types of vertical welding, prerequisites needed for vertical welding, and the steps to stick weld vertically. We also discussed precautions, various welding techniques, factors affecting vertical welding, troubleshooting tips, aftercare practices, and typical applications of vertical welding.
To wrap things up, learning how to stick weld vertically can be straightforward. Focus on using proper techniques and equipment, like the right rod size (such as 3/32 Inch or 2.5 Mm). Simply put, it’s about maintaining a steady angle, staying consistent, and adjusting your technique based on materials. Now that you’ve got a solid foundation, you’re ready to tackle your next vertical welding project confidently.
For additional welding insights and techniques, feel free to explore What is Welding.
Additional Reading
- Miller Electric. (2021). Welding Safety: A Complete Guide. Appleton, WI: Miller Electric Manufacturing Company.
- Occupational Safety and Health Administration (OSHA): Welding, Cutting, and Brazing: https://www.osha.gov/welding-cutting-brazing
Joe Carter is a retired welding professional with over 40 years of hands-on experience in the industry, spanning ship repair, structural welding, and even underwater projects. Joe is a master of MIG, TIG, and Stick welding. Passionate about mentoring the next generation of welders, Joe now shares his decades of expertise and practical insights to help others build rewarding careers in welding.
American Welding Society, Metal Fabrication, MIG Welding, Stick Welding, Vertical Welding, Welding, Welding Applications, Welding Safety, Welding Techniques, Welding Tips

