How to Remove Welds? Methods, Precautions, and Tips
Published on: June 9, 2025 | Last modified: March 4, 2025
By: Joe Carter
Removing welds means getting rid of unwanted welding joins. It’s a way to separate pieces of metal that were joined together.
A frequent question I encounter is how to remove welds. It’s important to know the best methods because improper techniques can damage materials or even cause safety issues. From my experience, I’ve seen weld removal go wrong when people rush or use the wrong tools.
In this guide on how to remove welds, we’ll cover types of weld removal methods, essential prerequisites before starting, steps to effectively remove welds, necessary precautions, factors affecting techniques, troubleshooting common issues, aftercare tips, and the typical uses of weld removal. You’ll learn everything you need to work confidently, whether you want to know how to remove a tack weld or undo a weld on a project.
Contents
- How to Remove Welds?
- What is Remove Welds?
- Types Of Weld Removal Methods
- Essential Prerequisites to Get Started
- Tools for Weld Removal
- Steps to Remove Welds
- Precautions
- Factors Affecting Weld Removal Techniques
- Common Issues and Troubleshooting
- Why This is Worth It: Advantages
- Typical Uses Of Removing Welds
- Exploring Alternatives
- Frequently Asked Questions (FAQs)
- Conclusion
- References
How to Remove Welds?
To ‘remove welds’ means to detach welded pieces without damage. You use a grinder or torch, achieve a temperature above 1800°F (982°C). This takes practice; typical applications include bike repairs and metal fabrication.
Welding projects can vary significantly in cost depending on complexity and materials used, so it’s essential to understand how much welding costs.
What is Remove Welds?
Remove welds refers to dismantling welded joints. Welding connects parts using heat to create a fusion. Sometimes, you’ll need to cut these connections for repairs or modifications. In industrial applications, about 25% of welded components require removal during their service life.
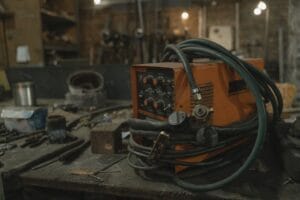
Now, let’s discuss how to remove welds. Using tools like grinders or plasma cutters is common. In my experience, a powered angle grinder efficiently removes welds without damaging the base metal.
I’ve used it for removing tack welds before. I remember working on a motorcycle frame where it was crucial to undo the welds for a complete overhaul. Knowing how to remove welded metal properly can save time and prevent errors later.
Types Of Weld Removal Methods
What are the methods to remove welds?
-
Mechanical Removal Methods
This method uses physical force to break or grind off welds. Generally, you’d use tools like chisels or hammers. Start by securely holding your workpiece, then gradually knock away the welding material to avoid damaging the base metal. If you are preparing your workspace, ensure your welder’s power supply is correctly connected by knowing how to wire a 220 outlet for a welder.
-
Chemical Removal Agents
Chemicals can safely dissolve certain welds. For this approach, typically apply a weld remover solution. Mix the chemical as specified, coat the weld area, and let it sit according to the product instructions. Rinse and clean the surface afterward. In welding, understanding different energy sources is crucial and you can explore more about secondary power in welding.
-
Thermal Cleaning Processes
This involves using high heat to melt away the weld. You’ll need a torch set to a suitable heat level. Heat the weld until it’s molten, then scrape off the excess with a metal spatula before it cools. When working on projects like these, it is crucial to understand the limitations of welding on components such as how many times you can weld an alloy wheel.
-
Grinding Techniques
Grinding removes welds by wearing them away with an abrasive tool. Use a flap disc or grinder. Hold the tool at a 15-degree angle to the weld and smoothly move it across until the weld is flush with the base material. Choosing the appropriate welding rod is crucial for effective welds and understanding the differences between 6010 and 6011 rods can enhance your welding outcomes significantly.
-
Cutting Tools
Specialized cutting tools can effectively slice through weld lines. To cut a weld, select a suitable cutting torch or saw. Position the tool at the edge of the weld and apply steady pressure to cut through, ensuring alignment with any surrounding materials.
So far we covered the different methods for removing welds. Next, let’s look at the important prerequisites needed to begin.
Essential Prerequisites to Get Started
What do you need to remove welds?
- Angle Grinder: You’ll need an angle grinder, such as the DEWALT DWE402 (4.5 In / 115 Mm). It’s essential for quickly removing welds from metal surfaces.
- Weld Removal Tool: You’ll need a specialized tool like the OTC 6598 weld removal tool. It helps grind down and eliminate excessive weld material without damaging the base metal.
- Chisel Set: You’ll need a chisel set, such as the TEKTON 30403. They’re useful for getting under and lifting welds, making the process easier and reducing damage.
- Smoothing Disc: You’ll need a smoothing disc compatible with your grinder, like a 120-grit flap disc (5 in / 125 Mm). It’s necessary to smooth the surface after weld removal for a good finish.
You should now have a good understanding of the necessary prerequisites to begin. In the next part, we’ll discuss how to remove welds.
Tools for Weld Removal
When you’re ready to tackle weld removal, you need the right tools. Here’s a quick rundown:
- Angle Grinder: Ideal for grinding down welds. A 4.5-inch (115 mm) grinder works well.
- Chisel and Hammer: Great for manual removal, especially on softer metals.
- Plasma Cutter: Quick and precise, perfect for thick materials.
- Cutting Torch: Uses flames to cut through steel, but it requires gas tanks.
- Weld Removal Tools: Specially designed bits can simplify the process.
Choosing the Right Tool
Consider the material and thickness of the weld. For thick steel, a plasma cutter is faster. If you’re on thin metal, an angle grinder may be your best bet.
Maintaining Your Tools
Keep your tools sharp and clean. A dull tool can make the job harder and extend removal time.

Steps to Remove Welds
Now, we’ll cover the steps to effectively remove welds from various materials.
-
Heat the Weld Area
Start by heating the welded joint. Use a propane torch or an acetylene torch to heat the weld gradually. Maintain the temperature around 400°C (752°F) for optimal flexibility of the metal. To learn more about this process, refer to various welding techniques that can enhance your skills. Too much heat may warp the surrounding area, so be cautious and keep the flame moving.
Choosing the right welding equipment is essential for achieving precision and quality in your projects, so learning about the best welding machine for home use can greatly enhance your results.
This method softens the weld pool, making it easier to manipulate. Focus on maintaining a consistent heating pattern: less heat in the middle and more on the edges works best.
-
Grind Down the Weld
Next, use an angle grinder fitted with a grinding disc to grind away the weld. Apply steady pressure and grind at an angle for quicker results. Grind past the heat-affected zone, which is typically a few millimeters deep. Those interested in mastering techniques can explore how to forge weld to enhance their skills.
Grind slowly to avoid removing too much base metal. Keeping your grinder steady will help maintain control. A quicker job may seem tempting, but precision is key for a clean finish.
-
Chisel the Welds
If any weld material remains, use a chisel to carefully chip it away. Start at the edges of the weld and work toward the middle. A cold chisel made of durable alloy works well for this task.
Use a hammer to drive the chisel, but don’t apply too much force; it’s easy to damage the base metal. Take your time; removing welds isn’t a sprint but a marathon.
-
Use a Weld Removal Tool
For stubborn welds, consider a dedicated weld removal tool. These tools often resemble a drill bit and work efficiently on high-strength materials. They can eliminate welds without grinding too much surrounding material.
Follow the manufacturer’s instructions for the best results. Adjust the tool’s speed settings based on the material being worked on. Your goal is to penetrate the weld without damaging what’s beneath.
-
Clean the Surface
After removing the weld, use a wire brush or sandpaper to clean the area. This step eliminates debris and ensures a smooth surface. A clean workspace contributes to better adhesion for future welding or repairs.
Ensure there’s no leftover residue. A clean area prevents further complications, whether you’re welding again or just looking for a polished finish. Plus, it’ll make you proud of your handiwork!
We’ve wrapped up the steps to remove welds here. Next up, we’ll look at essential precautions to take.
Precautions
Let’s cover essential safety measures for removing welds.
- Protective Gear: Always wear proper gear, including gloves and goggles. I recommend a welding helmet like the Lincoln Electric KH631 for eye protection. Safety reduces risks!
- Ventilation: Ensure you work in a well-ventilated area. Good airflow helps prevent toxic fume build-up while removing welds.
- Tool Condition: Check tools for damage before use. Use a clean grinder to avoid uneven cuts that can cause injuries!
- Area Inspection: Inspect the work area for hazards. Clear debris or obstacles to promote a safe and efficient work environment.
Remember, safety precautions are crucial—they keep you safe and focused.
Factors Affecting Weld Removal Techniques
What factors influence the methods you’ll use to remove welds?
-
Type Of Material Being Welded
The material impacts the removal technique. For example, removing welds from carbon steel is generally easier than from harder metals like titanium or stainless steel, which may require specialty tools.
-
Weld Joint Configuration
The design of the weld joint affects access and your choice of method. A T-joint is often easier to access than a corner joint, simplifying tool use for removal.
-
Thickness Of Welded Sections
Consider the thickness carefully. Thicker welds require more powerful removal methods, like grinding or cutting. For welds under 1/8 inch (3.2 Mm), simpler techniques may suffice.
-
Type Of Weld Used
The type of weld, such as MIG or stick, matters. Different welding processes create varying joint strengths, affecting removal difficulty. Spot welds may require specialized tools like a spot weld removal tool, while fillet welds may need grinding.
-
Accessibility Of the Weld Area
Access to the weld area influences your choice of removal technique. If there’s limited space, a grinder might not fit, and you’ll need a more compact tool, like a cutting torch.
We’ve wrapped up the factors influencing weld removal techniques here. Next up, we’ll look at common issues and troubleshooting.
Common Issues and Troubleshooting
Let’s look at unique challenges when removing welds.
-
Inconsistent Removal Quality
Inconsistent quality can occur if your removal tool lacks pressure control. Check for even pressure; I recommend using a gauge. Consistency ensures a smooth finish.
-
Overheating Problems
Monitor heat levels closely when removing welds. Excessive heat can cause distortion. Use a thermal camera to identify hot spots and apply cooling techniques like compressed air.
-
Tool Wear and Tear
Removing welds can wear out your tools quickly. Inspect cutting blades weekly for cracks or dullness, and replace them promptly to maintain efficiency.
-
Surface Damage Risks
Removing welds can damage the underlying material, especially with improper tool usage. Always practice on scrap material before tackling your main project.
-
Improper Technique Execution
Using the wrong technique when removing welds can create stress points. Evaluate your methods: use oscillating tools in delicate areas to avoid unnecessary pressure.
Why This is Worth It: Advantages
The main benefit of removing welds is flexibility. I’ve used it for making adjustments in tight spots or correcting mistakes without starting from scratch.
Additionally, it lets you reuse materials, save time, and reduce waste. Imagine fixing a complicated joint, avoiding costly replacements, and streamlining your workflow—all by simply undoing a weld! If you’re wondering how to adapt your equipment for varied power supplies, you might find it insightful to explore how a 220 welder can be converted to 110.
Typical Uses Of Removing Welds
I’ve known people who use techniques to remove welds for repairs and modifications, but there are many applications, such as:
- Automotive Repairs: Removing welds on chassis parts allows for damage assessment and easier replacement. This process is popular in collision repair shops.
- Recycling Metal: Dismantling welded assemblies helps reclaim valuable metals. Scrap yards often use these techniques to maximize profits from scrap materials.
- Aerospace Maintenance: Technicians often need to undo welds on aircraft components during inspections. This practice ensures parts meet safety regulations.
- Custom Fabrication: Artists and metalworkers regularly remove welds for creative design. It’s common in custom art pieces and innovative product designs.

Exploring Alternatives
There are several effective alternatives to achieve similar results in removing welds. For instance, using a grinding tool like the Dewalt DWMT70781 or a weld removal tool can efficiently eliminate welds with precision. I’ve learned through hands-on experience that in tight spaces, a spot weld removal tool excels where bigger grinders struggle.
Additionally, chemical methods such as those from J-B Weld can help dissolve welding material without harsh tools. In specific cases, it’s much safer to opt for these methods to avoid damaging surrounding metal. This can save you time and hassle if you’re not keen on using heavy machinery. A deeper understanding of electrode classifications, such as E316-16 specifications, can further enhance your welding technique.
Frequently Asked Questions (FAQs)
Now let us look at some common questions I typically get asked.
How Are Welds Removed?
Welds can be removed using various methods, like grinding, cutting, or even chemical solutions. Each method’s efficiency varies; for example, cutting can be fast but may weaken surrounding structures.
What Tools Are Best for Removing Welds?
The best tools for removing welds include angle grinders, plasma cutters, and acetylene torches. An angle grinder with a flap disc can remove welds quickly with minimal material loss.
Is It Safe to Use Chemicals for Weld Removal?
Yes, it’s safe to use chemicals for weld removal if you follow safety guidelines. Chemical removers can effectively dissolve the weld material, but they require proper ventilation and personal protective equipment (PPE) to prevent inhalation and skin contact.
How Do You Remove Welded Baffles?
To remove welded baffles, apply heat using a cutting torch or grinder carefully. These methods help separate the baffle without damaging the surrounding tank structure, which is crucial for maintaining integrity.
How Do You Undo a Weld on Aluminum?
You can undo a weld on aluminum by using a grinder or a torch to heat and soften the weld. Aluminum melts at about 660°C (1220°F), making it easier to break apart once heated correctly.
How Do You Remove a Tack Weld?
You can remove a tack weld by using an angle grinder or hammer to break it loose. Tack welds are generally small, so they’re easier to remove than traditional welds.
What Should You Remove Before Welding on a Motorcycle?
Before welding on a motorcycle, remove paint, debris, and grease. Doing so prevents contamination, which can affect weld quality and strength, leading to increased repair costs down the line.
Conclusion
You made it to the end of our guide on how to remove welds. We covered what removing welds means, the various steps involved, essential tools like grinders and cutting torches, precautions to take, troubleshooting tips, and the types of weld removal methods available. Remember the importance of factors that can affect your approach, like the material type and weld size.
So, how to remove welds? You can use techniques such as grinding, cutting, or applying heat to undo a weld. With a method mapped out, you’ll have the knowledge to tackle welds effectively in projects, improving outcomes from simple jobs to advanced tasks. Wishing you success in your welding projects as you master how to remove stern challenges with confidence.
For additional insights and resources on welding, visit What is Welding.
References
- American Welding Society. (2021). AWS SENSE: Guidelines for Entry-Level Welders. Miami, FL: AWS.
Joe Carter is a retired welding professional with over 40 years of hands-on experience in the industry, spanning ship repair, structural welding, and even underwater projects. Joe is a master of MIG, TIG, and Stick welding. Passionate about mentoring the next generation of welders, Joe now shares his decades of expertise and practical insights to help others build rewarding careers in welding.
American Welding Society, Mechanical Tools, Metalworking, Personal Protective Equipment, Safety Precautions, Weld Removal, Welding, Welding Equipment, Welding Repairs, Welding Techniques