How to MIG Weld Vertical? Techniques, Safety Tips, Common Issues
Published on: December 12, 2024 | Last modified: March 4, 2025
By: Tyler James
Vertical welding is when you weld on a vertical surface. It’s a bit tricky but manageable with practice.
Now, how do you get the hang of how to mig weld vertical? It’s super important to learn vertical welding well since many projects need it. I’ve faced my share of struggles, but nailing this technique opened up new opportunities for me.
In this article, you’ll discover the types of vertical welding, prerequisites to get started, steps for MIG welding vertically, safety tips, factors affecting vertical MIG welding, common issues, inspection advice, key benefits, and industry applications. You’ll also find other options to consider if you wanna learn more about how to vertical mig weld.
Contents
- How to MIG Weld Vertical?
- What is Vertical Welding?
- Types Of Vertical Welding
- Prerequisites
- Safety Tips
- Steps for MIG Welding Vertically
- Types Of MIG Welding Processes for Vertical Applications
- Factors Affecting Vertical MIG Welding
- What Could Go Wrong: Common Issues
- Aftercare, Inspection, and Advanced Tips for MIG Welding Vertically
- Advanced Techniques for Vertical MIG Welding
- Key Benefits
- Industry Uses
- Other Options You Can Consider
- Frequently Asked Questions (FAQs)
- Conclusion
- References
How to MIG Weld Vertical?
How to MIG weld vertical refers to the technique of joining materials in an upright position. For best results, use a 5-15 degree angle. Practice makes perfect—this method is tough and often used in construction and fabrication.
What is Vertical Welding?
Vertical welding is the process of welding in a vertical position. This method often involves welding upwards (Vertical Up) or downwards (Vertical Down). It’s essential for structural applications, especially in large projects like skyscrapers or bridges. According to the American Welding Society (AWS), about 20% of welding jobs require vertical welding skills.
When you think about how to MIG weld vertically, you picture a welder controlling the nozzle angle while working against gravity. In my hands-on experience, the correct speed and feed are crucial for achieving a good bead, especially when welding vertical up. Knowing your machine’s settings can help prevent issues like undercutting.
Reflecting on my first vertical MIG weld, I was excited and nervous. Practicing how to MIG weld vertically before tackling my larger project was incredibly helpful. The tips and tricks I learned, such as the right angles and settings, boosted my confidence significantly. Exploring how to MIG weld vertical up can also refine your skills.
Types Of Vertical Welding
What types of vertical welding should you know about?
-
Flat Position Vertical Welding
This type keeps the workpiece flat. Find a stable surface for welding. Use a MIG welder set to 18-20 volts for smooth beads and less spatter.
-
Uphill Vertical Welding
Uphill welding means working from the bottom to the top. Tilt your MIG gun slightly forward and push the weld pool up, maintaining a vertical angle of about 45 degrees.
-
Downhill Vertical Welding
Downhill welding moves from top to bottom. Set your welder to 24-30 volts and use a steady hand to control the weld puddle as it flows down, moving quickly.
-
Vertical Pipe Welding
This focuses on welding around pipes. Use the MIG welding torch at a slight angle for better visibility. Select a wire size of 0.035 inches (0.89 Mm) for optimal penetration.
-
Vertical Plate Welding
This technique involves welding vertical plates together. Keep the torch at a 30-degree angle and use a weave pattern for uniform heat distribution. Opt for a 0.030 inch (0.76 Mm) wire feed for versatility. Selecting the right electrode for the job is essential to achieve high-quality welds, and understanding how to choose the best electrode can make a significant difference in the welding process.
We have now covered different types of vertical welding techniques. The next section will discuss the necessary prerequisites for welding.
Prerequisites
What do you need to prepare for MIG welding vertically?
- MIG Welder: You’ll need a MIG welder like the Hobart Handler 210 MVP. It’s essential for quality welds and can handle various metal thicknesses.
- Wire Feed Speed and Voltage Settings: Ensure your machine adjusts settings, such as 10–12 IPM (Inches Per Minute) at 18–21 volts. These settings are crucial for stable arcs during vertical welding.
- Welding Wire: Use .030 in. (0.76 Mm) ER70S-6 wire, like Lincoln Electric ER70S-6. It offers better penetration and a clean finish, vital for vertical welds.
- Shielding Gas: You’ll need a mix of 75% Argon and 25% CO2, known as C25. This gas blend reduces spatter and enhances safety.
- Welding Cart: A sturdy cart, such as the Eastwood MIG Welding Cart, is essential. It keeps your equipment organized and portable, making maneuvering during vertical welds easier.
So far we covered the necessary requirements. Let’s look at essential safety precautions next.
Safety Tips
Let’s cover essential precautions for vertical welding.
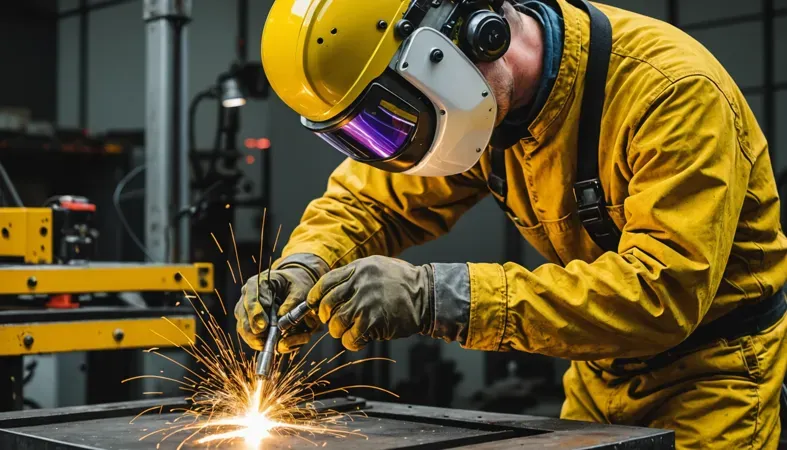
- Wear PPE: Always wear gloves, a welding helmet, and protective clothing to minimize injury. I recommend 3M welding gloves for excellent protection.
- Ventilation: Ensure your workspace is well-ventilated to avoid harmful fumes. A fan or exhaust system can reduce toxic exposure by up to 70%.
- Clamp Properly: Secure your workpiece with clamps to prevent movement, ensuring safer and more accurate welding. Use at least two clamps for stability.
- Check Equipment: Inspect your welding gear for wear and tear before each use to prevent accidents. Replace any faulty components immediately.
Taking safety precautions is critical; I’ve seen what can go wrong. Better safe than sorry!
We covered essential safety tips for MIG welding. We will now cover the steps for performing vertical MIG welding.
Steps for MIG Welding Vertically
Now, we’ll cover the essential steps of vertical MIG welding. It’s important to follow each step carefully for the best results.
-
Set Your Welding Parameters
Begin by adjusting your MIG welding machine. For vertical MIG welding, set the voltage between 18 to 24 volts, depending on the material’s thickness. Use a wire feed speed of 300 to 600 inches (762 to 1524 Cm) per minute. It’s vital to match these settings to your specific project for optimal penetration and bead shape.
Keep in mind that wire feed speed significantly impacts arc behavior. A slow feed can lead to undercutting, while a fast feed may cause excessive spatter. Finding the right balance is key and may require some trial and error!
-
Choose Your Welding Angle
Select an angle that suits your technique for vertical welding. A common angle for vertical-up welding is about 10 to 15 degrees back from vertical. This helps control the flow of the molten pool. It’s crucial to maintain this angle consistently to avoid poor penetration.
Practicing at different angles can help you discover what works best for you. Minor adjustments can make a big difference; don’t be afraid to experiment a little. Remember, a lean angle tends to provide better control during the weld.
-
Utilize the Weaving Technique
Use the weaving technique when welding vertically up. Move in a zigzag motion to ensure better bead coverage and heat distribution. Try to maintain a consistent speed to prevent the molten metal from sagging. A weaving width of 3/8 to 1/2 inch (1—1.27 Cm) usually works well.
Maintaining a steady pace significantly improves bead quality. If you’re moving too fast, you’ll end up with poor fusion; move too slowly, and you risk burning through the material. Practice makes perfect!
-
Monitor the Heat Pool
Watch the heat pool closely during vertical welding. Control how quickly the heat travels up the joint. Aim for a pool size of about 1/4 inch (0.64 Cm) in diameter. A pool that’s too large leads to excess distortion; too small results in lack of fusion.
Adjust your speed and weaving technique based on the behavior of the heat pool. If it begins to overflow or erode the edges, consider slowing down to stabilize it. Keeping an eye on this can save you from redoing a lot of work!
That covers the steps for vertical MIG welding. Let’s now take a look at the different MIG welding processes for vertical applications.
Types Of MIG Welding Processes for Vertical Applications
Let’s discuss the MIG welding processes suitable for vertical applications. We’ll cover Short Circuit Transfer, Globular Transfer, Spray Transfer, Pulsed Spray Transfer, and Rotary Welding.
-
Short Circuit Transfer
Short Circuit Transfer is popular for vertical MIG welding. It creates a short circuit between the electrode and the workpiece, forming a molten droplet. This process works best at lower voltages, typically around 15-20 volts, and helps avoid excessive heat input on vertical joints. Selecting the appropriate electrical components is crucial for efficient welding operations, and understanding what size breaker for welder can improve safety and performance.
-
Globular Transfer
Globular Transfer is effective for welding thicker materials. Larger droplets form and fall due to gravity. It usually operates at higher voltages, between 25-30 volts, making it less controlled for vertical welding.
-
Spray Transfer
Spray Transfer is ideal for vertical positions with high voltage (Around 24-40 Volts). It produces a fine mist of molten droplets, minimizing spatter and providing a clean weld. This method allows for faster welding while achieving deeper penetration, essential for vertical MIG welds.
-
Pulsed Spray Transfer
Pulsed Spray Transfer combines the benefits of spray and short circuit methods. It emits pulses of high current to create droplets, reducing heat input while maintaining good penetration. This technique is excellent for vertical MIG welding since it controls the cooling rate and prevents excessive warping.
-
Rotary Welding
Rotary Welding involves moving the workpiece to maintain a stable arc. It’s less common for vertical welding but can be useful in specific applications. You’ll see this method more in automated or large-scale production environments.

Factors Affecting Vertical MIG Welding
What factors influence the technique for effectively welding in the vertical position?
-
Welding Speed
Welding speed significantly impacts bead quality. For vertical MIG welding, a typical range is 4 to 10 inches per minute (102 to 254 Mm/min), depending on material thickness.
-
Electrode Angle
The electrode angle should be 10-15 degrees backward for vertical welding. This helps maintain proper heat distribution and penetration.
-
Workpiece Material Thickness
Material thickness is crucial for vertical MIG welding. Thicker materials over 1/4 inch (6.35 Mm) require higher amperage settings and possibly slower speeds to ensure proper fusion.
-
Wire Feed Speed
A wire feed speed of 200 to 400 inches per minute (5080 to 10160 Mm/min) is common for vertical MIG. This keeps the arc stable and helps prevent burn-through.
-
Heat Input
Managing heat input is vital for vertical welding. Too much heat can cause sagging, while too little can lead to weak welds; aim for around 60-80 joules/mm for the best results.
What Could Go Wrong: Common Issues
Here are some common problems in vertical welding.
-
Inconsistent Welds
Vertical welding often leads to inconsistent weld beads. Inspect for uneven width and height. Adjusting travel speed or amperage settings can resolve this.
-
Undercutting
In vertical welding, undercutting occurs when you’re too fast or hot. It’s crucial to regulate your feed rate and arc distance to eliminate gaps.
-
Burn-through
Vertical welding can easily cause burn-through on thin metals. Check for holes in your weld. Lowering amperage or increasing motion speed can help avoid this.
-
Porosity
Vertical welding may trap moisture or contaminants, causing porosity. Look for pinholes. Upgrading your gas shielding and properly cleaning your surface can fix this.
-
Ineffective Penetration
In vertical welding, ineffective penetration can occur. If you see weak, layered welds, slow your travel speed while maintaining heat to improve depth.
Aftercare, Inspection, and Advanced Tips for MIG Welding Vertically
Here’s crucial aftercare, inspection advice, and expert tips for your MIG welding projects.
Aftercare Recommendations
After vertical welding, let the welds air dry for at least 10 minutes to keep them cool. It’s also essential to clean the weld area with a wire brush to remove slag and spatter. If you notice discoloration or contamination, wipe down the heat-affected zone with a damp cloth. Understanding various welding processes can further enhance your technique and results.
Inspection Insights
Inspect weld bead profiles closely; look for consistent ripple patterns, ideally with 3–5 ripples per inch (1–2 Ripples Per Centimeter). Check penetration depth; it should be between 2–3 mm (0.08–0.12 In). Use ultrasonic testing devices for internal flaws and consistency, as I did with the Sonatest product for precise measurements.
Expert Tips
Start with a higher voltage, around 22–24 volts, to ensure deeper penetration on thicker materials. Control travel speed at 4–6 inches (10–15 Cm) per minute to prevent sagging during vertical upward welding. Use 0.045 in (1.2 Mm) wire for lower heat input, producing a smoother vertical weld appearance while minimizing burn-through. Utilizing specific shielding gases can significantly impact welding outcomes, and argon is often chosen for its ability to produce cleaner, higher-quality welds. Discover what argon is used for in welding to enhance your welding process.
Advanced Techniques for Vertical MIG Welding
If you’re looking to really polish your vertical MIG welding skills, consider these advanced techniques.
Multi-Pass Welding Strategy
When working with thicker materials, using a multi-pass approach is key. Here’s a quick summary:
| Pass Type | Purpose | Recommended Settings |
|---|---|---|
| Root Pass | Foundation layer for stronger weld | 18–22 V, 200 IPM |
| Fill Pass | Build on the root for added strength | 22–24 V, 250 IPM |
| Cap Pass | Final layer for smooth finish | 22–26 V, 300 IPM |
Utilizing Backstepping Technique
Backstepping is an effective technique for improving penetration and controlling the heat-affected zone during vertical welding. Follow these steps:
- Start from the Bottom: Initiate the weld at the lowest point.
- Move Slightly Up: Pull the gun back while welding, typically around 1/4 inch (0.64 cm).
- Short Bursts: Use short bursts of welding to minimize overheating.
This strategy helps maintain a controlled puddle and enhances weld stability. It’s worked wonders for my tougher welds!
Learning to Control the Weave Pattern
Different weave patterns can significantly affect bead shape. Consider experimenting with:
- Figure-Eight Weave: Good for too much heat spread.
- U-Shaped Weave: Helps with high deposition rates.
- Circle Weave: Ideal for tight joints to ensure even distribution.
Varying your weave pattern allows you to adapt to the specific project needs, enhancing both quality and speed.
Key Benefits
The main benefit of learning to MIG weld vertically is improved skill versatility. Mastering vertical welding makes you a more capable welder, prepared for various projects.
Additionally, this technique enhances your ability to tackle challenging jobs, boosts productivity, increases weld quality, and expands your project options. You’ll discover endless opportunities to apply what you learn!
Industry Uses
I know people who use vertical MIG welding for various projects. It has many applications, such as:
- Construction Sites: It’s ideal for joining steel beams. Vertical welds are strong under load and resist vibrations, making it a preferred choice for many builders.
- Automotive Repairs: When fixing car frames, vertical MIG welding maintains structural integrity. Technicians prefer it for its speed and effectiveness in tight spaces.
- Pipelines: In oil and gas, vertical welding creates secure joints that can handle high pressure. It’s commonly used in line runs to prevent leaks.
- Shipbuilding: Welding hulls vertically creates robust bonds against powerful ocean forces. Shipbuilders typically choose this technique for its reliability.
Other Options You Can Consider
When tackling vertical welding, consider methods like vertical stick welding or flux-cored welding. These alternatives, such as the Lincoln Electric K2185-1, excel in vertical applications, especially where portability’s a plus. I learned that sometimes, using the right tool can make all the difference in your weld quality.
If you’re looking for different approaches, try out vertical MIG welding techniques, like weaving or stringer beads, to achieve similar results. An option like the Hobart Handler 210 MVP can give you solid performance in various positions. It taught me that flexibility in our methods often leads to success in welding projects and helps you adapt to different situations.
Frequently Asked Questions (FAQs)
Now let us look at some questions I typically get asked about vertical welding.
What is the Trick to Vertical Welding?
Yes, the trick to vertical welding is understanding manipulation of the welder. Controlling speed and angle is crucial for a smooth bead. Technically, adopting a drag or push technique can make a difference, especially for MIG welding, leading to better penetration and less spatter.
Is It Better to Weld Vertically Up or Down?
Yes, it is often better to weld vertically up rather than down. Welding uphill helps improve penetration, filling the joint better, while also minimizing the chance of defects. In fact, many welders prefer the uphill method for strong, durable joints.
Do You Run MIG Uphill or Downhill?
You should typically run MIG welds uphill. MIG welding uphill enhances penetration and reduces the risk of sagging weld beads. Statistics show that uphill welding yields a stronger bond due to the added control over the molten pool.
What Type Of Wire is Used for Vertical Welding?
For vertical welding, a solid MIG wire is usually recommended. Solid wire gives better control and a more uniform bead, essential for vertical applications. Usually, a diameter of 0.6 to 1.0 mm (0.023 To 0.040 In) works best in manageable heat settings.
How Can You Improve Your Vertical Welding Technique?
You can improve your vertical welding technique by practicing consistent speed and angle. Keep your posture comfortable and use a steady hand. Studies indicate that practice leads to up to a 30% reduction in defects over time for novice welders.
Conclusion
I hope this gave you what you needed about how to mig weld vertical. We covered what vertical welding is, types of vertical welding, prerequisites, steps for MIG welding vertically, and essential safety tips. We also discussed common issues, aftercare, inspection, factors affecting vertical MIG welding, key benefits, industry uses, and other options you can consider.
So, how to mig weld vertical? In simple terms, it’s about maintaining proper technique and settings while welding upwards at an angle. Remember the importance of practice and attention to detail. Feel free to reach out if you have further questions about how to weld vertical up, or anything else in MIG welding.
If you’re eager to explore more about welding, What is Welding offers comprehensive insights to enhance your understanding.
References
- American Welding Society. (2015). AWS D1.1/D1.1M: Structural Welding Code – Steel. Miami, FL: AWS.
- Appleton, W. (2020). Welding and Cutting: A Practical Handbook. Hauppauge, NY: Nova Science Publishers.
Tyler is a passionate DIY welder and self-taught metal artist with years of hands-on experience transforming raw materials into functional and artistic creations. Specializing in MIG welding, Tyler crafts everything from custom furniture to outdoor sculptures, blending creativity with technical skill. Committed to making welding accessible, Tyler shares practical insights and project inspiration to help beginners and hobbyists confidently explore the world of metalworking.
American Welding Society, MIG Welding, Safety Tips, Vertical Welding, Welding, Welding Applications, Welding Skills, Welding Techniques, Welding Wire
