How to Make a Welding Arm Pad? Tips, Tools, & Steps to Follow
Published on: June 16, 2025 | Last modified: March 4, 2025
By: Mark Carter
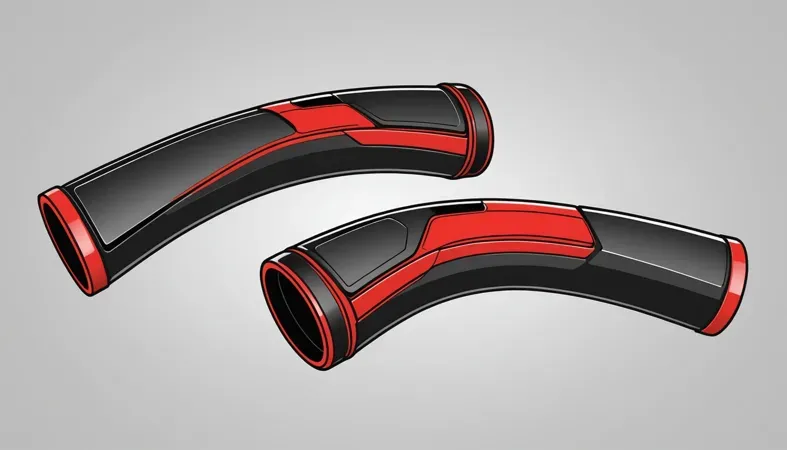
A welding arm pad is a protective cushion that you place on your arm while welding. It shields your skin from heat and sparks, which helps prevent burns and injuries.
I’ve received numerous inquiries about how to make a welding arm pad. It’s crucial to get this right because improper padding can lead to discomfort or even injuries while you work. From my experience, a good arm pad can make a long welding session much more manageable.
In this guide, I’ll cover what a welding arm pad is, types of pads available, essential tools you’ll need before starting, safety tips, steps to make your pad, and materials you can use. I’ll also discuss factors that affect the creation process, unique issues related to arm pads, aftercare and inspection tips, benefits, typical applications, and alternatives to consider. Plus, if you’re interested, I’ll link it back to how to build a welding cart for efficiency in your workspace.
Contents
- How to Make A Welding Arm Pad?
- What is a Welding Arm Pad?
- Types Of Welding Arm Pads
- Essential Tools Before You Start (Prerequisites)
- Steps for Making a Welding Arm Pad
- Safety Tips
- Types Of Welding Arm Pad Materials
- Factors Affecting Welding Arm Pad Creation
- Issues Unique to Welding Arm Pads
- Aftercare and Inspection Tips
- Benefits
- Typical Applications
- What Are Alternatives to Making a Welding Arm Pad?
- Frequently Asked Questions (FAQs)
- Conclusion
- References
How to Make A Welding Arm Pad?
A welding arm pad is a protective cushion for your arm. To make one, use 25 cm (10 Inches) of thick foam, wrap it in durable fabric, and stitch. It’s easy, useful for heavy welding, and perfect for comfort.
What is a Welding Arm Pad?
A welding arm pad is a protective cushion worn on the forearm while welding. It’s designed to shield against heat and sparks, preventing burns. Typically, these pads are made from leather or heavy-duty fabric. They usually measure about 25 cm x 15 cm (10 in X 6 in) for adequate protection.
When I started using a welding arm pad, it was a game-changer. It absorbed heat and kept my skin safe during long sessions. Buying a good one really makes a difference!
A colleague found it useful for reducing fatigue during welding tasks. While building his welding rig, he discovered that the arm pad provided extra comfort. This small feature helped him work longer without soreness, similar to how you’d build a welding cart for accessibility and efficiency.
Types Of Welding Arm Pads
What types of welding arm pads can you make?
-
Foam Welding Arm Pads
Foam pads offer comfort and shock absorption. Cut high-density foam to about 15 cm x 30 cm (6 in X 12 in) and wrap it in fabric.
-
Gel Welding Arm Pads
Gel pads provide excellent cushioning and moisture resistance. Use gel-filled pouches measuring 15 cm x 30 cm (6 in X 12 in) and securely attach them to a waterproof covering.
-
Leather Welding Arm Pads
Leather pads are durable and heat-resistant. Cut leather to about 15 cm x 30 cm (6 in X 12 in) and stitch quilted fabric as a backing.
-
Rubber Welding Arm Pads
Rubber pads resist slipping and provide grip. Cut a rubber sheet to 15 cm x 30 cm (6 in X 12 in) and attach it to your work surface with adhesive.
-
Thermal Resistant Welding Arm Pads
These pads protect against high temperatures. Use fire-resistant materials like fiberglass, cut to 15 cm x 30 cm (6 in X 12 in), and encase it in a heat-resistant cover.

Essential Tools Before You Start (Prerequisites)
What do you need to make a welding arm pad?
- Industrial-Grade Foam: Use high-density foam, such as Tori 76mm (3 Inches) Thick Foam. It offers comfort and support during welding, reducing fatigue.
- Fabric Cover: Choose a durable, heat-resistant fabric like 100% cotton duck canvas. It protects the foam from sparks and heat damage.
- Heavy-Duty Sewing Machine: Consider a model like Brother ST371HD. It’s essential for stitching through thick materials, increasing the pad’s durability.
- Adhesive Spray: Use 3M Super 77 spray adhesive. It securely bonds foam to fabric, ensuring your materials stay together while you work.
Steps for Making a Welding Arm Pad
Here are steps to create a comfortable welding arm pad for long hours of work.
-
Measure and Cut the Base
Start by measuring a piece of durable foam, about 15 cm x 30 cm (6 in X 12 in). Use a sharp utility knife for clean edges. I once frayed the foam by rushing; take your time with this step.
This size provides ample support for your arm during welding. Ensure the foam thickness is at least 2.5 cm (1 in) for extra cushion. Heavier density foam resists wear over time.
-
Attach the Fabric Cover
Choose a heat-resistant fabric like neoprene or canvas. Cut a piece that’s about 5 cm (2 in) larger than the foam on each side. Fold the fabric over the foam edges for a neat finish. Use strong adhesive or sew the edges to secure it.
Make sure there’s no exposed foam to prevent damage while welding. A fitted cover adds comfort and a professional look. Match the color of your other equipment for a cohesive style.
-
Secure the Velcro Straps
Cut two pieces of Velcro, each about 60 cm (24 in) long. Position them underneath the pad to hold it in place during welding. Attach one side of the Velcro with adhesive or stitching, ensuring proper alignment to avoid slipping. Welders commonly use a variety of materials depending on the nature of the project and the specifications required, and understanding these can enhance the quality of the results. Discover more about what materials welders prefer.
I once misplaced the Velcro too close to the edge, making it harder to secure. Test the positioning before the final attachment. Correct placement will keep your pad secure during use.
-
Add Extra Padding (Optional)
If you want more comfort, consider adding extra padding layers. Cut smaller foam pieces that are half the thickness of your main pad. Use adhesive to attach them beneath your main layer; ensure these pieces don’t create an uneven surface.
While more padding may feel great, watch the overall height. An overly thick pad can affect your arm alignment. Aim for a balance between comfort and usability.
-
Finish and Test It Out
Finally, examine the craftsmanship. Look for unsecured straps or loose fabric edges that might wear quickly. Test the pad in different welding positions to ensure it supports your arm effectively.
A well-constructed welding arm pad enhances comfort, reduces strain, and helps maintain focus while you work. Always adjust it after testing to find your perfect fit!
Safety Tips
Let’s cover essential precautions for making a welding arm pad.
- Use Protective Gear: Always wear a welding helmet, gloves, and a mask to prevent burns. Consider the Miller Classic, as it’s recommended for comfort.
- Check Your Workspace: Ensure your workspace is free from flammable items to prevent fires during intense projects.
- Stable Setup: Use a level surface for your pad. This enhances stability and reduces accidents.
- Don’t Rush: Take your time with design and placement. Moving slowly lets you catch mistakes quickly!
Prioritizing safety in your welding projects is vital—it’s worth it!
Types Of Welding Arm Pad Materials
This section covers High-Density Foam, Protective Leather, Cooling Gel Inserts, Heat-Resistant Fabrics, and Non-Slip Base Materials.
-
High-density Foam
High-density foam is popular for its excellent cushioning and support. It has a density of about 50-70 kg/m³, offering great resilience. This material helps reduce fatigue during long welding projects.
-
Protective Leather
Leather arm pads are durable and resistant to heat, often lasting over 10 years with proper care. Thickness ranges from 1.5 to 3 mm. Naturally tough, leather protects against sparks and spatter, making it a reliable choice for welders.
-
Cooling Gel Inserts
Cooling gel inserts absorb heat and keep things comfortable, especially in hot environments. They reduce heat transfer by about 30%, helping you stay focused. From my experience, a good cooling gel can significantly improve comfort during long welding hours.
-
Heat-resistant Fabrics
Heat-resistant fabrics can withstand temperatures up to 300°C (572°F). These materials protect against high heat without melting or degrading quickly. Durable and flexible, they add an extra layer of protection to welding arm pads.
-
Non-slip Base Materials
A non-slip base keeps your welding arm pad secure, preventing slips during work. Rubber or textured surfaces are popular choices, providing traction even with greasy hands. This feature enhances safety and ensures control while welding.
Factors Affecting Welding Arm Pad Creation
What factors impact creating an effective welding arm pad?
-
Material Selection
Your choice of materials matters. For example, heat-resistant fabric can withstand temperatures up to 300°C (572°F), making it ideal for welding environments.
-
Thickness Of Padding
A thicker pad generally provides better comfort and protection. Choose at least 10 mm (0.4 In) padding to absorb vibrations and reduce fatigue during long welding sessions.
-
Design Ergonomics
I once overlooked ergonomic design. A well-contoured arm pad fits snugly and distributes pressure evenly, preventing discomfort during prolonged tasks.
-
Durability Requirements
Your welding arm pad needs to last. Look for materials that resist wear; some high-density foam pads last over 5 years, even under heavy use.
-
Cost Considerations
Don’t underestimate the budget. Prices range from $20 to $100. Higher-priced pads often feature better materials or added benefits that enhance comfort and safety.
Issues Unique to Welding Arm Pads
Here are the unique issues you might encounter with a welding arm pad.
-
Insufficient Padding
This can cause discomfort. Look for thick cushioning, ideally 1.5 cm (0.6 In). Replace it if it feels flat!
-
Poor Adhesion Of Materials
I once used weak glue, causing layers to separate. Use industrial-strength adhesive for better durability.
-
Wear and Tear From Heat Exposure
The welding arm pad should withstand temperatures up to 150°C (302°F). Check for singeing; renew it if it’s worn.
-
Allergic Reactions to Materials
Some people may react to specific fabrics or foams. Identify sensitivities and choose hypoallergenic options.
Aftercare and Inspection Tips
Here’s essential guidance for keeping your welding arm pad in top shape.
Aftercare Tips
After creating your welding arm pad, clean it regularly with a damp cloth to remove weld spatter. If you used fabric or foam, replace these components every 6 months for durability. For added longevity, apply a fabric protectant every few months to resist heat and wear. Knowing how to treat welding burns on skin is crucial to ensure safety in the workshop.
Inspection
Inspect your welding arm pad every 30 uses. Check for cracks or significant wear, especially in high-stress areas where your arm rests. Use products like 3M’s Heavy-Duty Adhesive to quickly repair minor damage. I trust this adhesive; it makes fixing imperfections simple and efficient.
Expert Tips
For added strength, reinforce your welding arm pad with an inner layer of Kevlar. Additionally, maintain a minimum temperature of 32°F (0°C) during crafting to enhance pliability. Finally, use high-temperature insulation materials in inner pockets to improve heat damage resistance. When choosing materials, procure the right metal for welding from buying metal for welding.
Benefits
The main benefit of a welding arm pad is comfort. A colleague found it helpful for reducing fatigue during long welding sessions.
Additionally, a custom arm pad enhances precision, provides better control, and improves safety, all while being cost-effective and easy to make.
Typical Applications
I’ve known people who use welding arm pads for comfort and support while working. They also have unique applications such as:
- Automotive Repair: Auto mechanics use them during lengthy welding tasks to prevent arm fatigue. They keep workers focused and productive.
- Artistic Metalwork: Artists use welding arm pads to improve precision and reduce strain during detailed work. Their popularity is increasing in creative spaces.
- Manufacturing: Factory workers wear them for repetitive welds to maintain consistent quality. They’re essential in high-output environments.
- Aerospace Applications: Engineers use welding arm pads for extended assembly tasks on complex components. Their use is becoming vital for detailed accuracy.

What Are Alternatives to Making a Welding Arm Pad?
If crafting a welding arm pad isn’t your thing, no worries—there are lots of alternatives to consider. You might prefer pre-made options, such as those from brands like Lincoln Electric or Miller. From both successes and failures, I’ve learned that using a comfortable welding jacket can protect your arms while you work, reducing heat transfer without the extra mess of DIY projects.
Another option is using shop rags or towels, which can serve as makeshift arm pads in a pinch. They’re easy to grab and use, and they offer decent protection too. Just remember to keep them clean and dry; you want to avoid sparks igniting fabrics!
Frequently Asked Questions (FAQs)
Now let us look at some common questions I typically get asked.
How Do I Maintain My Welding Equipment?
Maintaining your welding equipment is crucial for safety and longevity. Regularly clean your welder, inspect cables, and check gas connections to avoid accidents. Schedule maintenance every 6–12 months to keep everything in top shape.
What Safety Gear Do I Need for Welding?
Yes, you need proper safety gear for welding. Wear a welding helmet with a good filter lens and protective gloves to shield against harmful sparks. Since 60% of injuries happen without proper gear, it’s essential to invest in quality welding accessories and avoid costly incident-related expenses.
To enhance your welding skills and achieve better control of the welding arc, consider exploring arc control techniques on a MIG welder.
What Types Of Welding Are There?
There are several types of welding, including MIG, TIG, and Stick welding. Each type has its own applications; for example, MIG welding is often used for thin metals and is easier to learn, making it perfect for newbies.
Can You Weld Aluminum?
Yes, you can weld aluminum. Aluminum requires specific techniques, such as preheating and using filler materials. It has a lower melting point, around 660°C (1220°F), so attention to heat control is essential to avoid warping.
How Do I Choose the Right Welding Rod?
Choosing the right welding rod depends on the material you’re welding. For example, E6011 rods are great for mild steel and can penetrate deep. Make sure to match your rod with the material for best results. When considering more advanced techniques, understanding the nuances of how to forge weld can significantly enhance your welding skills.
What’s the Difference Between AC and DC Welding?
The difference between AC and DC welding lies in the current flow. AC offers better cleaning for aluminum but produces a less stable arc. DC welding provides deeper penetration and better control, especially suitable for thicker materials. When setting up your equipment, it is crucial to consider the optimal height for a welding table to ensure precision and comfort.
How Do I Build a MIG Welding Cart?
Building a MIG welding cart can simplify your workspace. Use lightweight metals, such as steel, and include compartments for tools. This type of project not only improves organization but also enhances efficiency. Aim for a height that matches your working level, ideally around 90–100 cm (35–39 Inches) for easy access. For more ideas on crafting your own equipment, you can check out various DIY welding projects.
When creating or modifying any vehicle structures, it’s crucial to know whether you can legally weld a car frame.
What is the Best Metal for a Welding Table?
The best metal for a welding table is typically steel. A thickness of at least 5 mm (0.2 Inches) provides durability and resistance to warping under heat. Steel tables can bear heavy loads, making them a top choice for professional workspaces.
Conclusion
Phew, that’s a lot to cover. We talked about what a welding arm pad is, types of arm pads, and essential tools you need before starting. We also discussed steps for making the pad, safety tips, materials, factors impacting creation, unique issues, aftercare, benefits, applications, and some alternatives.
To wrap it up, making a welding arm pad means gathering relevant materials like foam, fabric, and Velcro. You also need tools, time, and safety equipment. By following the steps outlined, you can create a customized pad that’ll improve your welding experience.
For more insights and resources on welding techniques and information, be sure to visit What is Welding.
References
- Jeffus, L. (2020). Welding: Principles and Applications (9th ed.). Boston, MA: Cengage Learning.
Mark is a skilled welding engineer specializing in advanced metal joining technologies and process design. With a formal education in welding engineering and a background rooted in practical experience, Mark bridges the gap between theory and application. He is passionate about making technical concepts accessible, empowering welders to embrace innovation while mastering essential skills. Mark combines his scientific expertise with a commitment to supporting the welding community alongside his uncle, Joe.
DIY Welding Accessories, Protective Gear, Safety Tips, Welding, Welding Arm Pad, Welding Equipment, Welding Safety Gear, Welding Table, Welding Techniques, Welding Tools


