How to Install Aftermarket Muffler Without Welding?
Published on: December 3, 2024 | Last modified: March 4, 2025
By: Joe Carter
Aftermarket mufflers are replacement parts made for your car’s exhaust system. They enhance performance and often improve the vehicle’s sound.
People are frequently curious about how to install aftermarket muffler without welding. It’s important to know this because many DIY enthusiasts want to save time and money. In my own experience, following the right steps made installation smoother and helped avoid costly mistakes.
In this article, we’ll cover what aftermarket mufflers are, the types available, prerequisites for installation, step-by-step installation without welding, precautions to take, different installation methods, factors affecting the process, how to fix common problems, aftercare tips, advantages, applications to consider, alternatives for installation, and FAQs about this topic. We’ll also touch on how to replace a muffler without welding and related topics to give you a comprehensive guide.
Contents
- How to Install Aftermarket Muffler Without Welding?
- What Are Aftermarket Mufflers?
- Types Of Aftermarket Mufflers
- Prerequisites
- Steps to Install an Aftermarket Muffler Without Welding
- Precautions
- Types Of Muffler Installation Methods
- Factors Affecting Installation Of Aftermarket Mufflers
- How to Address Common Problems
- Aftercare, Inspection, and Advanced Tips for Aftermarket Muffler Installation
- Advantages Of Aftermarket Mufflers
- Applications You Should Know About
- Alternatives for Installing Aftermarket Mufflers
- Frequently Asked Questions (FAQs)
- Conclusion
- References
How to Install Aftermarket Muffler Without Welding?
An aftermarket muffler upgrades your exhaust system. To install an aftermarket muffler without welding, use clamps or hangers for a typical 2-3 hour job. It’s fairly easy for DIYers. Commonly used in performance and replacement applications.
What Are Aftermarket Mufflers?
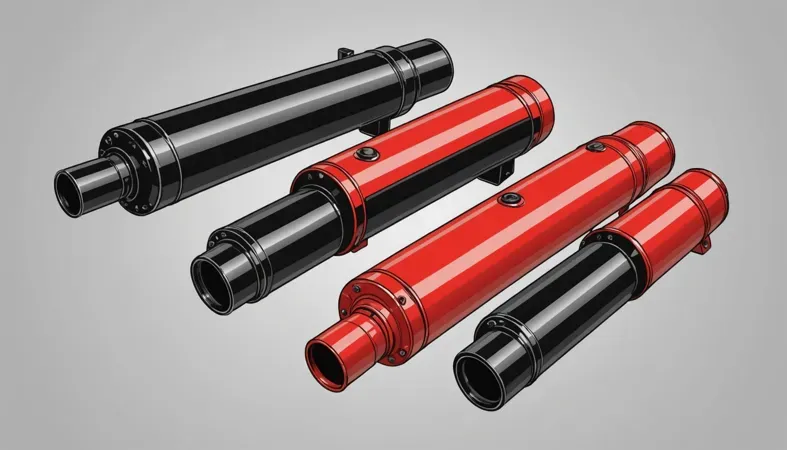
An aftermarket muffler is a replacement exhaust component that reduces noise and improves vehicle performance. They’re usually made of stainless steel for durability and corrosion resistance. Aftermarket mufflers come in various designs, like chambered or straight-through, each offering different sound levels and flow characteristics. You can typically find them in sizes ranging from 2 to 3 inches (5.1 To 7.6 Cm) in diameter to fit most car models.
If you’re considering how to install an aftermarket muffler without welding, it’s easier than you think! Muffler clamps secure the new muffler in place effectively. When I tackled a similar project, it took me under an hour to complete. Just ensure you have the right size clamps ready, and it’ll fit perfectly.
I’ve used aftermarket mufflers for my own car restoration projects. It’s a game changer to learn how to install a new muffler without welding. Removing a welded muffler may seem daunting, but with the right tools and approach, it’s straightforward. Plus, using muffler clamps instead of welding saves time and hassle!
Types Of Aftermarket Mufflers
What types of aftermarket mufflers can you install without welding?
-
Performance Mufflers
Performance mufflers enhance engine efficiency and sound. You’ll need specific adjustments for a proper fit. Use muffler clamps to secure it to the tailpipe.
-
Quiet Mufflers
Quiet mufflers reduce noise while maintaining performance. Simple clamps suffice for installation. Align the muffler with the exhaust pipe and tighten the clamps securely.
-
Dual Exit Mufflers
Dual exit mufflers provide a stylish look and improved exhaust flow. No welding is needed. Ensure both exits align with the pipes and clamp them tightly to prevent leaks.
-
Glass Pack Mufflers
Glass pack mufflers create a distinct sound and are lightweight. Welding is entirely unnecessary. Slide it over the pipe and use clamps to hold it securely in place.
-
Turbo Mufflers
Turbo mufflers maximize airflow and minimize back pressure. No welding’s required here either. Ensure a snug fit on the exhaust and clamp it down tightly.
That covers different kinds of aftermarket mufflers. Let’s now take a look at the requirements needed for installation.

Prerequisites
What do you need to get started on installing an aftermarket muffler without welding?
- Muffler Clamps: You’ll need heavy-duty clamps, such as the Walker Exhaust Clamp (Part Number 36390), for secure connections. They’re essential for holding the aftermarket muffler firmly in place.
- Exhaust Pipe Reducers: Get reducers like the Vibrant Performance Exhaust Reducer for proper fitment; it ensures your new muffler connects well to your exhaust pipe.
- Muffler Hanger Brackets: Use brackets like the Dorman 423-325 Exhaust Hanger; they support the muffler and keep it in position without welding.
- Thread Locker: Apply a thread locker, like Loctite Blue, on clamp bolts to prevent loosening; this keeps your installation secure during use.
You should now have a good understanding of the required basics for installation. In the next part, we’ll discuss the installation steps for an aftermarket muffler.
Steps to Install an Aftermarket Muffler Without Welding
Here are the key steps for installing an aftermarket muffler without welding. Follow these precisely for a successful installation.
Remove the Old Muffler
First, lift your vehicle using jack stands for safety. Then locate the exhaust hangers securing the old muffler. These may be rusty or stuck. Use penetrating oil and pliers or a wrench to remove them—be ready for some grime! When tackling welding projects, it’s crucial to consider the ideal height for a welding table to ensure efficiency and comfort.
After disconnecting the hangers, slide the muffler off the exhaust pipe. If it’s welded, use a sawzall (Reciprocating Saw) for quick removal. A helpful tip: keep a container underneath for any drips. This step requires persistence. Grab a friend if it gets tough!
When welding on a vehicle, it is essential to know what components to disconnect to ensure safety and effectiveness.
Prepare the Exhaust Pipe
Next, inspect the exhaust pipe for rust or damage. Clean the surface where the new muffler will attach to ensure a secure fit. Use a wire brush or sandpaper; aim for a smooth surface to help the clamps work effectively.
I skipped this step once and ended up with leaks, causing noise and performance issues. So don’t cut corners! A clean surface ensures your new clamps provide a snug fit, which is essential.
Install the New Muffler
Now, slide the new aftermarket muffler over the exhaust pipe, ensuring it faces the right direction. Tighten any included muffler clamps. Follow the manufacturer’s torque specifications to avoid issues.
If your vehicle has multiple pipes or dual exhausts, ensure each is snug and aligned. If it vibrates while running, that could signal trouble later. Always double-check your alignment after this step!
Secure All Connections
Once the muffler’s installed, focus on securing every connection. Tighten those clamps with a socket wrench. For a firm grip, torque specifications often suggest tightening to 20-40 foot-pounds (27-54 Nm); refer to your specific muffler’s requirements.
After securing it, double-check all clamps and hangers. Ensure it’s firmly in place to avoid rattling or premature wear. It’s better to be a little too tight than too loose!
Check for Leaks
Finally, start your engine to check for leaks. Listen for any unusual sounds around the new muffler. A quick visual inspection of the joints will help too; a soapy water solution will create bubbles if there’s a leak.
It’s crucial to ensure everything’s sealed tight. If you see bubbles, shut off the engine and re-tighten the clamps until the issue is resolved. This part is vital for long-term performance—don’t skip it!
We’ve wrapped up the steps for installing an aftermarket muffler without welding. Next up, we’ll look at precautions.
Precautions
Here are essential safety tips for muffler installation.
-
-
- Work in a Well-Ventilated Area: Exhaust fumes can be deadly. Ensure good airflow—consider your garage or the outdoors.
- Use Proper Eye Protection: Protect your eyes from debris and metal shavings. Use safety goggles, such as 3M Virtua 100 UV Protective Eyewear.
- Inspect Your Tools: Use tools in good condition. Damaged tools can break and cause injury, so check your ratchets and clamping tools.
- Check Surrounding Temperature: Avoid working on a hot car after a drive. Wait at least 30 minutes for it to cool down.
-
Following these precautions keeps you safe—everyone appreciates a secure setup, right?
So far we covered necessary precautions. Next, let’s look at different methods for installing mufflers.
Types Of Muffler Installation Methods
Let’s explore different ways to install an aftermarket muffler without welding. We’ll cover Clamp-On, Slip-On, Hang-On, Spring-Loaded, and Bolt-On methods.
-
-
-
Clamp-on Installation Methods
This method uses clamps to fasten the muffler to the exhaust pipe. It’s a simple DIY fix. Just find the right size clamp, typically around 2.5 inches (6.35 Cm) for standard pipes. Tighten securely, and you’re good to go!
-
Slip-on Installation Methods
In Slip-On methods, the new muffler slides over the existing exhaust pipe. This works well if the pipe is intact. You might need an exhaust pipe expander for a snug fit without leaks. Use a slip joint as a gasket for better sealing.
-
Hang-on Installation Methods
Hang-On methods use brackets or hangers to support the muffler. Proper alignment is vital so it doesn’t hang low. You may need a rubber hanger, rated for up to 50 pounds (22.68 Kg), to reduce vibrations and secure the setup.
-
Spring-loaded Installation Methods
This style employs springs to hold the muffler in place. It’s easy to install—just connect the spring at each end of the pipe. The springs can handle heat expansion and contraction, making this method reliable.
-
Bolt-on Installation Methods
Bolt-On methods feature pre-drilled holes in the muffler for a secure fit. You’ll usually use bolts and nuts that withstand high temperatures. A tip: always use stainless steel bolts for durability—they won’t rust easily!
-
-
Factors Affecting Installation Of Aftermarket Mufflers
What factors should you consider for a successful installation? Let’s break it down.
-
-
-
Exhaust System Compatibility
Your exhaust system must be compatible with the aftermarket muffler. Most systems use standard sizes, such as 2.5 inches (63.5 Mm) in diameter, but variations exist. Ensure both parts match for a secure fit.
-
Type Of Muffler
The design of the muffler is important. Some mufflers, like performance or glasspack, need special attention during installation and may require welding. The shape can influence the hangers and clamps needed for secure connections.
-
Available Tools and Equipment
You need the right tools for this job. Muffler clamps, wrenches, and a jack are essential. Without them, you might struggle to attach your muffler properly, risking leaks.
-
Vehicle Model and Year
The year, make, and model of your vehicle can affect installation. Different vehicles have unique exhaust layouts. Always check specifications to ensure the aftermarket muffler fits your vehicle perfectly.
-
Local Regulations
Local regulations can affect how you install a muffler. Some areas have noise regulations that impact the type of muffler you can legally use. Always check to avoid fines or complications during installation.
-
-
How to Address Common Problems
Let’s look at specific issues related to aftermarket mufflers.
-
-
-
Loose Connections
Aftermarket mufflers can have loose connections. You’ll know if there’s a rattling sound or exhaust at the joints. Tighten the clamps to fix this.
-
Exhaust Leaks
Aftermarket mufflers often develop exhaust leaks. I’ve experienced this before—spotting soot around joints or hearing hissing noises. To fix it, inspect the seams and apply exhaust tape or sealant.
-
Vibration Issues
Vibration issues with aftermarket mufflers can cause discomfort. If you feel excessive shaking, check the mounting brackets. Use rubber grommets to reduce vibrations.
-
Muffler Misalignment
An aftermarket muffler may become misaligned over time. Look for uneven gaps between the exhaust pipe and the muffler. Adjust it to the correct position and tighten your fittings.
-
Excessive Noise
Aftermarket mufflers may produce excessive noise, signaling a problem. If it’s louder than usual, identify the faulty components. Replace or insulate them to lower sound levels.
-
-
Aftercare, Inspection, and Advanced Tips for Aftermarket Muffler Installation
Here’s some essential information on aftercare, inspection, and advanced techniques to remember after your installation.
Aftercare Tips
After installation, check the aftermarket muffler’s mounting bolts with a torque wrench. Ensure they meet the manufacturer’s specifications, typically around 15-20 ft-lb (20-27 Nm). Look for rust or corrosion at the joints; if you find any, apply a rust inhibitor like silicone spray to protect those connections.
Inspection
Inspect the muffler’s seams and hangers for leaks right after installation. A quick way to check is by feeling for air escaping or using a simple soap solution that will bubble if there are leaks. For hangers, ensure you use generic products like the Dorman 917-125. I recommend Westin’s suspension bushings for better durability.
Expert Tips
As an expert, I suggest using a heat shield to protect nearby components during installation. Consider clamps that can withstand up to 300°F (150°C) for better stability. For tighter spaces, look into offset exhaust tips that improve alignment and provide a cleaner setup while avoiding awkward seams.
Advantages Of Aftermarket Mufflers
The biggest benefit of installing an aftermarket muffler without welding is the ease of installation. I’ve used it to improve performance and save time on my projects.
This method offers flexibility, allowing you to change your muffler easily, minimizes the need for specialized tools, reduces labor costs, and lets you try different designs.
Applications You Should Know About
I’ve known people to use aftermarket mufflers for performance upgrades, but they have many applications, such as:
-
-
- Custom Exhaust Systems: Many car enthusiasts create unique setups for better flow. You can easily swap out mufflers without welding to customize the sound and performance of your ride. This method is popular among automotive hobbyists.
- Quick Repairs: If your factory muffler fails, using clamps allows for quick fixes on the road. This is especially common for DIY mechanics who want to save time and money during repairs.
- Noise Reduction: Aftermarket mufflers can significantly reduce harsh sounds. You can often replace them easily with clamps instead of a full weld, which is important in urban areas.
- Restoration Projects: In classic cars, installing an aftermarket muffler without welding helps preserve original parts. Many vintage restorers appreciate retaining car value through easy replacements, making this approach popular in the collector community.
-

Are you ready to enhance your vehicle’s performance with a no-weld muffler installation?
Alternatives for Installing Aftermarket Mufflers
There are several ways to attach an aftermarket muffler without using a welder. For instance, you might prefer using muffler clamps such as the Walker Exhaust Clamp or the Duralast Exhaust Clamp. These clamps offer a quick, easy fit, especially in tight spaces or if you want to avoid welding altogether. Exposure to welding processes can raise unexpected questions about safety, such as potential skin damage from welding.
Another option is to use a muffler hanger, like the DEA Products Exhaust Hanger. This is particularly useful if you’re looking for a more secure setup without getting into welding. Here’s a nugget of wisdom I’ve picked up along the way: always double-check the size and fit of your parts before installation to save time and effort!
Frequently Asked Questions (FAQs)
Now let us look at some questions I typically get asked.
How Do You Attach Exhaust Without Welding?
You can attach exhaust without welding by using clamps or special hangers. These methods allow for secure attachment and facilitate future repairs. Typically, exhaust clamps range from $10 to $30, and they provide a simple, effective way to maintain your system. If welding becomes necessary, especially when considering different materials, it’s crucial to understand the process involved in welding zinc plated steel.
Does a New Muffler Need to Be Welded?
No, a new muffler doesn’t need to be welded. Most aftermarket mufflers come with installation kits featuring clamps for a solid hold. This approach also saves time and cost since welding might require professional help, often costing around $100 or more.
Can I Replace My Muffler With a Straight Pipe?
Yes, you can replace your muffler with a straight pipe. This is popular for enhancing exhaust flow and increasing performance. Just remember, removing the muffler can increase noise levels significantly, potentially leading to legal issues in some areas.
Can You Install a Muffler Yourself?
Yes, you can install a muffler yourself, and many DIYers do. With basic tools and a clear guide, you can save on labor costs and learn more about your vehicle. Just ensure that all connections are tight to prevent leaks.
How Do You Remove a Welded Muffler?
You can remove a welded muffler by cutting it away. Use a reciprocating saw or cutoff tool to slice through the welds. Be cautious of sharp edges afterward. This method may take some time and involves safety gear like goggles to avoid injury.
Conclusion
I hope this gave you what you needed about how to install aftermarket muffler without welding. We covered aftermarket mufflers, their types, prerequisites, installation steps, precautions, methods, factors affecting installation, common problems, aftercare, advantages, and even alternatives. Each section aimed to guide you through the installation process smoothly.
I trust these insights have been helpful in understanding how to install an aftermarket muffler without welding. Simply put, you can replace, put on, or attach a muffler easily by following the detailed steps provided, like using clamps or hangers instead of welding. This approach ensures you still enjoy the benefits of a new muffler without the need for extensive tools or techniques.
To enhance your skills further and explore more about welding techniques, visit What is Welding.
References
-
-
- American Welding Society. (2020). AWS Welding Handbook: Welding Science and Technology (Vol. 1). Miami, FL: American Welding Society.
-
Joe Carter is a retired welding professional with over 40 years of hands-on experience in the industry, spanning ship repair, structural welding, and even underwater projects. Joe is a master of MIG, TIG, and Stick welding. Passionate about mentoring the next generation of welders, Joe now shares his decades of expertise and practical insights to help others build rewarding careers in welding.
Aftermarket Muffler, American Welding Society, DIY Installation, Exhaust System, Performance Upgrades, Safety Tips, Vehicle Maintenance, Welding, Welding Alternatives, Welding Table, Welding Techniques


